Clone Windows to a WD Black SN850X SSD
The WD Black SN850X is a PCIe 4.0 NVMe SSD built for gaming and heavy storage work. It comes in an M.2 2280 format, with or without a heatsink, and it is fast enough to make an older hard drive feel obsolete.
This guide covers what the drive offers, how to choose a slot or enclosure for it, which steps prevent a failed clone, and how to copy Windows to it with Qiling Disk Master. It also explains the limits of the WD Edition of Acronis True Image.
PAGE CONTENT
- What the WD Black SN850X Brings
- Choose the Right Slot and Enclosure
- Prepare for a PCIe 4.0 Clone
- Clone with Qiling Disk Master
- Boot, Cool, and Verify
- FAQs About the SN850X
- Back Up Before You Clone
What the WD Black SN850X Brings
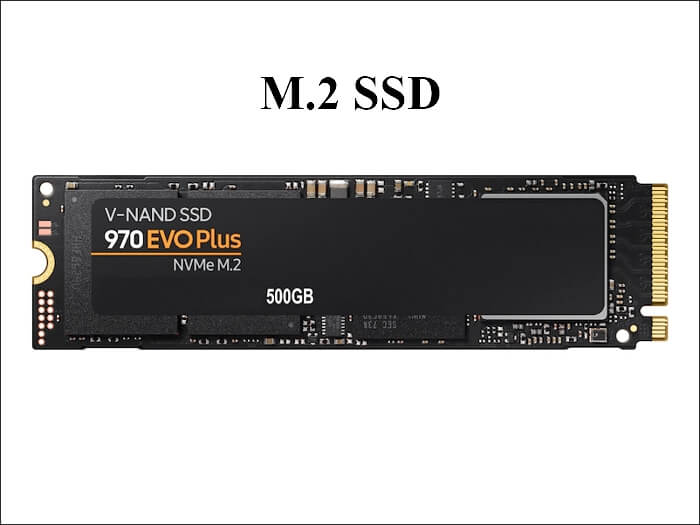
- PCIe 4.0 x4 NVMe. The larger capacities are rated for sequential reads of around 7,000 MB/s, about twice what a PCIe 3.0 slot can deliver.
- M.2 2280 with optional heatsink. Retail versions ship with or without a heatsink. The heatsink model is taller and needs clearance above the drive.
- Gaming tuning. WD targets fast game loading and large file work, and the drive uses a write cache to absorb bursts of data.
- WD Dashboard. WD Dashboard reports firmware, temperature, and health, and it can install firmware updates.
- Backward compatible. The drive runs in a PCIe 3.0 slot at a lower speed, so an older desktop or laptop can still use it.
The SN850X is a high-performance drive that can also run warm. Treat cooling as part of the upgrade rather than an optional extra, especially when the drive sits under a laptop cover or behind a graphics card.
Choose the Right Slot and Enclosure
- Desktop second slot. Many boards offer a second M.2 slot fed by the chipset. Check the manual to see whether it shares lanes with SATA ports.
- Full-speed link. PCIe 4.0 speed needs a compatible CPU and slot. In a PCIe 3.0 slot the drive still works, but at roughly half the bandwidth.
- Laptop enclosure. A laptop with a single M.2 slot needs a USB NVMe enclosure, ideally a USB 3.2 Gen 2 model with a metal body.
- Heatsink clearance. The heatsink version may not fit under a laptop bottom cover or under a low-profile motherboard shield.
- Airflow. If the board gives you a choice, avoid the slot directly under a hot graphics card and leave room for air to pass.
Before you open the case, confirm which slot is wired to the CPU and which one runs through the chipset. The CPU slot usually gives the best speed, while the chipset slot is fine for a data drive or a second copy.
Prepare for a PCIe 4.0 Clone
- Back up and read SMART. Save your personal files and check the source drive health before you start. A clone is not a backup.
- Suspend BitLocker. Pause BitLocker on the system drive and keep the recovery key. Resume protection after the new drive boots.
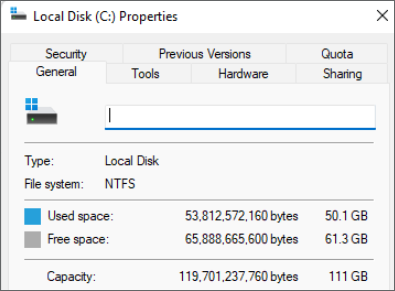
- Match capacity and layout. The target must hold the used space. Initialize it as GPT for a UEFI system and MBR for a legacy system.
- Update the BIOS. Early PCIe 4.0 firmware had compatibility issues. Update the motherboard BIOS before you install the new drive.
- Disconnect spare drives. Remove extra storage so the clone source and destination are easy to identify.
If you plan to use the WD Edition of Acronis True Image, remember that it only accepts a WD target and only clones the system disk. The same job in Qiling Disk Master works with any brand of source and can resize partitions during the copy.
Clone with Qiling Disk Master
Qiling Disk Master handles PCIe 4.0 NVMe drives from any brand. It preserves the EFI and recovery partitions, aligns them for SSD performance, and can expand the system partition when the SN850X is larger than the old drive.
Watch the video tutorial below to clone the drive step by step with Qiling Disk Master.
Step 1. Open Qiling Disk Master, choose Clone, and then select Disk Clone.

Step 2. Select the source disk and click Next.

Step 3. Select the destination SSD and confirm that its data will be replaced.

Step 4. Choose the clone mode and adjust the partition size if the target is larger.

Step 5. Click Proceed, wait for the copy to finish, then shut the machine down before you remove any cable.

Boot, Cool, and Verify
- Shut down fully. Power off completely and unplug the machine, so no cached writes remain when the drive is removed.
- Install with a thermal pad. Fit the SN850X with the pad or heatsink the slot provides. A bare drive in a hot case will throttle.
- Set the boot order. Enter BIOS and make the new drive first in the boot list. Keep UEFI mode for a GPT clone.
- Confirm the link speed. Open WD Dashboard and check that the drive reports PCIe 4.0 and four lanes if the slot supports them.
- Check temperature and TRIM. Run a large copy, watch the temperature, and confirm that TRIM is enabled for the new drive.
If the drive shows PCIe 3.0 in Dashboard, check the slot specification, the CPU generation, and whether the slot shares lanes with another device. A correct clone on a slower link still works; only throughput is reduced.
FAQs About the SN850X
Does the SN850X need its heatsink during cloning?
Not for a short clone, but sustained writes warm the drive. Use the slot heatsink in a desktop, and choose a metal enclosure with good airflow when cloning through USB.
Can I install the heatsink version in a laptop?
Only if the bottom cover has enough clearance. Check before you buy. Never force the cover over a tall heatsink, and do not remove a heatsink that is bonded to the drive.
Is the WD Edition of Acronis True Image enough for this clone?
It works only with a WD target and only copies the system disk. It cannot resize partitions or clone a secondary drive, so Qiling Disk Master is the better choice for a flexible upgrade.
Why does WD Dashboard show PCIe 3.0 x4 after the upgrade?
The slot, the CPU, or lane sharing is limiting the link. Check the motherboard manual and move the drive to the CPU-connected slot if you want PCIe 4.0 speed.
Will the SN850X work in a PCIe 5.0 slot?
Yes. The slot is backward compatible, and the drive runs at its PCIe 4.0 speed. You gain no extra bandwidth, but you keep full drive performance.
Back Up Before You Clone
A clone writes over the target disk and depends on a readable source. Back up the system first so a failed job, a power loss, or a bad sector never leaves you without a working Windows installation.
Watch the video tutorial below to back up Windows and restore it if the clone fails.
Step 1. Open Qiling Disk Master and select System Backup to include the boot partitions.

Step 2. Save the image to a drive other than the target disk and start the backup.

Step 3. Click Proceed to start the system backup and wait patiently until it finishes. You can also tick Shut down the computer when the operation is completed to power off automatically.

Step 4. If the clone fails, restore the image and check the source disk before you retry.

Conclusion
The SN850X rewards a careful upgrade. Put it in a PCIe 4.0 slot when you can, cool it properly, and confirm the link and the boot entry after the first start. With those checks, a cloned Windows installation runs on the new drive exactly as it did on the old one.
For related guides, see How to Clone a SATA SSD to an NVMe SSD, How to Fix an SSD That Is Slow After Cloning, How to Clone an NVMe SSD to a Larger NVMe SSD, and Why a Cloned SSD Does Not Show Full Capacity.
Related Articles
- How to Clone a WD SSD (Western Digital) to a New Drive
An overview of cloning Western Digital SSDs, including WD Dashboard checks and the limits of WD Edition Acronis. - How to Clone Windows to a PCIe 4.0 SSD
Move Windows to a PCIe 4.0 drive, confirm the correct slot and link speed, and verify the boot entry after the swap. - How to Clone an NVMe SSD to a Larger NVMe SSD
Clone a smaller NVMe system drive to a larger one and expand the partitions so the extra space is usable. - 4K Alignment When Cloning to an SSD: Why It Matters
Understand 4K alignment, why misaligned partitions slow an SSD, and how clone software fixes alignment during the job. - Cloned Drive Won't Boot? How to Fix It
Repair boot records, EFI entries, and BIOS settings when a cloned drive refuses to start Windows.
Products
Articles & Tutorials
- Data Recovery
- Data Backup
- File Recovery
- File Backup
- System Backup and Restore
- Disk and Partition Clone
- Technical articles
- Mobile articles
- Disk Master Help
- Windows Data Recovery Tutorials
- Windows Secure Delete Tutorials
- Windows Partition Management Tutorials
- Windows File Backup and Restore Tutorials
- Windows System Backup and Restore Tutorials
- Windows Disk Backup and Restore Tutorials
- Windows Clone Tutorials