How to Format eMMC Drive [2024 Full Guide]
The eMMC (embedded MultiMediaCard) drive is a compact and reliable storage medium widely used in electronic devices. This guide will provide a comprehensive overview of formatting an eMMC drive, including step-by-step instructions on how to do so through both Linux and Windows.
So, let's learn all about the eMMC Drive formatting process on Windows and Linux.
| ⏱️Duration | 3-5 minutes |
| 💻Supported System | Windows, Linux |
| ⛏️Required Tools |
✔️Windows format tool: Qiling Disk Master ✔️Linux tool: fdisk |
| 👣Steps |
1️⃣Format eMMC on Windows - Easy 2️⃣Format eMMC on Linux - Difficult |
What Is eMMC Format?
Understanding the format of an eMMC drive is crucial for effective storage management and performance optimization. The two most commonly used formats for eMMC drives are EXT4 and FAT format.
1. EXT4 Format: EXT4 is a widely used file system format for eMMC drives, supported by various operating systems including Linux. It provides robustness, reliability, and supports larger file sizes and partitions, making it suitable for devices that handle significant data volumes, such as smartphones and embedded systems. EXT4 efficiently manages data and handles frequent read and write operations, making it an ideal choice for devices that require reliable data storage.
2. FAT Format: The FAT format is a widely compatible file system for eMMC drives, compatible with Windows, macOS, and embedded systems, making it suitable for simpler devices and ensuring ease of data interchange between different devices, but with limitations compared to EXT4.
The choice of format depends on the device's intended use and specifications.
- Tip
- If you need a reliable file system with larger file support and good performance, choose EXT4. If you prioritize cross-platform compatibility and simplicity, select FAT.
How to Format eMMC Drive?
Whether you're using a Windows or Linux system, we'll guide you through the formatting process on both platforms. Let's start by looking at how to format an eMMC drive on Windows.
Guide 1. Format eMMC on Windows
To format an eMMC drive on Windows, download the Qiling Disk Master Free tool, which allows you to format the drive to EXT4 or FAT format using a user-friendly interface.
Formatting an eMMC drive on Windows is easier with Qiling Disk Master. Its user-friendly interface helps beginners format an eMMC drive without complex commands. Follow the steps below to format your eMMC drive with Qiling Disk Master.
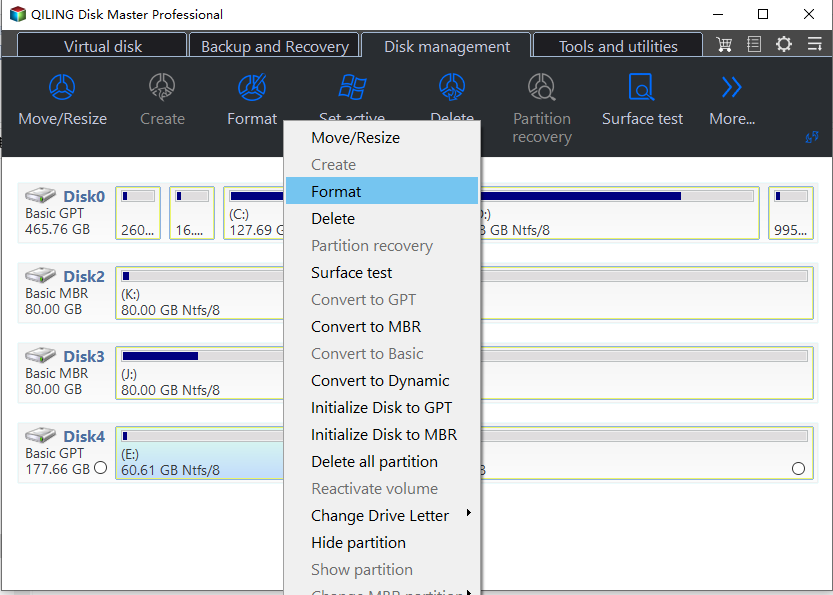
Step 1. Launch Qiling Disk Master, right-click the partition on your external hard drive/USB/SD card which you want to format and choose the "Format" option.
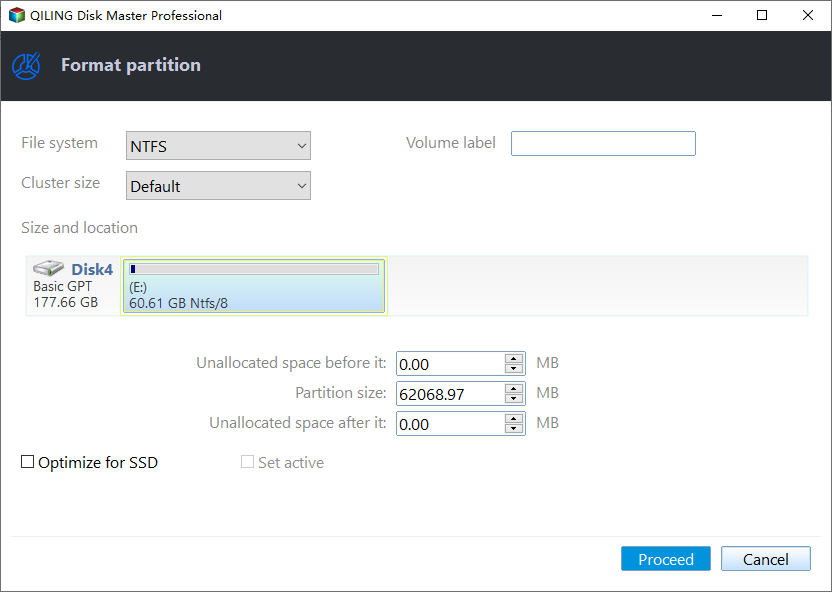
Step 2. Assign a new partition label, file system (NTFS/FAT32/EXT2/EXT3/EXT4/exFAT), and cluster size to the selected partition.
Step 3. Click the "Proceed" button to start formatting your external hard drive, USB, or SD card.
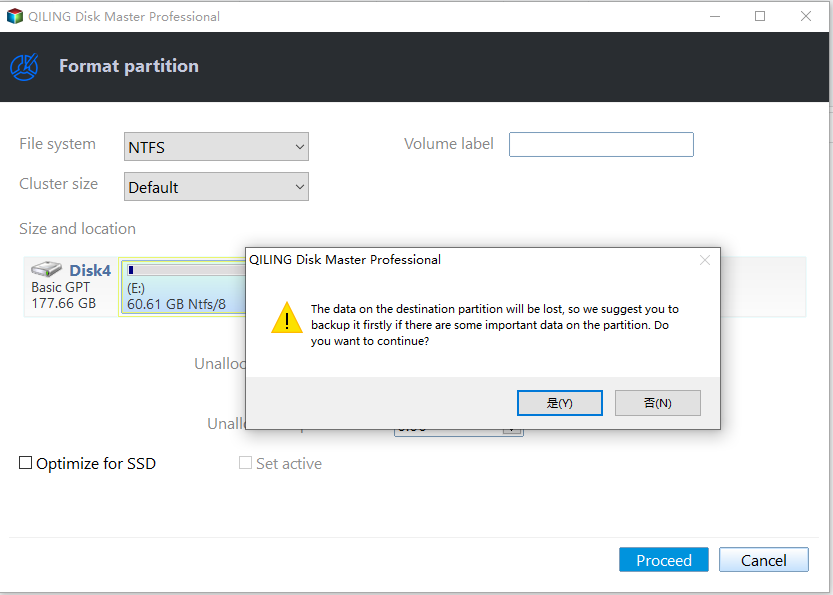
Step 4. In the Warning window, click "Yes" to continue.
We highly recommend Qiling Disk Master for its user-friendly interface and comprehensive disk management capabilities. Enjoy a seamless experience with its various useful and incredible features by downloading Qiling Disk Master now and performing routine tasks easily.
You May Also Like:
Guide 2. Format eMMC on Linux
fdisk is a command line partition editor that helps manage and control drives. To utilize the 8GB eMMC storage as a writable volume in Linux, you'll need to remove the existing partitions, create a new partition, format it, and then mount it. This process involves a series of steps that can be completed using the fdisk command line interface.
- Notice:
- This section provides a step-by-step guide on how to use the built-in 8GB eMMC storage as a writable volume in Linux. For those who want to learn about formatting with fdisk, you can refer to the command guide on another page: Use Fdisk Format Partition in Linux.
Step 1. Begin by deleting the existing partitions. Open a terminal and enter the following command:
sudo fdisk /dev/mmcblk1
Step 2. To delete a partition, use the 'p' key to list all existing partitions, then select the partition you want to delete by typing 'd' followed by the partition number. Confirm the deletion by typing 'y'. Repeat this process for each partition you want to delete, then use the 'w' key to save the changes.
Step 3. To create a new partition, navigate to the terminal and enter the command `fdisk /dev/sda` (assuming your drive is `/dev/sda`), then follow the prompts to create a new partition. Alternatively, you can use the `parted` command, which is a more user-friendly option, by running `parted /dev/sda` and following the on-screen instructions to create a new partition. Once you have created the new partition, you can format it with a file system such as ext4 using the `mkfs.
sudo fdisk /dev/mmcblk1
Step 4. To create a new partition, use the 'n' key, accept all the default settings, and then use the 'w' key to save the changes.
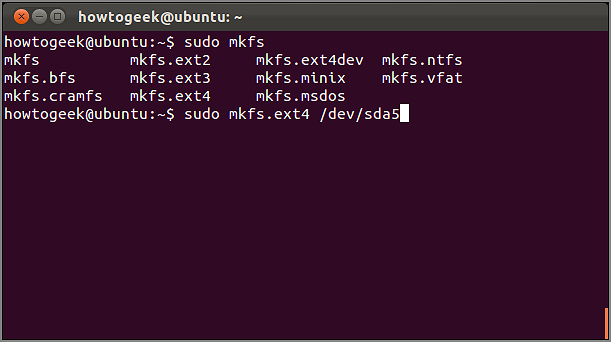
Step 5. Format the newly created partition to the desired file system. In this case, we'll use ext4. The command is: `mkfs.
sudo mkfs.ext4 -L "emmc" /dev/mmcblk1p1
Step 6. Create a mount point directory for the eMMC storage:
sudo mkdir /emmc
Step 7. Finally, mount the formatted partition to the newly created directory:
sudo mount /dev/mmcblk1p1 /emmc
To format the eMMC drive on your Orange Pi Plus and use it as a writable volume in Linux, follow these steps: first, insert the eMMC drive into your Orange Pi Plus, then boot up your device and enter the Linux system. Next, open a terminal window and use the command 'fdisk -l' to identify the eMMC drive. Once identified, use the command 'mkfs.
Conclusion
The article delves into the two primary formats for eMMC drives: EXT4 and FAT, highlighting their benefits and applications. It also provides step-by-step instructions for formatting eMMC drives on both Windows and Linux platforms. For Windows users, the recommended tool is "Qiling Disk Master," a user-friendly disk management software that efficiently formats eMMC drives to either EXT4 or FAT format.
To utilize the eMMC storage on the Orange Pi Plus, Linux users can manually format the eMMC drive following detailed steps, ensuring effective use of their eMMC storage.
FAQs About How to Format eMMC Drive
If you have further questions or queries about formatting eMMC drives, the below FAQs may help you.
1. Can I replace eMMC with SSD?
Replacing eMMC storage with an SSD is possible in some devices, but it's a complex process that requires technical expertise. Not all devices support SSD upgrades, so it's crucial to check your device's specifications and compatibility before attempting any changes.
2. Does Raspberry Pi have eMMC?
The Raspberry Pi models do not have built-in eMMC storage, but some models like the Raspberry Pi Compute Module offer eMMC storage options, with microSD cards used for storage in standard models.
3. How to partition eMMC?
To partition an eMMC drive, use disk management tools like "fdisk" on Linux or "Qiling Disk Master" on Windows, which allow you to create, delete, or format partitions to organize and optimize your storage.
Related Articles
- How to Boot From USB on Windows 11 [Full Guide]
- How to Fix Dell Laptop Running Slow on Windows 10/11
- Setup Was Unable To Create a New System Partition or Locate an Existing System Partition Windows 7
- I Need Solid Ways That Can Create a New Partition on the Hard Drive, Help
If you are looking for solid ways to create a new partition on the hard drive, read this article, in which you can find the partition methods with detailed tutorials. - There Is No Disk in the Drive. Please Insert a Disk into Drive
When you start your computer, you may encounter an error message stating that there is no disk in the drive. To resolve the “No disk in Drive” error in Windows 7, 8, 8.1, or 10, simply follow the methods offered here. - How to Fix Error No Such Partition Grub Rescue in Windows 11/10
Get error no such partition grub rescue Windows 11/10 and cannot boot your system? This page shows you how to fix error no such partition by fixing MBR and restoring the BCD, configuring the active partition, rebuilding BDC, etc.. Try these solutions to solving grub rescue Windows 11/10.