[Solved] Secure Boot Violation Invalid Signature Detected
Some computer manufacturers like ASUS have implemented Secure Boot by default, which can protect systems from viruses or malware attacks, but may also cause unexpected issues.
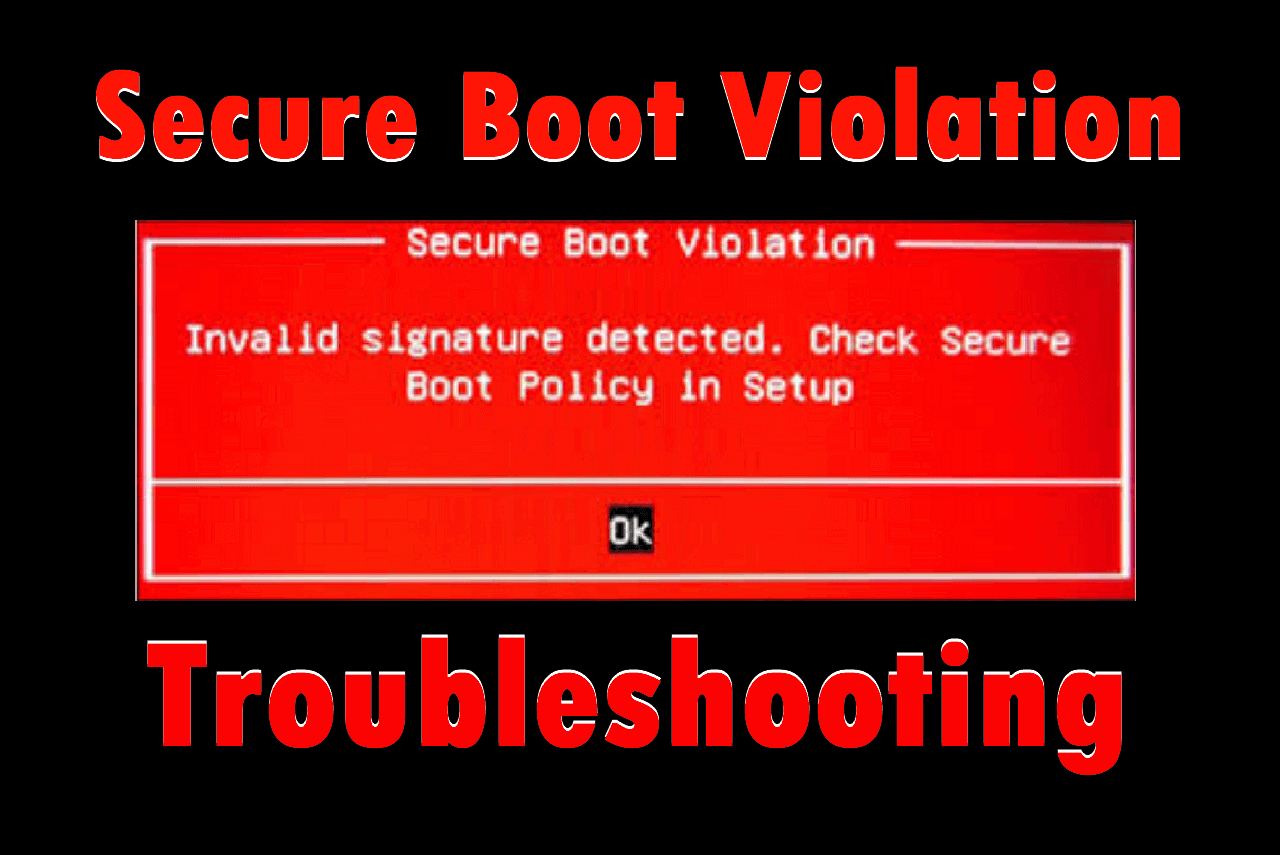
If you're encountering the "Secure Boot Violation" error with a message saying, "Invalid signature detected. Check Secure Boot Policy in Setup," Qiling is here to help. With this guide, you can troubleshoot and potentially fix the issue yourself, getting your computer up and running smoothly once again.
How to Fix Secure Boot Violation
To resolve the Secure Boot Violation error, here are 4 methods you can try.
- Fix 1. Disable the Secure Boot
- Fix 2. Disable the Digital Driver Signature Enforcement
- Fix 3. Perform Boot Repair via Qiling Disk Master
- Fix 4. Install/Uninstall Windows Update
Fix 1. Disable the Secure Boot
To resolve the issue of Windows 11/10 not being compatible with the motherboard, try disabling the Secure Boot option in the BIOS configuration, which is a common solution for ASUS desktops and laptops experiencing this problem.
Disabling Secure Boot will not harm your system, but it may lead to a PC won't boot issue if there are viruses or malware in the system, as they can attack the system bootloader.
Step 1. To access the BIOS settings, press the designated BIOS hotkey (usually F1, F2, F10, Delete, or Esc) as soon as your computer starts booting up. This will take you directly to the BIOS interface, where you can adjust various settings, including the boot order, time and date, and other advanced options.
Step 2. You can use the arrow keys on your keyboard to navigate to the location where you want to modify the settings, and then make the necessary changes. The location may vary depending on the type of computer you are using.
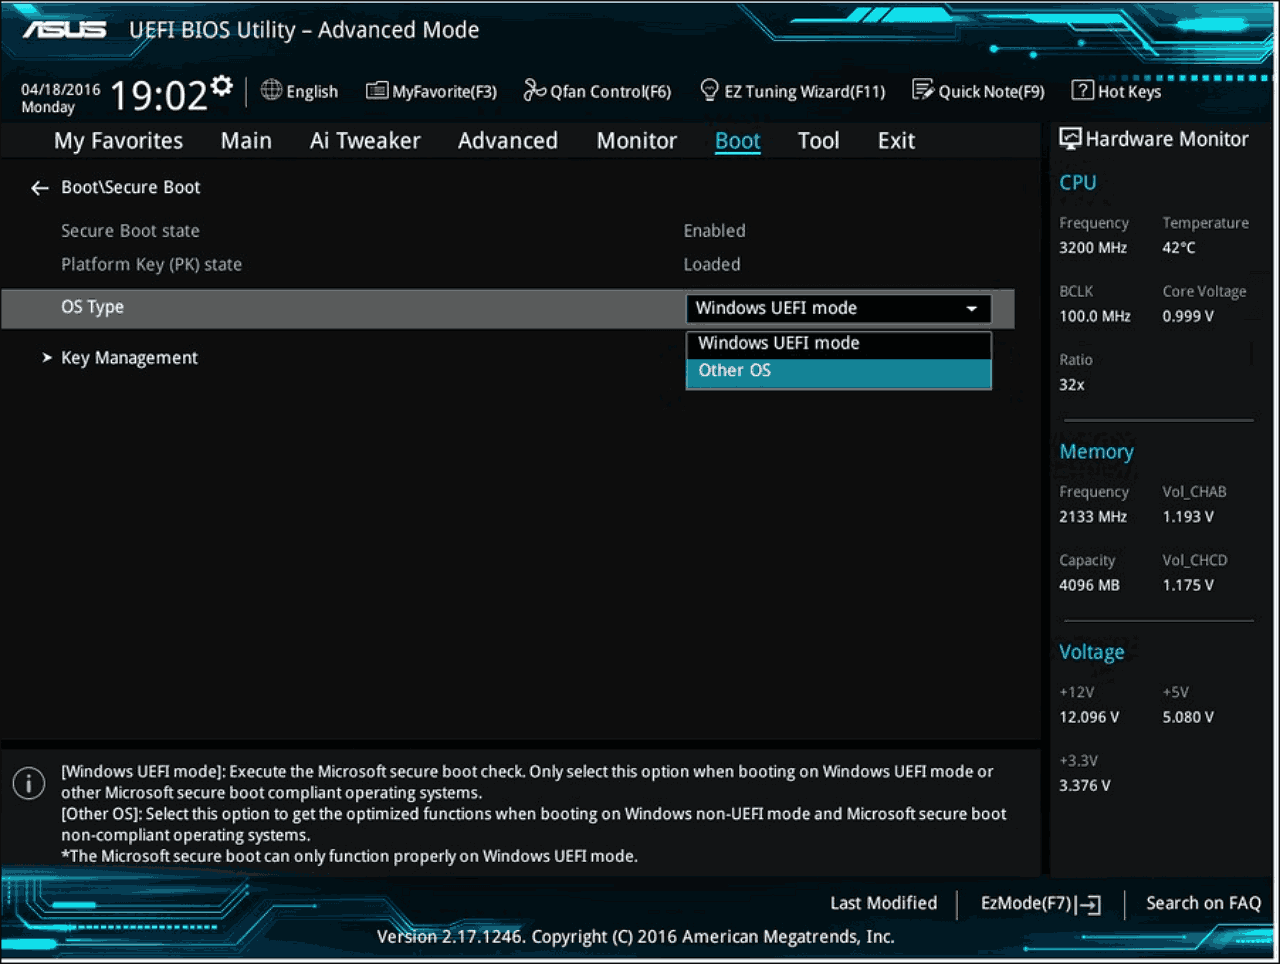
#1. Move to "Boot" > "Secure Boot."
To disable Secure Boot on Windows, select "OS Type" and set it to "Other OS".
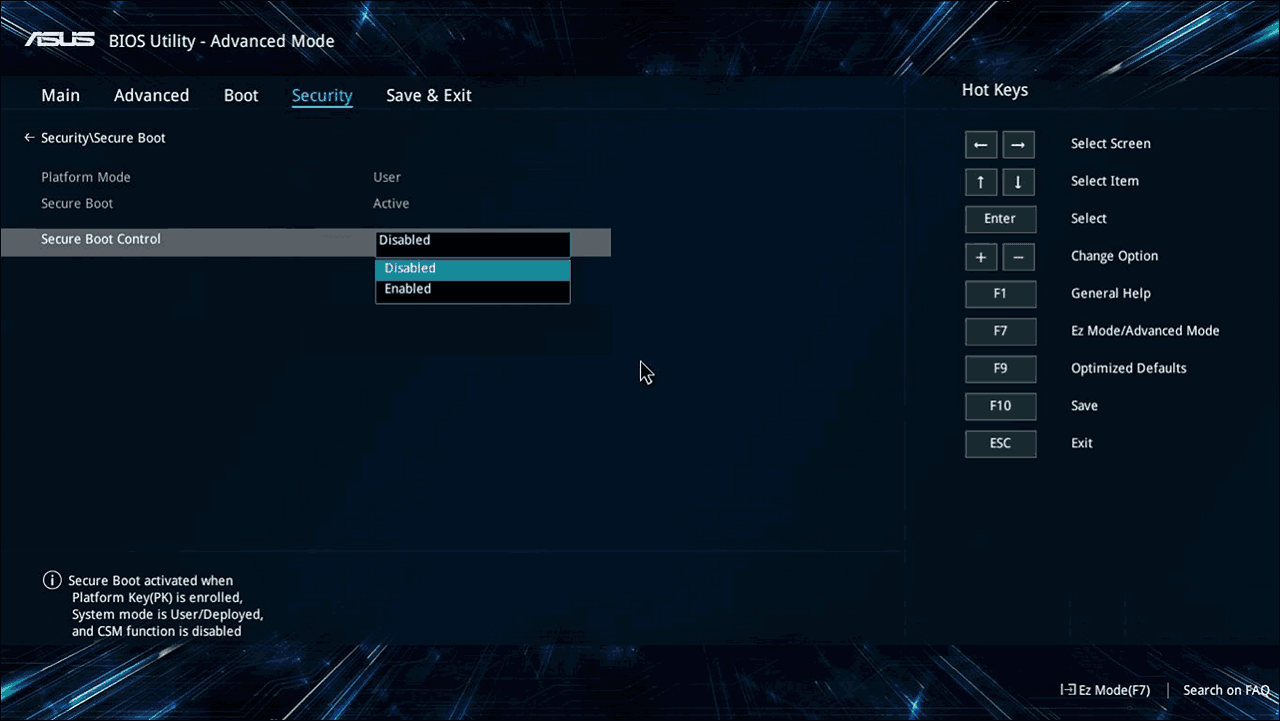
#2. Move to "Security" > "Secure Boot."
To disable Secure Boot, select the "Secure Boot Control" option and set it to "Disabled".
Step 3. To save and exit, press the "F10" key, and your computer will automatically restart.
Related article:
Fix 2. Disable the Digital Driver Signature Enforcement
The Secure Boot Violation issue may be caused by a conflict between unsigned device drivers and the system protection module, leading to the problem. Disabling digital driver signature enforcement might resolve the issue.
Step 1. Go to the Start menu and open Settings.
Step 2. In the Settings window, navigate to "Update & Security" > "System" > "Recovery".
Step 3. To enter the Advanced Startup Options, go to the Settings app, then click on "Update & Security", then click on "Recovery", and finally click on "Restart now" under the "Advanced startup" section. This will take you to the Advanced Startup Options.
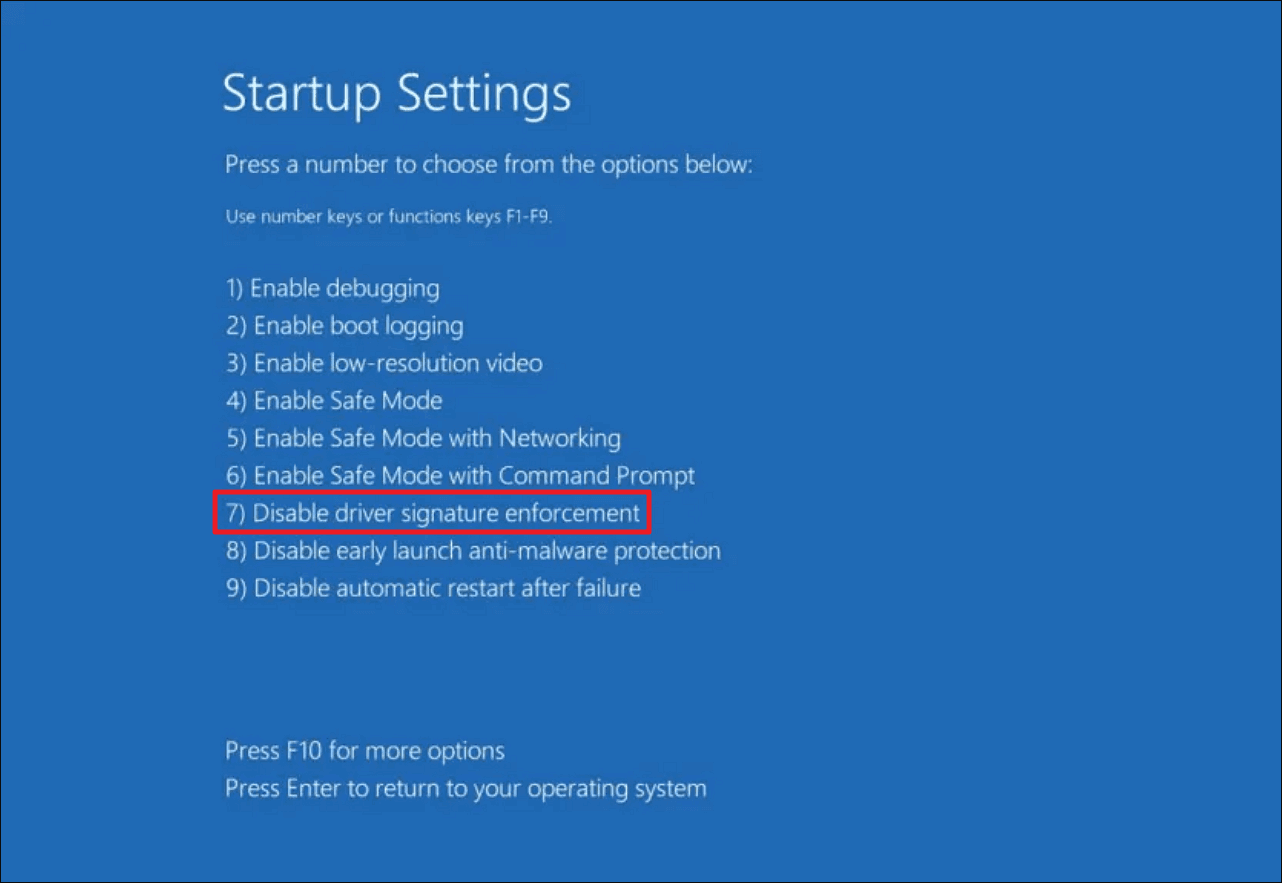
Step 4. In the Choose an option window, go to "Troubleshoot" > "Advanced Options" > "Startup Settings".
Step 5. To disable driver signature enforcement, locate the "Disable driver signature enforcement" option, and press "7" or "F7" to disable the function.
Step 6. Press "Enter" to return to your Windows OS and check if it works.
Fix 3. Perform Boot Repair via Qiling Disk Master
If the above two methods can't resolve the issue, consider seeking help from professional third-party software, such as Qiling Disk Master Professional, which offers a Boot Repair feature to address various Windows bootup problems.
With advanced algorithms, this tool can automatically examine and quickly repair any errors it finds, streamlining the process and saving time.
Step 1. To create a bootable media using Qiling Disk Master, connect the external drive/USB to your computer and launch Qiling Disk Master. Then, navigate to the "Bootable Media" option and click on "Create bootable media" to proceed.

Step 2. To create a bootable Windows installation media, select a USB drive or CD/DVD and click on "Create" to begin the process. Alternatively, you can burn the Windows ISO file onto the chosen storage media.

Step 3. Connect a bootable drive to a new computer, reboot it by pressing F2/Del to enter the BIOS, set the bootable drive as the boot disk, and exit the BIOS by pressing F10.
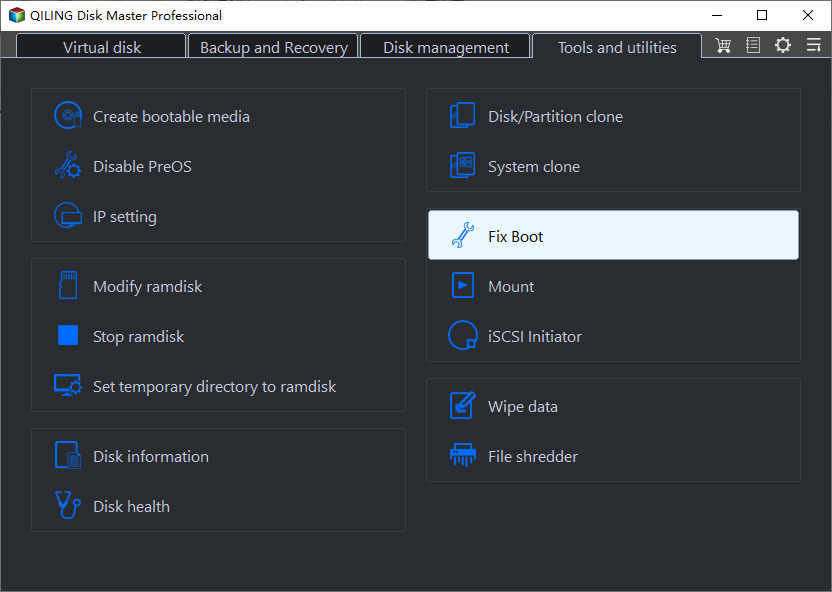
Step 4. Boot the computer again and enter the WinPE interface. Then, open Qiling Disk Master, go to the "Tools" page and click "Fix Boot".
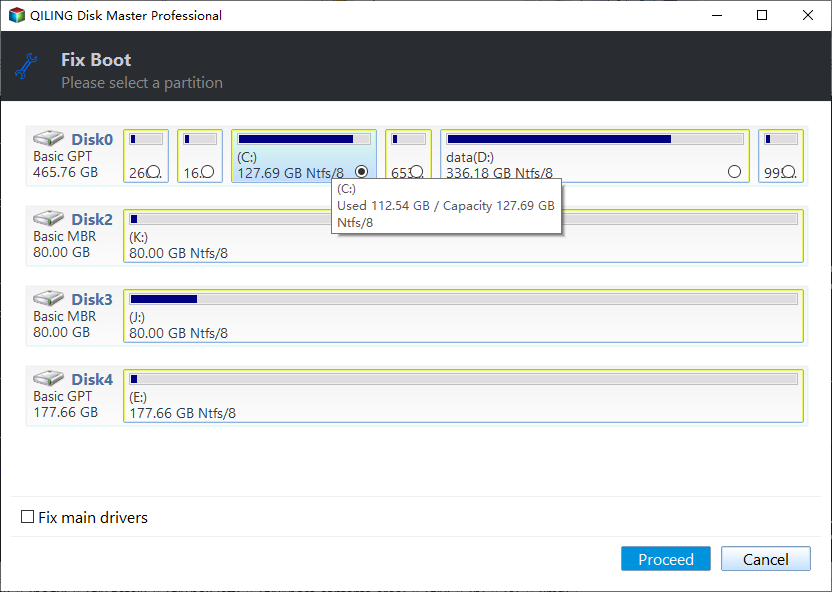
Step 5: Select the system you want to repair and click "Proceed".
Step 6. Wait a moment, and you will receive an alert that the system has been successfully repaired. Click "OK" to complete the boot repair process.
⭐Professional Help
This is a consultation entrance for your additional queries. Click and chat with the support engineers:
Qiling experts offer one-on-one manual services 24/7 to help with Windows boot errors, BSOD, and computer boot loops. They provide free evaluation and diagnosis services to resolve system boot failures, Windows stop codes, and OS lagging issues with their decades of experience.
- 1. To fix the BSOD error due to Windows update or other reasons, restart your computer in safe mode and uninstall any recently installed updates. If the issue persists, try running the System File Checker (SFC) tool to scan and replace corrupted system files.
- 2. To resolve Windows boot errors like "no bootable device found" or BCD file corruption, you can try booting in Safe Mode, checking the BIOS settings, and running a System File Checker (SFC) scan. If the issue persists, you can also try using a Windows installation media to repair or reinstall the operating system.
- 3. To resolve Windows system or OS boot loop issues due to 0x000000 error codes, you can try the following steps. Firstly, disconnect any recently added hardware or peripherals and restart the system to see if the issue persists.
You can share this powerful and time-saving tool with your friends who also encountered startup issues, helping them to quickly resolve their problems and regain access to their device.
Fix 4. Install/Uninstall Windows Update
Windows users have been experiencing Secure Boot Violation errors since Windows 7, despite Microsoft releasing patches to fix the issue, which still persists in Windows 10 and 11. Upgrading or downgrading the Windows version might resolve the problem.
#1. Install Windows Update
Step 1. Go to the Start menu and open Settings.
Step 2. To update Windows, navigate to the "Update & Security" section, then click on "Windows Update" and select "Check for updates".
Step 3. Install the update if there is a new version.
#2. Uninstall Windows Update
Step 1. To open the Control Panel, go to the search box on the taskbar, type "Control Panel", and select it from the search results.
Step 2. To access the Programs and Features window, go to the Control Panel, then select the "Programs" category, and finally click on "Programs and Features".
Step 3. To view installed updates, click on the "View installed updates" option located on the left side of the window.
Step 4. Select the problematic update from the list of installed Windows updates, then click "Uninstall" at the top and follow the on-screen guide to complete the uninstall procedure.
Related article:
Why Secure Boot Violation Error Occurs on Bootup
You may encounter a Secure Boot Violation with the message "Invalid signature detected. Check Secure Boot Policy in Setup" while booting up your PC, due to one of two main reasons. The first possible cause is a mismatch between the Secure Boot Policy in the BIOS and the actual firmware on your system, which can be caused by a corrupted or outdated BIOS. The second possible cause is a Secure Boot Policy that is not compatible with the firmware on your system, which can be caused by a firmware update that was not properly configured or a Secure Boot Policy that was not properly set up.
- Certain Windows versions are incompatible with the Secure Boot Technology in ASUS motherboards. This means that if you have an ASUS motherboard with Secure Boot enabled, you may not be able to boot up with certain versions of Windows.
- The Digital Driver Signature Enforcement that performs checks may cause your computer to be unbootable.
Secure Boot Violation is a common error that occurs when your computer's Secure Boot feature is disabled or not properly configured. This can happen when your computer's firmware or BIOS is outdated, or when a malware or virus is present.
Conclusion
This article contains 4 solutions to Secure Boot Violation Invalid signature detected issue. In most cases, this error occurs on ASUS computers, whose Secure Boot Technology has a bigger chance of being incompatible with some versions of Windows.
If you're unable to fix a computer problem because it's from a different brand or general methods don't work, Qiling Disk Master can assist. Its Boot Repair function can resolve various startup errors with minimal effort.
FAQs on Secure Boot Violation
If your device is experiencing a Secure Boot Violation, it may be due to a software issue, malware, or a hardware problem. You can try booting your device in safe mode to isolate the issue, or you can try resetting the Secure Boot settings. If the issue persists, it may be necessary to perform a factory reset or seek professional help to resolve the issue.
1. What is a Secure Boot on a PC?
Secure Boot is a security feature that ensures only trusted software can run on a PC, preventing malicious code from executing. It is supported on various operating systems, including Windows, Linux, and BSD.
2. Is Secure Boot good or bad?
Secure Boot is beneficial in most cases as it verifies the digital signature of executable files, safeguarding the system from viruses and malware. However, some users have also experienced drawbacks from enabling Secure Boot.
3. Does Secure Boot decrease performance?
Enabling Secure Boot has a negligible impact on computer performance, and disabling it can be done by accessing the UEFI/BIOS settings and setting Secure Boot to disabled.
Related Articles
- Fix No Option to Format SSD in Windows 10/11 [Quick & Easy Methods]
- How to Merge Partitions by Disk Management and Free Partition Software
- M.2 vs. SSD, What's the Difference [New Details]
- How to Convert Boot Disk Between MBR and GPT Styles without Data Loss?
To convert a boot disk between MBR and GPT styles without data loss, follow these steps: first, ensure the disk is not in use and has enough free space to accommodate the conversion process. Then, use a tool like Qiling Partition Master or Disk Management to convert the disk style. - BSOD (INVALID_DATA_ACCESS_TRAP) when upgrade to Windows 11 from Windows 10
There are some reports that errors like BSOD would happen during the process. One of the common error codes is 'INVALID_DATA_ACCESS_TRAP'. Continue reading, and you will find the way to resolve BSOD (INVALID_DATA_ACCESS_TRAP) when upgrade to Windows 11 from Windows 10. - Can I Format a 64GB USB Flash Drive to FAT32 and How?
You can only format a USB flash drive of at most 32GB to FAT32 in Windows. However, This article shows you how to format a 64GB USB flash drive to FAT32 in an effective and easy way.