How to Backup and Restore 7 Days to Die Save [3 Effective Ways]
7 Days To Die is an open-world sandbox survival horror game that combines elements of survival, horror, tower defense, and role-playing genres, featuring a detailed environment with varied biomes and character customization. Since its release, it has been a hit among survival game enthusiasts.

7 Days to Die saves game progress and associated data, including settings, characters, levels, and gameplay progress, which can be lost due to computer issues or hardware failures. Regularly backing up save files is recommended to prevent data loss.
This post provides three practical ways to back up your 7 Days to Die game saves, offering a detailed guide to help you choose the method that suits you best.
[3 Effective Ways] How to Backup and Restore 7 Days to Die
To back up and restore 7 Days to Die save, you can use the game's built-in save system, a third-party save manager, or a cloud storage service. The game's built-in system allows you to save your progress at any time, and you can restore it by loading the saved game. A third-party save manager, such as 7 Days to Die Save Manager, can provide more advanced features, including automatic backup and restore, and the ability to save and load multiple saves.
- Method 1. Manually Copy to Back Up and Restore 7 Days to Die Save Files
- Method 2. Use Qiling Disk Master to Backup and Restore 7 Days to Die Save
- Method 3. Backup and Restore 7 Days to Die Save on Steam
Method 1. Manually Copy to Back Up and Restore 7 Days to Die Save Files
7 Days to Die save game backup can be achieved through manual copying, which involves saving the save files manually to a secure location, thereby ensuring the preservation of progress.
Step 1. To start the game, go to the 7 Days To Die folder on your computer.
7 Days to Die save files are stored in the game directory, typically at C:\Users\[username]\AppData\Roaming\7DaysToDie on Windows, and ~/Library/Application Support/7DaysToDie on macOS.
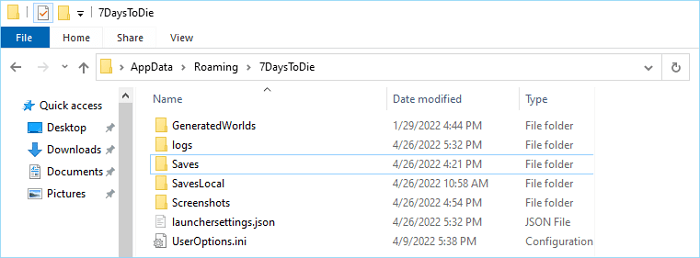
Step 2. Copy 7 Days To Die Save Files.
Once you open the 7 Days To Die folder, select all the saves within the Saves folder, including the game name and date tag, and copy them to an external storage device such as a USB drive or a cloud service like Dropbox or Google Drive.
Step 3. Restore 7 Days To Die Save Files.
To restore 7 Days to Die save files, copy the 7 Days to Die files from your backup device to the 7 Days To Die folder.
Method 2. Use Qiling Disk Master to Backup and Restore 7 Days to Die Save
7 Days To Die data backup and restore tool Qiling Disk Master Pro allows you to back up and restore files, folders, disks, and the system. It has a scheduled backup function, enabling automatic backup on a regular basis, and is a great tool for backing up 7 Days To Die save files in a few simple clicks.
- You can use a backup and restore tool to save and recover various game data, such as Call of Duty Warzone files, GTA V files, and 7 Days to Die saves, among others.
- 7 Days to Die is a popular survival video game that allows players to build, explore, and fight for survival in a post-apocalyptic world. To ensure that your progress is not lost, it's highly recommended to back up your save files regularly.
- The software supports various types of backup, including full backup, incremental backup, differential backup, compress backup, and secure backup, to help save storage space efficiently.
- Set a scheduled backup plan, such as daily, weekly, or monthly, to automatically back up game data without interrupting gameplay.
Now follow the steps to back up your 7 Days to Die game saved files:
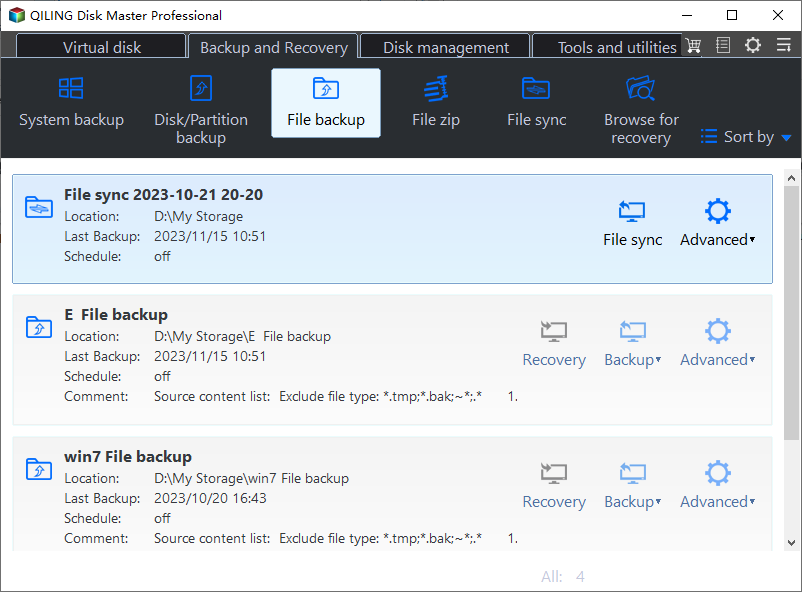
Step 1. Click "Select backup contents" to initiate a backup.

Step 2. There are four data backup categories, File, Disk, OS, and Mail, click File.
Step 3. Local and network files will be displayed on the left side, allowing you to extend the directory and choose which files to back up.
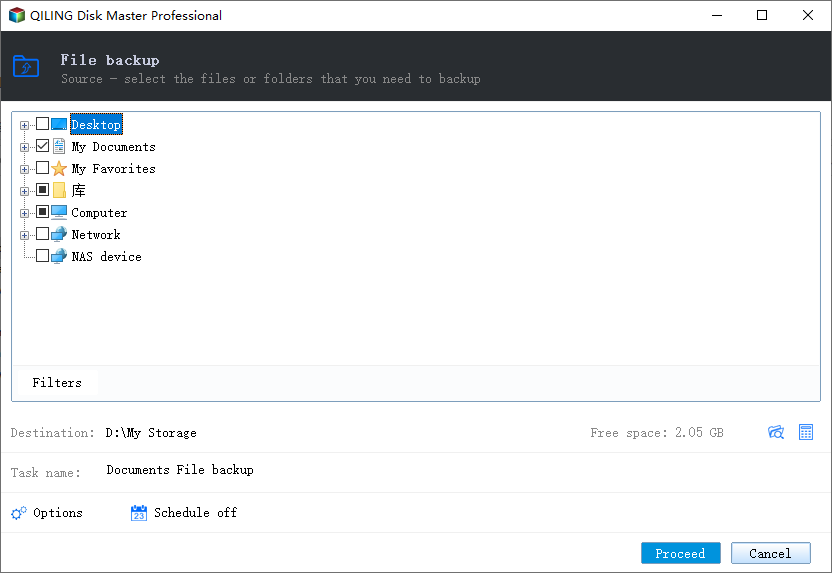
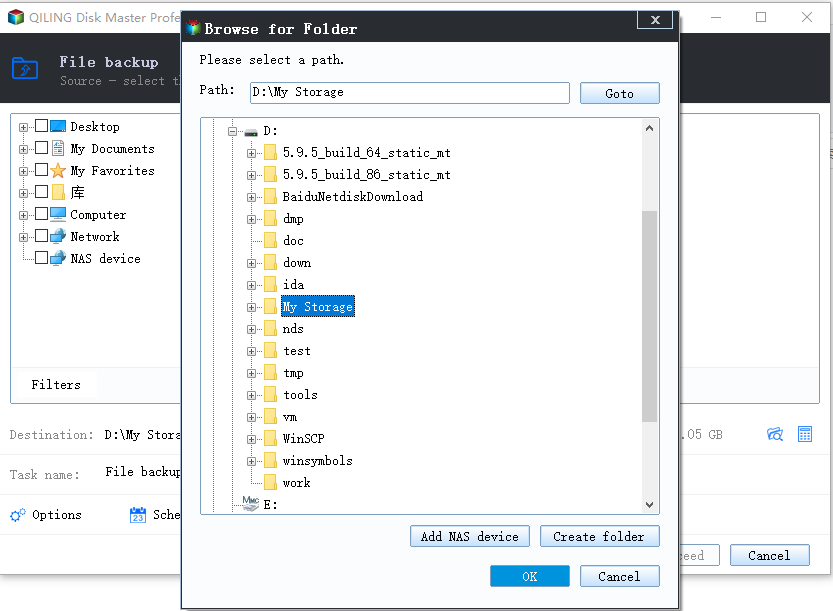
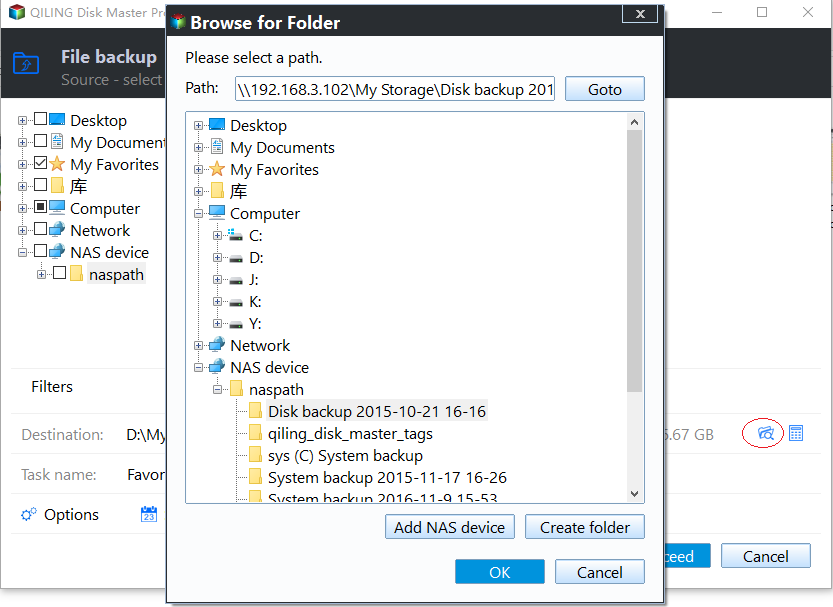
Step 4. You can store the backup on an external hard drive, a network location, or a cloud storage service like Google Drive or Dropbox. Simply select the location and follow the on-screen instructions to complete the backup process.
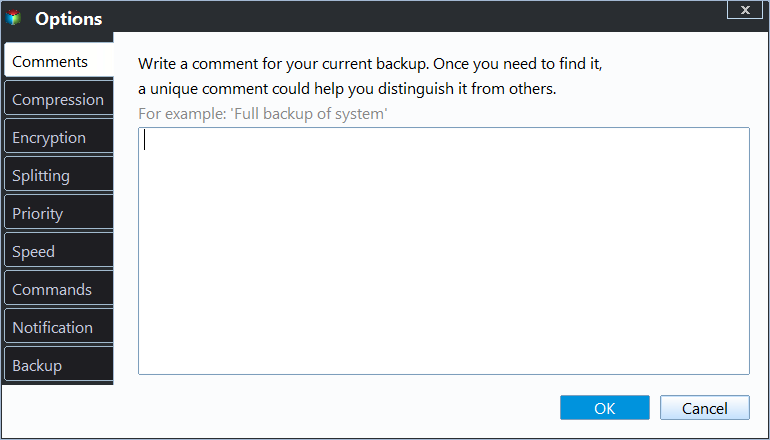
The software allows users to encrypt the backup with a password, set up a backup schedule, and initiate a backup at a specific event, among other customization options.
Step 5. You can save the backup to a local disk, Qiling's online service, or a NAS.
Step 6. Qiling Disk Master allows customers to back up data to a third-party cloud drive and its own cloud drive.
To back up data to a third-party cloud drive, select Local Drive, scroll down to add Cloud Device, add your account, and log in.
Step 7. Click "Proceed" to start the backup process. Once it's finished, the backup will be displayed on the left panel as a card. You can manage the backup job further by right-clicking it.
When you need to restore the backed-up 7 Days to Die save, operate according to the below steps:
Step 1. Launch Qiling Disk Master, click "Browse for Recover".

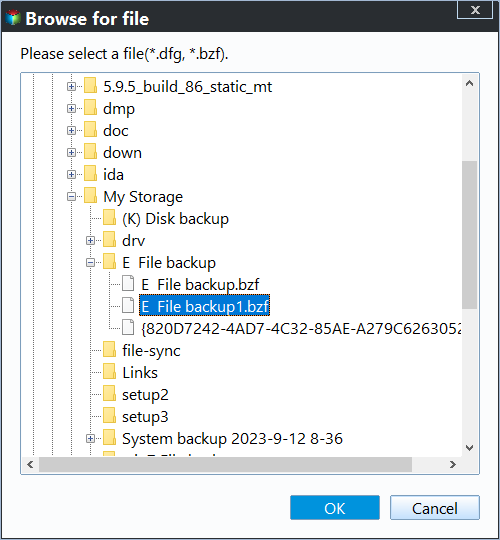
Step 2. To recover your data, go to your backup destination and select the bzf file created by Qiling Disk Master. This file contains the backup of your data.
Step 3. Choose the recovery location, which can be a specific location or the original location where the data was stored.
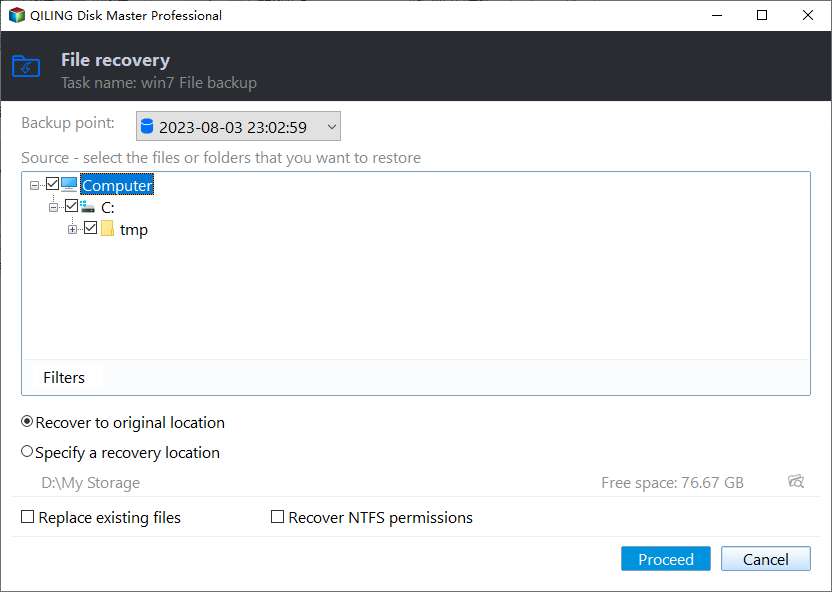
Step 4. Click "Proceed" and the recovery would start.
Method 3. Backup and Restore 7 Days to Die Save on Steam
Steam, developed by Valve Corporation, is a digital distribution platform that allows users to back up and restore game files, including those for popular games like 7 Days to Die. The game's cloud sync feature makes it easy to save and restore save files, providing a convenient and hassle-free experience.
Now follow the steps below to back up 7 Days To Die save on Steam:
Step 1. Log in to Your Steam Account.
To access the 7 Days to Die store page on Steam, you need to log into your Steam account with your username and password. This will allow you to view and potentially purchase the game.
Step 2. Enable 7 Days To Die Cloud Saving Feature.
Once you log in, click the cloud icon next to the 7 Days to Die game title, then your 7 Days to Die save files will sync to your Steam cloud.
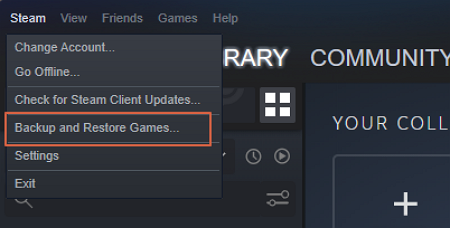
Step 3. To backup and restore games on Steam, click the "Steam" tab from the top menu bar, and select the "Backup and Restore Games" option.
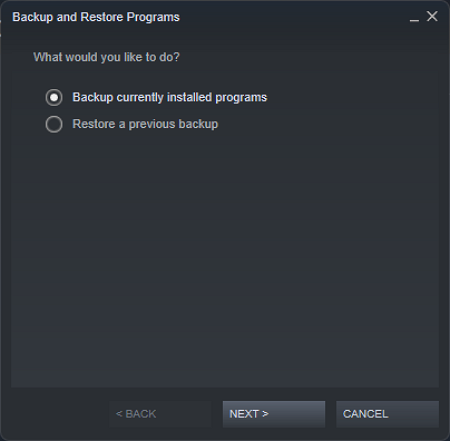
Step 4. Select "Backup currently installed program" in the Backup and Restore Programs window, and click "NEXT>".
Step 5. Select "7 Days to Die" from the list of installed programs to include it in the backup.
Step 6. "BROWSE…" to choose a location as the backup destination.
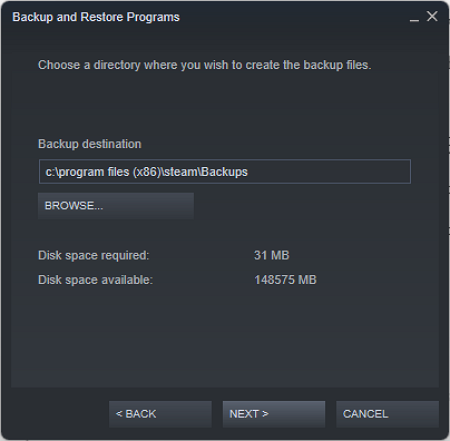
Step 7. To initiate a backup, enter a proper name for the backup and click "NEXT>" to start the process.
Step 8. When finished, click the "OPEN BACKUP FOLDER" button to verify the integrity of the backup files.

When needed, you can restore the game save backup with the following guide:
Step 1. Open the Backup and Restore Programs window by following the steps outlined in Step 3 of the backup guide.
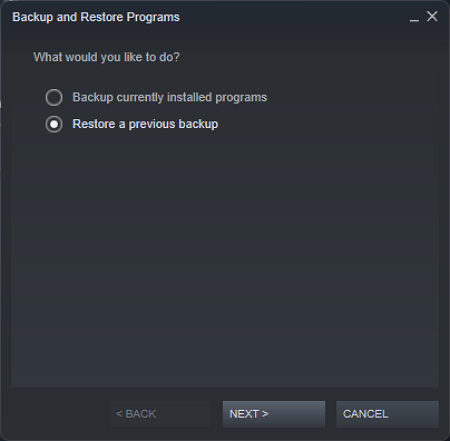
Step 2. Choose the "Restore a previous backup" option.
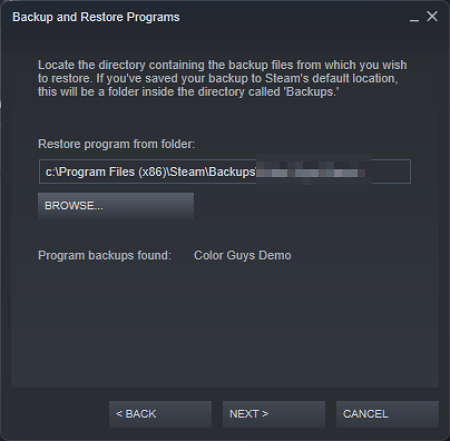
Step 3. To restore a 7 Days to Die backup, locate the directory containing the backup using the "BROWSE… "option, and then initiate the restoration process by tapping "NEXT>".
Concluding Thoughts
7 Days To Die backup and restore is a straightforward process that can be done using three methods described in this article. These methods allow users to easily back up their 7 Days to Die save game files without worrying about losing data.
7 Days to Die game saves can be backed up and restored using Qiling Disk Master Pro, which allows for automatic backups and saves game files, making it a recommended tool for users.
FAQ on How to Backup 7 Days to Die Save
1. Where are 7 Days to Die saves located?
The 7 Days to Die save file location is C:\Users\Username\AppData\Roaming\7DaysToDie on Windows and ~/Library/Application Support/7DaysToDie on macOS.
2. How do I transfer single-player saves to the server 7 Days to Die?
The 7 Days to Die save files for single-player games are stored in the 7DaysToDie-Saves folder on your computer. To transfer saves to a server, you can manually copy the contents of the 7DaysToDie save folder and paste it into the 7DaysToDie/Saves folder on your server.
3. How do you roll back in 7 Days to Die?
7 Days to Die doesn't have a rollback feature, but you can use backup and restore methods to revert to a previous save. If you've backed up your saves with Qiling Disk Master Pro before making changes, you can restore the saves from the backup.
Related Articles
- OneDrive Files Not Showing Online: Why & How to Fix
- How to Backup PC Game Saves in 4 Different Ways
- Top 5 Best Hard Drive Cloning Software of 2023
- Windows 11 Ruined My Computer! Slows Down and Crashes a Lot
- pCloud vs Dropbox: Which Wins?🏆
- More Than Clone SSD - See What You Can Do with Qiling Disk Master
- Windows 10 Backup Keeps Failing? Solutions to Fix It Quickly
If you're using Windows Backup and Restore to back up files and system, but it keeps failing, you're not alone. Here we will show you why it occurs, and some solutions to fix Windows 10 backup keeps failing issue quickly.