[QuickBooks Online Backup] How to Backup QuickBooks Online to Desktop
Key Takeaways:
- Use the built-in feature to back up QuickBooks Online to QuickBooks Desktop.
- To create a local copy of the QuickBooks file on the Windows Desktop, use file backup software, such as the one recommended by digitaltrends.com. This will ensure that a duplicate of the file is saved on the desktop, providing a safeguard against data loss in case of any issues with the original file.
Can I Backup QuickBooks Online to Desktop?
QuickBooks Online Backup with Built-in Feature
To backup QuickBooks Online to desktop with free backup software, you can use the QuickBooks Cloud Backup tool, which is available for free. This tool allows you to backup your QuickBooks Online data to your desktop, where you can access it even if you lose internet connection.
Bonus Tip: Converting QuickBooks Desktop to Online
FAQs of QuickBooks Back Up File
Can I Backup QuickBooks Online to Desktop?
Backup to QuickBooks Desktop or Windows Desktop?
Back up to QBDT: QuickBooks users can easily back up their online data to their desktop using built-in features, a process that many may not be aware of. This simple step allows users to ensure their data is safely stored on their local computer, providing an added layer of security and peace of mind.
Back up to Windows Desktop: Yes, you can. The copy will be done by free backup software.
To back up QuickBooks Online to your desktop, follow the steps below. First, sign in to your QuickBooks Online account and go to the "Settings" icon, then click on "Backup." Select the backup option you prefer, such as "Full Backup" or "Incremental Backup," and choose the file format and location where you want to save the backup.
QuickBooks Online Backup with Built-in Feature
To export QuickBooks online to desktop:
Phase 1. Download and Install QuickBooks Desktop.
Run QuickBooks Desktop, click File and choose Close Company.
If you don't have a QuickBooks Desktop license, download the QuickBooks Desktop Restoration Tool.
Phase 2. Sign in to a QuickBooks Online account and Download A Tool for Migration
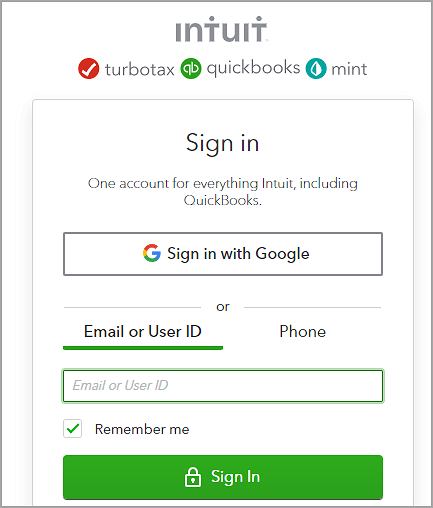
Step 1. Log in to your QuickBooks Online account using a supported web browser such as Google Chrome, Firefox, Microsoft Edge, Safari, Opera, or Samsung.
Step 2. Go to URL - https://app.qbo.intuit.com/app/exportqbodatatoqbdt, and click Enter.
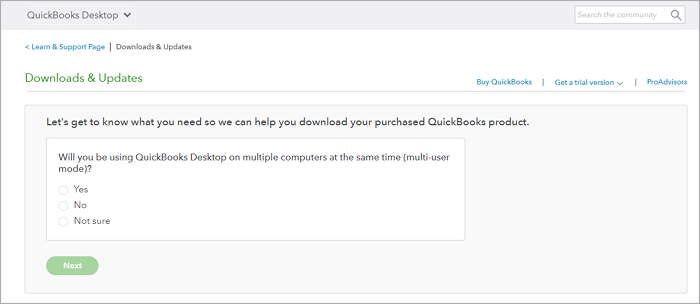
Step 3. Go to Export Overview Window and select Get Started.
Step 4. Download the QuickBooks Desktop Migration Tool by clicking Download Tool.
Step 5. After downloading the software, open and install it, then choose Next.
Step 6. Check Terms and select Next.
Step 7. Select Complete and Next.
Step 8. Choose Install, wait for finish.
Phase 3. Select your data in QuickBooks Online for Export
Step 1. Go to QuickBooks Online, click on the gear icon, and select Prepare to export. Then, click Continue.
Step 2. Choose the data you want to export and select Continue.
Step 3. Click on Continue to proceed with the conversion of your data for QuickBooks.
Step 4. Please provide your name and email address used for migration confirmation, then select the "Continue" option.
Step 5. On the email confirmation window, select Close and wait for the email confirmation to complete.
Step 6. Repeat Step 2 and select Get Started on the export screen of QBO.
Step 7. Select Continue on the Prepare to export screen.
Step 8. On the next page, select Continue.
Step 9. Select Continue to Download on the Exporting from QuickBooks Online screen.
Step 10. Download the QBXML file by selecting the Download QBXML file option, choosing a location to save the file, and then clicking Continue.
Step 11. Go to QuickBooks Desktop, and verify that you are in the No Company Open status.
Phase 4. Launch QuickBooks Migration Tool
Step 1. Open apps, enter the file path and select Import.
Step 2. Select location and name.
Step 3. Check the QuickBooks - Application Certificate. If you want to change read/modify rights, click to modify, then choose to Continue and Done.
Step 4. Once imported completes, select Done.
Now you can check your imported files.
Video Guide by QuickBooks - How to Export QuickBooks Online to QuickBooks Desktop
- This video tutorial demonstrates how to export your data from QuickBooks Online to QuickBooks Desktop.
- Start from 0:14.
If your export feature isn't working, you can reach out to the QuickBooks Care Team for help with converting QBO to QBDT.
Step 1. Open the QuickBooks Desktop app.
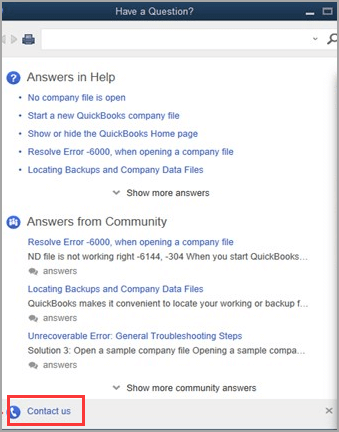
Step 2. Select Help and click QuickBooks Desktop Help.

Step 3. On the "Have a Question" window, select Contact US.
Step 4. To convert data from QuickBooks Online (QBO) to QuickBooks Desktop (QBDT), you can use the QuickBooks Online Export Tool. This tool allows you to export your QBO data into a file that can be imported into QBDT. The export process includes selecting the data you want to export, choosing the file format, and specifying the export location.
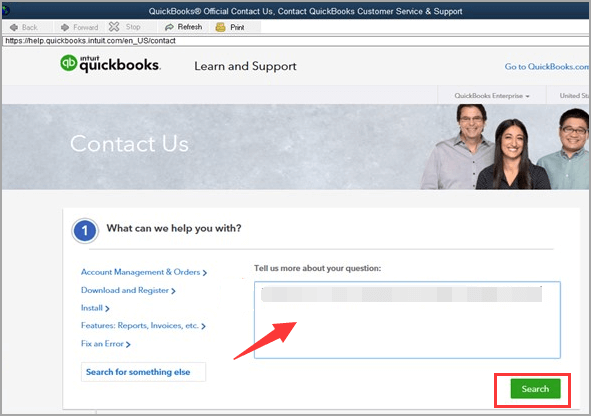
Step 5. Enter your message and select Submit.

How to Backup QuickBooks Desktop to Flash Drive [QuickBooks Guides]
You can back up QuickBooks desktop to a flash drive using two common methods. The first method involves using the built-in backup utility in QuickBooks desktop, while the second method utilizes professional data backup software to ensure a secure and reliable backup. Let's dive into the details of each approach.

How to Backup QuickBooks Online to Desktop with Free Backup Software
Qiling Disk Master Free provides automatic backup capabilities, allowing users to back up QuickBooks data to their Windows Desktop, as well as other file, disk, partition, Outlook, and system backups.
This Windows clone software can also help you clone hard drive to SSD whenever you need it.
Step 1. To start backup, click the Select backup contents.

Step 2. There are four main categories of data backup: File, Disk, OS, and Mail. These categories refer to the types of data that are being backed up, including individual files, entire hard drives or disks, the operating system, and email accounts.
Step 3. On the left-hand side, you'll see a list of local and network files to select from by expanding the directory, which will then be backed up.
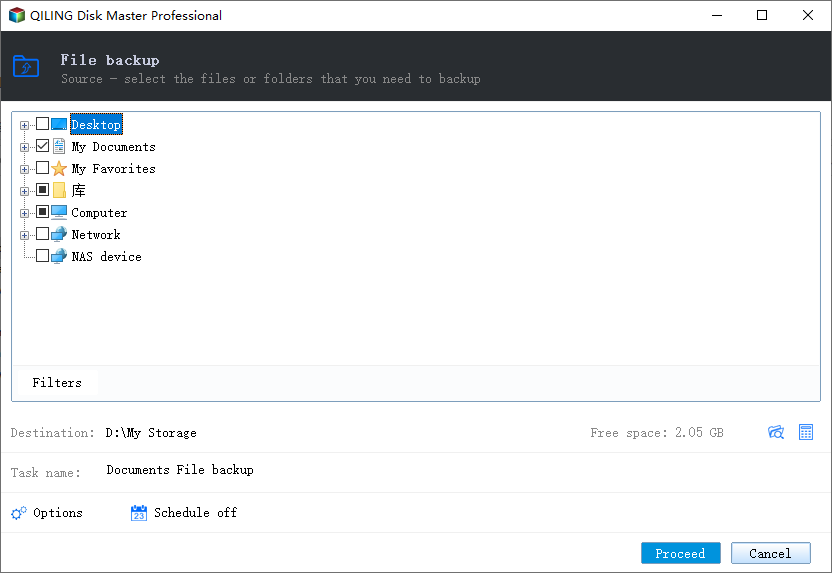
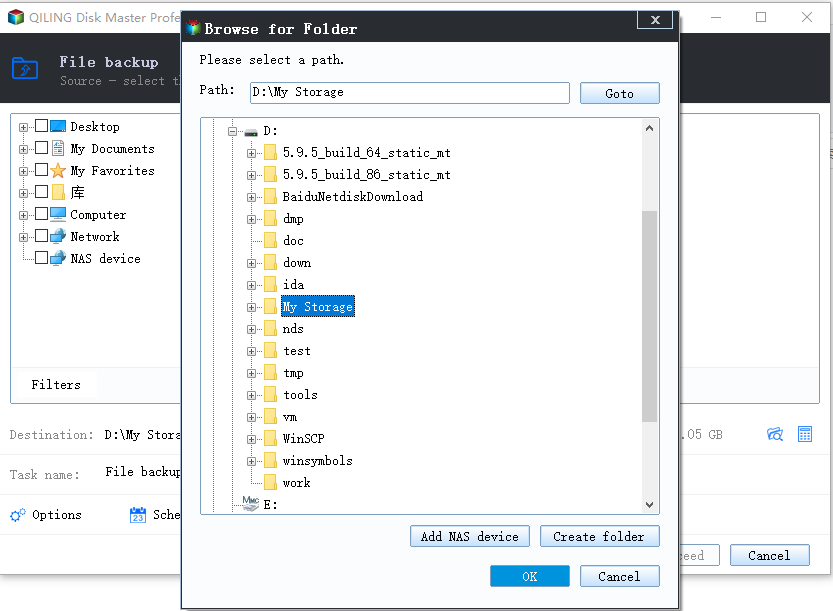
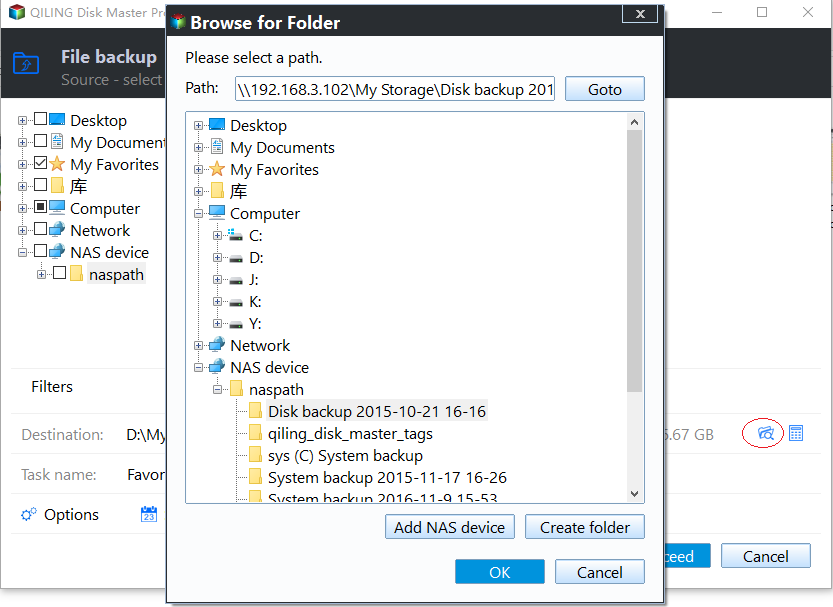
Step 4. Follow the on-screen instructions to select the desired location for storing the backup.
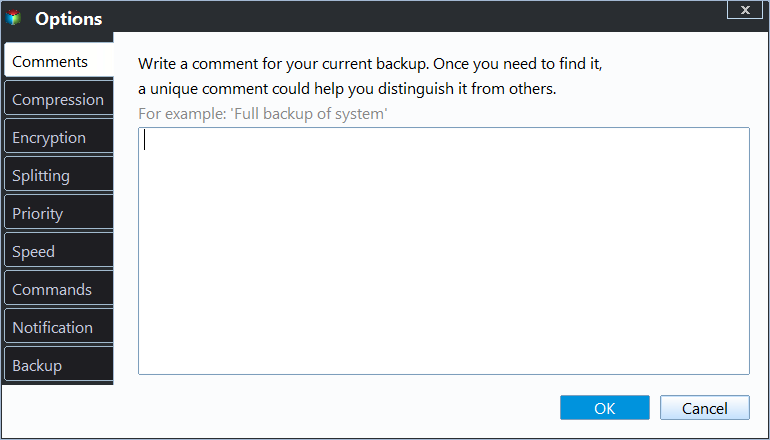
In the Backup Options section, click on Options to encrypt the backup with a password, set the backup schedule, and choose whether to start the backup at a specific event in the Backup Scheme. This allows for a range of customizable features to be explored and tailored to meet specific requirements.
Step 5. Backups can be stored on a local disk, in Qiling's cloud service, or on a network attached storage device (NAS).
Step 6. Qiling Disk Master allows customers to back up data to either a third-party cloud drive or Qiling's own cloud storage.
To back up your data to a third-party cloud drive, select Local Drive, scroll down to add Cloud Device and enter your account information.
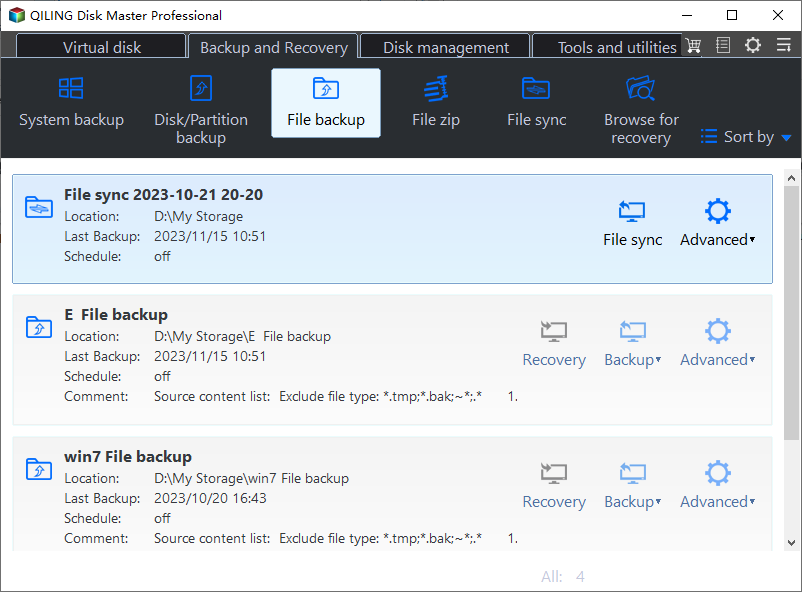
Step 7. To start a backup, select the "Proceed" option, and once the process is complete, the backup job will appear as a card on the left-hand panel. For more detailed information about the backup job, right-click on it.
Bonus Tip: Converting QuickBooks Desktop to Online
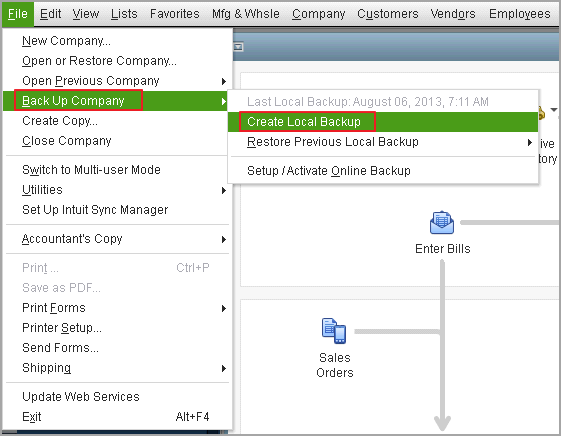
Step 1. Prepare QBDT data for export.
To create a local backup, go to the File tab in QuickBooks, click Back Up Company, and then select Create Local Backup.
Step 2. Export your Company file.
To export your company file to QuickBooks Online, click on the "Company" tab and select "Export Your Company File to QuickBooks Online".
Step 3. To connect QuickBooks Online, click "Move now". If you have a QBO account, select "Yes, sign me in" and enter your email and password, then click "Sign In".
Verify your identity.
Step 4. Select the data you want to import and wait for a while to finish the process.
FAQs of QuickBooks Back Up File
1. Can I backup data from QuickBooks online?
Yes - QuickBooks Online allows data backup, but the process varies depending on your plan. The self-employed plan doesn't include data export, while the accountants' plan does, and the Plus plan has limited export capabilities for transactions.
2. How much does it cost to backup QuickBooks online?
QuickBooks Online Backup is a cloud-based backup service for QuickBooks Online customers, available for a monthly cost of $4.95 for the company plan.
Related Articles
- How to Back up Windows 10 to Network Drive: 3 Ways Explained
- Is Google Drive Going Away? Get Clear Ideas Here!🥇
- Windows 10 Backup Not Backing Up All Files [2024 Solutions]
- Change Backup Location Windows 7: Manage Backup File & Space Saving
- Windows Backup Problem: Windows Backup Stuck at 97%
- How to Backup Entire Computer to OneDrive [Quick & Easy]
Learn how to back up your entire computer to OneDrive. Compare sync, manual upload, and automatic backup methods for safer Windows data protection.