Best Samsung T7 Backup Software Recommended | Never Miss
Samsung T7 is a top-of-the-line portable SSD that offers incredibly fast speeds of up to 1050MB/s read and 1000MB/s write via USB 3.2 Gen 2, making it a go-to storage solution for gamers, professionals, and anyone needing reliable backup storage.
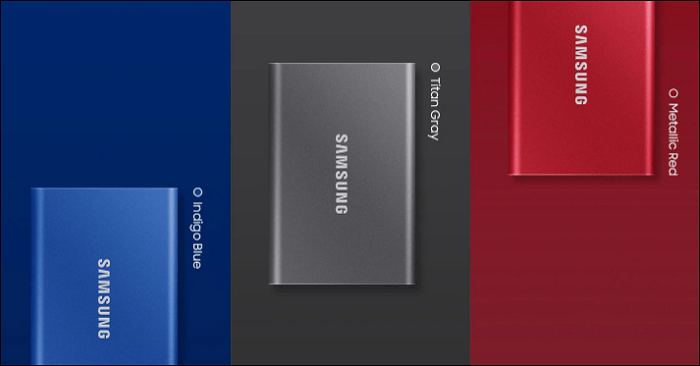
Samsung provides software to manage and back up data on the T7 SSD, but the reliability of the built-in software is sometimes questioned by users.
Many users are concerned about backing up their Samsung T7, so they search for the right backup software. This article will address the importance of backing up the T7 and explore the best backup software options for the device.
To get more information about Samsung SSDs, you can refer to two separate posts.
Why Should We Backup Samsung T7 SSD
SSD backup software is in high demand as it allows users to easily create backups of their device, ensuring quick access to their data in case of an issue. This software provides a convenient and secure way to back up important files, giving users peace of mind knowing their data is protected.
Here are a few reasons why you should back up your Samsung T7 SSD or any external storage:
- Avoid major data loss in the event of system failure.
- Avoid virus attacks or malware by keeping important data on T7.
- Ensure the safety & security of personal files.
- Avoid losing data when primary storage goes kaput.
- Relocate data to another device easily.
- Synchronize data across multiple devices, such as PS5, PC, or Mac.
Therefore, backing up your T7 or any other Samsung external SSD is important. It offers password protection, making it a safe option to keep your data, and creating a backup can ensure the security of your personal information.
Today's users are vulnerable to virus attacks and malware, making it essential to keep personal information and data on a device disconnected from the internet to ensure maximum security.
Does Samsung Provide Backup Software
Samsung provides backup software for their SSDs, specifically the T7 storage device, called Samsung Portable SSD Software for T7 | T7 Touch, which also supports the T5 variant.
The Samsung Portable SSD Software for T7 | T7 Touch is a lightweight and highly-regarded option, weighing in at just 140MB, making it a convenient choice for backing up data stored on an SSD drive.
- Allows you to control and set up your T7 SSD
- It helps you set up password protection for it
- Works with any Samsung USB type C external drive
- Monitors speed, temperature, and other performance elements
- It creates backup plans and schedules
- It also helps you restore said backups
Samsung Portable SSD Software is not the best backup software, but it's great for managing Samsung external drives, such as the T7 and T7 Touch.
This tool helps with data recovery, firmware updates, and resetting Samsung SSDs to their factory state.
The portable SSD software can be used as a management and mild backup tool, but it's not ideal for recovery in case of data loss. It's still better than using nothing and leaving it to factory defaults, though.
What Is the Best Backup Software for Samsung T7 SSD
Qiling Disk Master Pro is the best backup software for Samsung T7, offering a range of features that make it an ideal companion for users. Its ability to clone and backup data, as well as its user-friendly interface, make it a top choice. Many other options are available online, but none come close to the capabilities of Qiling Disk Master Pro, making it the go-to solution for Samsung T7 SSD users.
This backup tool offers a one-click backup feature, allowing for easy and convenient data protection. Additionally, it provides extensive free usage, enabling users to test and utilize its capabilities without any limitations. The tool also boasts a range of key features that cater to various user needs.
- Creates automatic backups in a few clicks
- Easy backup and restore methods
- Clone a hard drive or transfer your entire system swiftly
- Offers thorough Disk and Partition recovery
- The system allows users to store backups on various platforms, including the local disk, external devices, cloud storage services, or other designated platforms, providing flexibility and redundancy in data preservation.
- This software provides various backup modes, including incremental and full backups, among others.
The software provides a seamless backup experience, ideal for users of T7 hard drives, external storage, and cloud drives, without compromising transfer speeds. It allows for incremental backups alongside daily use, making it a convenient option for creating regular backups.
How to Backup Samsung Portable T7 SSD
To back up your Samsung Portable T7 SSD, use Qiling Disk Master Pro to create a secure backup of your SSD, ensuring your important files and data are safely stored and protected.
Therefore, make sure you're on PC and that you do the following first:
- Ensure you have the USB-type connection cable
- Download and install Qiling Disk Master Pro
Once you have these ready, here's what you're going to do:
Step 1. Click the "backup and recovery" tab page.
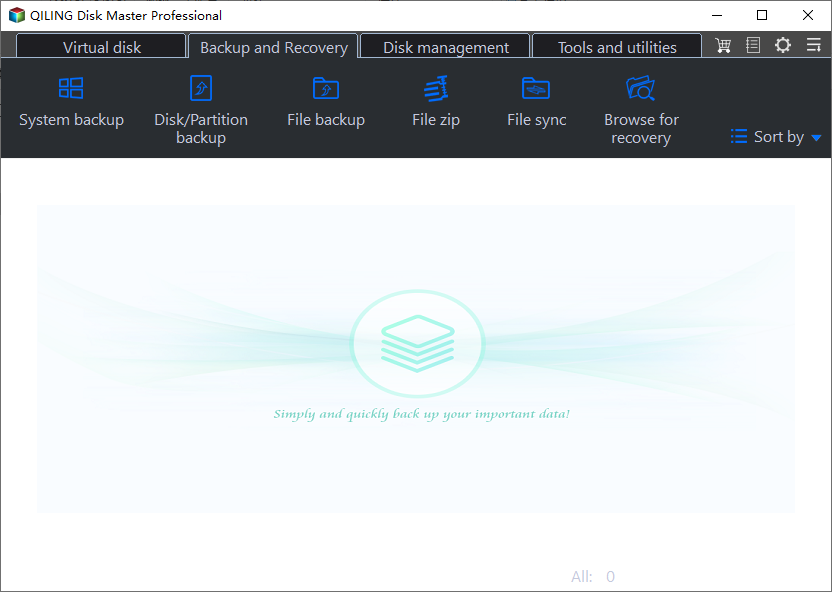
Step 2. There are four data backup categories, File, Disk, OS, and Mail, click File.
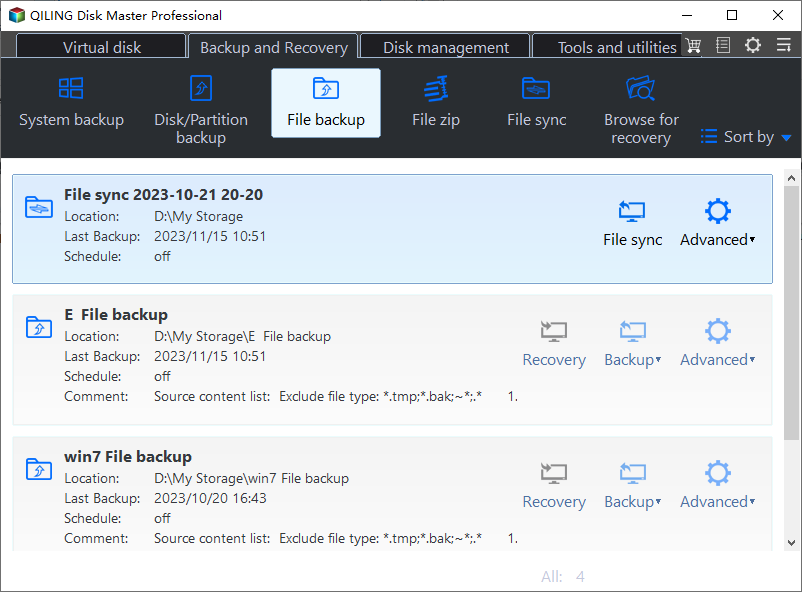
Step 3. Both local and network files will be listed on the left, allowing for the expansion of directories to select the desired files to be backed up.
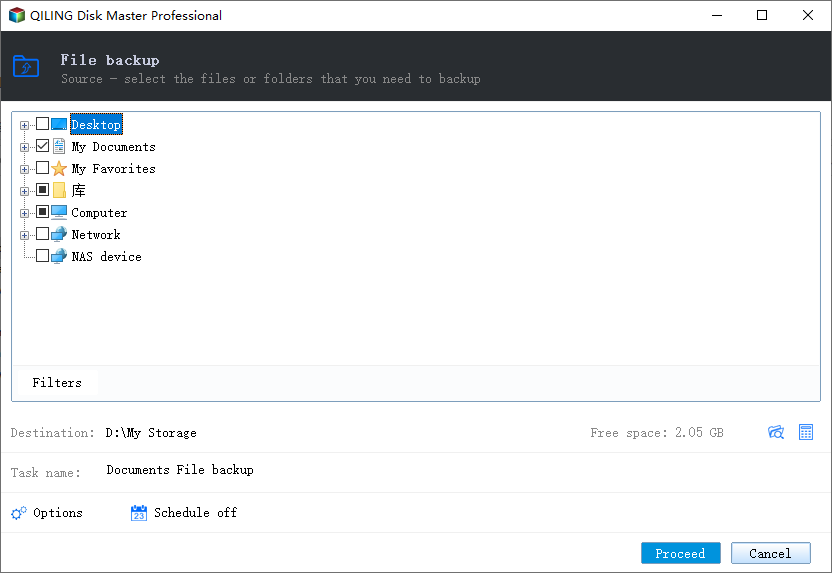
Step 4. Select the destination where you want to save the backup, following the on-screen guide.
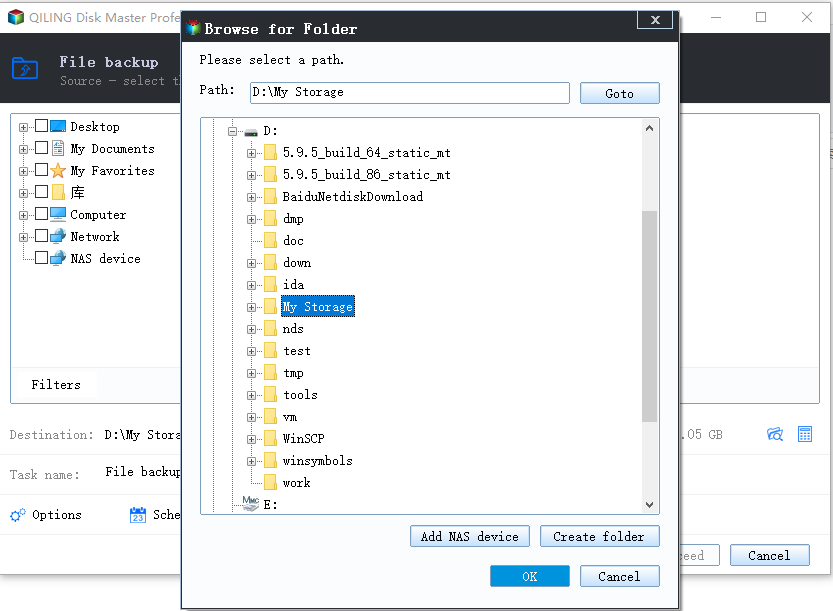
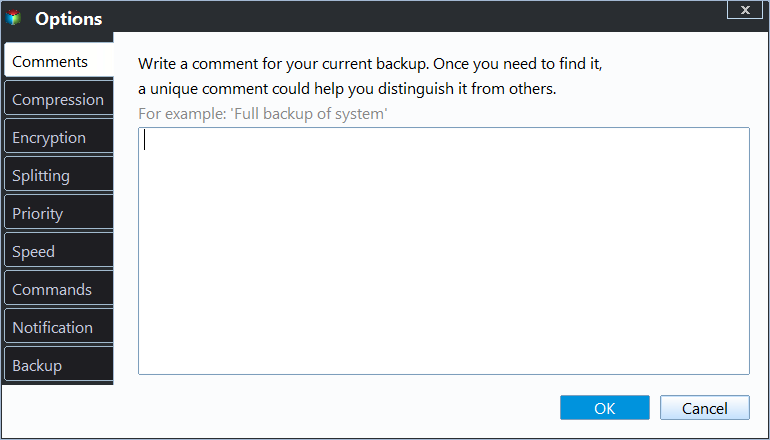
To encrypt the backup with a password, set the backup schedule, and choose to start the backup at a certain event, click on "Options" in the "Backup Options" section, then select the desired settings in the "Backup Scheme" section. This allows for customization of the backup task to suit individual needs.
Step 5. The backup can be stored on a local drive, Qiling's cloud service, or a Network-Attached Storage (NAS) device.
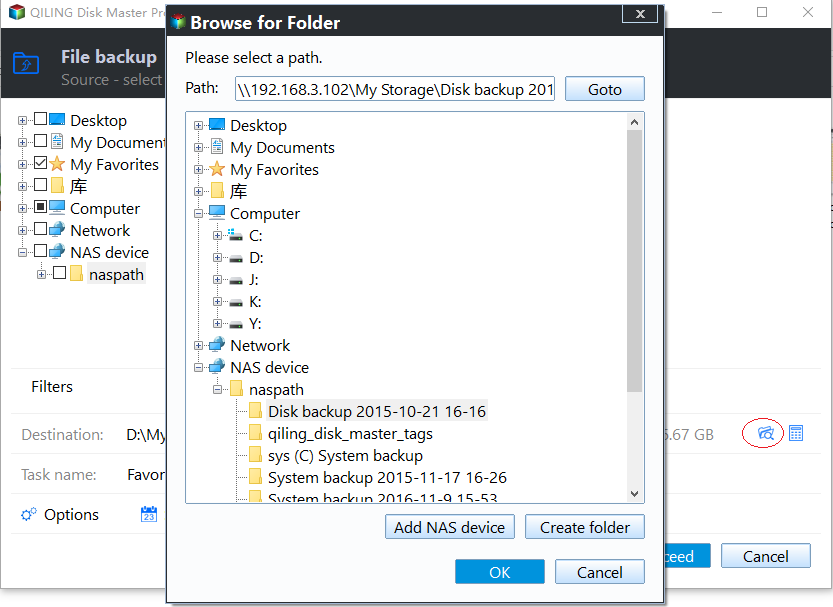
Step 6. Qiling Disk Master allows users to back up data to both third-party cloud drives and its own cloud drive.
To back up data to a third-party cloud drive, select Local Drive, scroll down to add a Cloud Device, and add your account, then log in.
Step 7. Click "Proceed" to start the backup process. Once completed, the task will be displayed as a card on the left panel, where you can further manage it by right-clicking on it.
Conclusion
Creating a backup on devices like the Samsung T7 is crucial in today's digital age, and using software like Qiling Disk Master Pro can make it easy. This software allows users to create backups of their device, helping to protect their important files and data from loss or damage. By using Qiling Disk Master Pro, users can ensure that their Samsung T7 is backed up and that their data is safe.
To ensure a reliable and easy backup for your Samsung T7, follow the steps mentioned in this article carefully, and use a more reliable tool instead of Samsung Portable SSD Software.
FAQs
Your further questions will be addressed in this section.
1. Does Samsung T7 have backup software?
The Samsung Portable SSD Software for T7 | T7 Touch is available for download from Samsung's consumer support website, but experts recommend using an alternative like Qiling Disk Master for creating backups due to its limitations.
2. How do I back up my Samsung SSD?
Samsung SSD users can use software such as Samsung SSD Magician, Samsung Portable SSD Software, or Qiling Disk Master Pro to back up or clone their SSD, depending on the type of Samsung SSD they have.
3. How do I connect my Samsung SSD T7 to my Android phone?
If you have a mobile phone with a USB Type C connector, you can directly connect it. Otherwise, you'll need a converter from Type C to your phone's connection type. After that, turn on the device and wait for it to power. Once done, you'll see the OTG device connected to your Android phone.
Related Articles
- How to Fix the Task Image Is Corrupted or Tampered With (4 Ways)
- How to Create Restore Point Automatically (2 Easy Ways!)👍
- Boot Device Not Found Hard Disk 3F0 Error on HP [FIXED]
- Bese Free SQL Backup Software
You can download a highly recommended free SQL Server backup software from Qiling and use it for free with a 30-day trial to effectively back up your SQL database. - Sync Files Between Desktop and Laptop | Easy!
Learn how to sync files between a desktop and laptop on Windows. Use cloud, network, or sync software to keep files updated. - Top 2 Ways to Transfer OS from Laptop to Desktop🔥
You can transfer an operating system from a laptop to a desktop in two ways: by backing up the entire laptop and restoring it, or by creating a clone and booting it on the desktop. A detailed tutorial on how to do this using a professional backup and cloning tool can be found in the post.
Products
Articles & Tutorials
- Data Recovery
- Data Backup
- File Recovery
- File Backup
- System Backup and Restore
- Disk and Partition Clone
- Technical articles
- Mobile articles
- Disk Master Help
- Windows Data Recovery Tutorials
- Windows Secure Delete Tutorials
- Windows Partition Management Tutorials
- Windows File Backup and Restore Tutorials
- Windows System Backup and Restore Tutorials
- Windows Disk Backup and Restore Tutorials
- Windows Clone Tutorials