How to Create Restore Point Automatically (2 Easy Ways!)👍
In Windows 10, you can create a system restore point to revert to a previous state if you're unsure about changes to your system or OS. This mechanism helps you recover from updates or modifications that don't go as planned. To create a restore point automatically, you can set up Windows to do so on a regular schedule, ensuring you always have a recent backup to fall back on.
Creating a restore point in Windows 10 can be done automatically, and in this post, we will outline the method and preparations needed to do so. We will delve into the process in detail, providing you with a comprehensive understanding of how to set up automatic restore points in Windows 10.
Preparation: Enable System Restore on Windows 10
To enable System Restore on Windows 10, you need to follow these steps:
Step 1: Search for Create a restore point on your Windows PC.
Step 2: To configure System Protection, click on the System Protection tab and then click on Configure. This will allow you to set the disk space that you want to use for System Protection, which will be used to store snapshots of your system at regular intervals. You can also choose to turn System Protection on or off for the selected drive.
Step 3: To enable system protection on Windows 10, toggle the Turn on system protection option and click Apply and OK to save the changes. This will allow you to create a system restore point, which can be used to revert your system to a previous state in case of any issues.
How to Setup Automatic Restore Points on Windows 10
To disable the System Restore point frequency, we need to change the settings in the Control Panel. We can do this by going to the System Protection section, clicking on the Configure button, and then selecting the option to disable the automatic restore point creation. Next, we can use the Task Scheduler to automate the restore point process.
Action 1. Disable System Restore Point Frequency
When you enable System Restore in Windows 10, the system won't automatically create another restore point within 24 hours of a previous one, but manual or automated points can still be created. This can also prevent Task Scheduler from creating backups at startup, but disabling the system restore point frequency can resolve this issue.
📓Note: Editing the Windows Registry is a complex process that requires caution, as the changes are irreversible. It's recommended to make a backup of your system before proceeding.
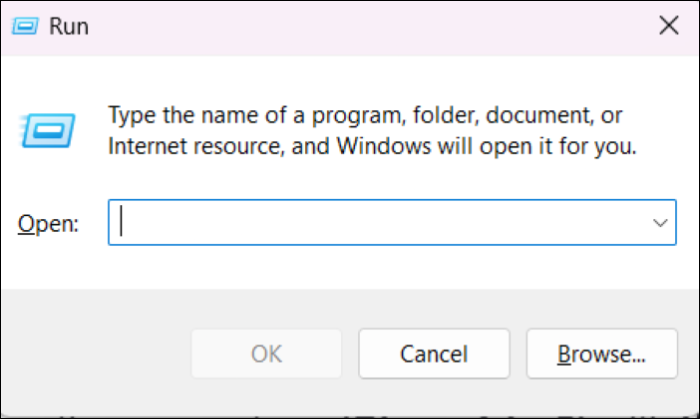
Step 1: To open the Run app, press the Windows key + R at the same time. This will open a small window where you can type a command or a file path to execute.
Step 2: To access the Registry Editor, open the Run dialog box by pressing the Windows key + R, type "regedit" and click "OK". This will open the Registry Editor. You can then navigate to the desired location by typing the path in the address bar or by manually browsing through the registry keys.
path: HKEY_LOCAL_MACHINE\SOFTWARE\Microsoft\Windows NT\CurrentVersion\SystemRestore
Step 3: Right-click on System Restore, hover over New, and click on DWORD (32-bit) Value.
Step 4: Enter the Value name as SystemRestorePointCreationFrequency, press Enter, double-click on the Key, enter the Value data as 0, and press OK.
Once you complete the process, the Task Scheduler can run the tasks with corresponding commands to create new restore points at every startup. This allows you to automate the creation of restore points, making it easier to revert to a previous state in case something goes wrong.
Windows Solution: Can't Create Restore Point Windows 10
To resolve the "can't create restore point" issue on Windows 10, try running the System File Checker (SFC) tool to scan and replace corrupted system files. Additionally, check the Disk Space and ensure there is enough free space available on the system drive. You can also try running the System Restore tool with elevated privileges, and if that doesn't work, check the Event Viewer for any error messages related to the System Restore feature. Furthermore, check the disk for errors and ensure that the system drive is not full or running low on disk space.
Action 2. Create System Restore Point via Task Scheduler
In this step, we use the Task Scheduler to create a new task at every startup to trigger a new restore point to save the current system. Follow the steps below to do it.
Step 1: Search for Task Scheduler and open the program.
Step 2: Right-click on the Task Scheduler Library and click Create Task.
💡Tip: Make sure to click OK before moving to other tabs.
Share it with your friends if you find it helpful:
Step 3: In the General tab, give a descriptive name to the task. Under Security Options, select the "Run whether the user is logged on or not" option and mark the "Run with highest privileges" checkbox.
Step 4: Click on New at the bottom of the Triggers tab.
Step 5: To begin the task at startup, click on the drop-down beside Begin the task and select At Startup.
Step 6: In the Actions tab, click New, press the drop-down beside Action, and select Start a program.
Step 7: Under Program/Script, type the following command: powershell.exe.
Share it with your friends if you find it helpful:
Step 8: Next to the Add arguments (optional) field, type the following command:
ExecutionPolicy Bypass -Command "Checkpoint-Computer -Description \"My Restore Point Startup\" -RestorePointType \"MODIFY_SETTINGS\""
Step 9: In the Conditions tab, under Power, clear these two options:
- Stop if the computer switches to battery power.
- "Start the task only if the computer is on AC power."
Step 10: Click OK and specify the password for your account when prompted.
- Notice:
- After completing the process, you can verify the new task in the Task Scheduler Library folder, which will run automatically every time you start your device to create a new system restore point. If you want to remove this task, go to the library, right-click on it, and press delete.
Bonus: Easier & Better Way to Create Windows 10 System Image
You can use the built-in Windows 10 feature called "Backup and Restore (Windows 10)" to create a system image. This feature allows you to create a full backup of your system, including the operating system, installed programs, and settings, which can be used to restore your system to a previous state. This method is safer and more straightforward than manually creating system restore points and task schedules.
System Image Recovery vs. System Restore in Windows 11/10/8/7
This article assists users in comparing and choosing a suitable system recovery solution based on their specific needs.
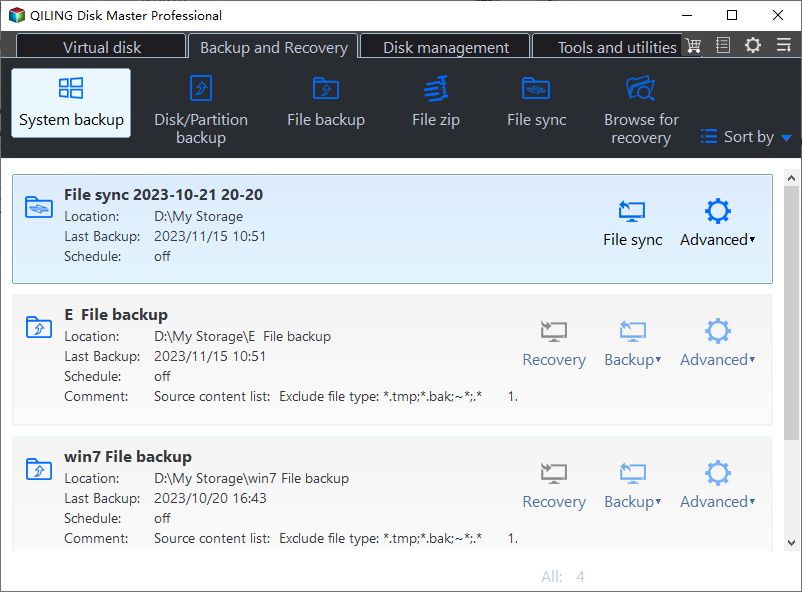
Qiling Disk Master is a tool that allows you to create a system image of your entire system in just a few steps, making it easy to make backups. You can select the source and destination drives, and the software will quickly create the image. Additionally, you can use the software to restore individual files from the image with a fast and efficient process.
| 🔒Backup and Restoration options | You can create a full backup. Drive Restore is a powerful tool that allows you to backup and restore entire drives, files, and system configurations in just a few clicks. With its intuitive interface, you can easily create backups of your important data and restore them in no time, ensuring that your valuable files and system settings are always safe and secure. |
| 👍Efficient cloning | To make system or disk clones of the used space only, use Qiling. It creates sector-by-sector cloning to save space on your disk. |
| 💾Create Bootable Drive | In case of emergencies, create rescue media using flash drives or CDs/DVDs to boot your devices. This allows you to troubleshoot and repair your devices even if the operating system is unresponsive or corrupted. |
| ⛑️Security Zone | Create a safe space for your essential data to protect it from external threats, ensuring it remains secure and accessible only to authorized individuals. |
| 🌩️Cloud Backup | You can save your files on our cloud services to backup, clone, or upgrade whenever required. |
To create a system image using Qiling Disk Master, follow these steps: First, ensure that your system is running and all applications are closed. Next, connect the external drive you want to use for the system image to your computer.
Step 1. On the main page, click "backup and recovery" tab page.

Step 2. Among the four available categories, click System backup.
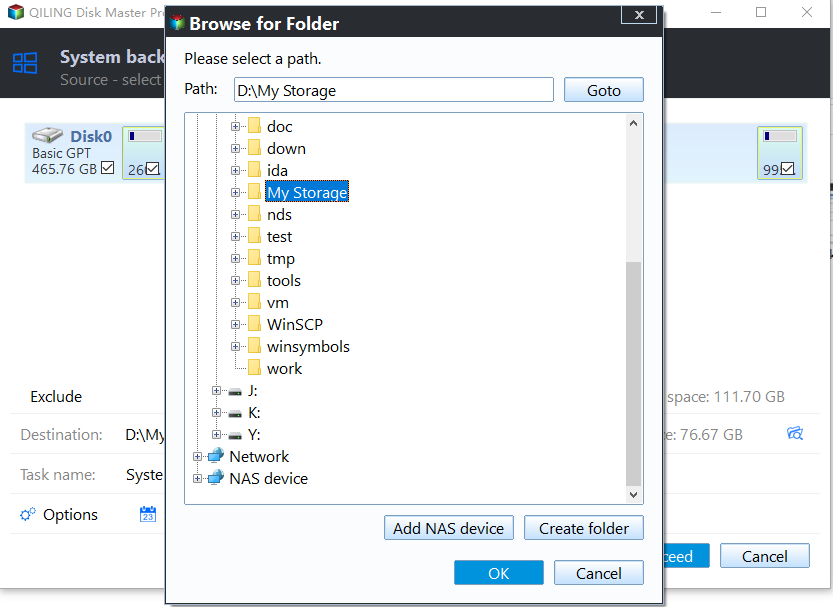
Step 3. Qiling Disk Master will automatically select your system partition, and you just need to choose where to back it up to.

Step 4. You have the option to save the backup file on a local drive or a network-attached storage (NAS) device.
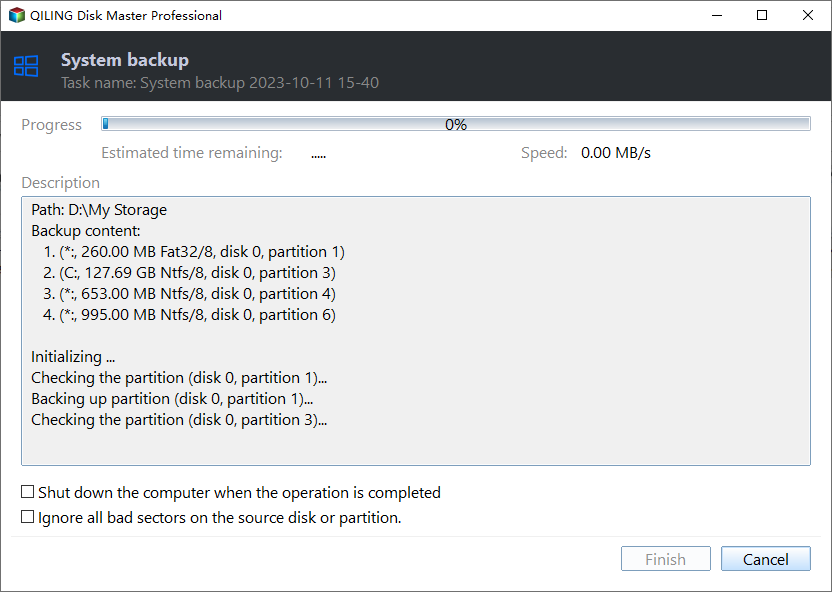
Step 5. After the backup process is complete, you can check the backup status, recover, open, or delete the backup by right-clicking the backup task on the left.
Conclusion
System Restore points are essential for reverting to a previous state in case of significant problems or issues. However, creating them can be risky, as they may permanently alter the Registry settings. Despite this, creating system restore points automatically in Windows 10 is possible, allowing users to quickly revert to a previous state if needed.
To avoid any potential issues, consider using a professional tool like Qiling Disk Master to create a system image before updating or making any changes. This way, if you're not satisfied with the outcome, you can instantly recover your previous state using the tool.
FAQs on How to Create Restore Point Automatically
Here are some frequently asked questions about automatically creating restore points in Windows 10:
1. Does Windows 10 automatically create system restore points?
Windows 10 automatically creates system restore points daily, which can be used to remove drivers, apps, and updates installed after the point was made without affecting personal files.
2. Is it OK to delete Windows restore points?
You don't need to create restore points frequently, as they are made automatically. In fact, deleting old restore points can help free up space and improve performance, but make sure to create a new one before deleting the old one.
3. Which scenario will automatically generate a Windows 10 system restore point?
Windows automatically generates a system restore point in various scenarios, including when the Windows Update process is initiated, when a new driver is installed, or when a system update is applied. Additionally, Windows also creates a restore point when a system maintenance task is performed, such as disk cleanup or disk defragmentation.
- While installing applications that use a System Restore-compliant installer
- Updating your Windows (even for auto updates)
- System Restore Operation
Related Articles
- How to Create A Bootable USB in Linux | All You Want Is Here
- Automatically Copy Files from One Folder to Another
- Simple & Easy: Backup External Hard Drive to Cloud
- Backup Hard Drive to Cloud [How to] + Feasible Cloud Backup Suggestion
- Change Backup Location Windows 7: Manage Backup File & Space Saving
- How to Save Files Before Factory Reset Windows 11 [2024 Updated]
If you are wondering how to save files before factory reset Windows 11, this post will help you. We are going to give you 4 solutions for backing up your important data to prevent data loss in the resetting process.