How to Backup External Hard Drive to Synology NAS (2024 Easiest Way)
Backing up data from an external hard drive to a Synology NAS is a smart way to reduce the risk of data loss. External drives can be damaged, lost, or accidentally erased, while a NAS provides centralized storage and easier access across your network. This guide explains two ways to back up an external hard drive to NAS: using Synology's built-in backup tool or using third-party backup software.
Can NAS Work With an External Hard Drive
Before using a NAS with an external hard drive, check compatibility, file system support, network connection, storage capacity, and backup settings. A proper setup ensures the NAS can recognize the drive and use it as a reliable backup source or destination.
- Check the compatibility of the external drive with your NAS and ensure the file format is compatible, such as NTFS or FAT32.
- Make sure the computer, NAS, and external hard drive can communicate through the same network or a supported USB connection.
- Configure settings related to the external hard drive.
- Ensure your NAS has sufficient storage space to hold all data before transferring files.
- Define your NAS backup strategy, including backup frequency, backup type, retention rules, and encryption settings.
How to Backup External Hard Drive to NAS - 2 Methods
For long-term data security, backing up an external hard drive to Synology NAS is more reliable than keeping only one local copy. You can use Synology's own backup utility or a Windows backup tool, depending on where the drive is connected and how much automation you need.
If you are comfortable with NAS settings, Synology Hyper Backup is a good built-in option. If you prefer a simpler Windows-based workflow, Qiling Disk Master can help you back up external drive data to NAS with fewer manual steps.
- Method 1. Backup External Hard Drive via Synology NAS Backup Tool
- Method 2. Backup External Hard Drive with Qiling Disk Master Easily🔥
Method 1. Backup External Hard Drive via Synology NAS Backup Tool
Synology NAS devices include Hyper Backup, a built-in backup tool that can protect data to local NAS folders, remote NAS devices, cloud storage, and USB devices. It supports scheduled backup, encryption, version retention, and efficient backup management.
👍Pros:
- Easy to use and set up
- Supports multiple destinations
- Flexible backup options
- High encryption
👎Cons:
- Requires technical expertise
- Only available for Synology NAS users
Share it with your fans if it is helpful:
To back up your external hard drive to a Synology NAS using Hyper Backup, create a new backup task, choose the external drive or target folder, select the NAS destination, configure backup settings, and start the task.
Step 1: Plug the external hard drive into your computer or the NAS's USB port.

Step 2: Log in to the Synology DSM web interface and open Hyper Backup.
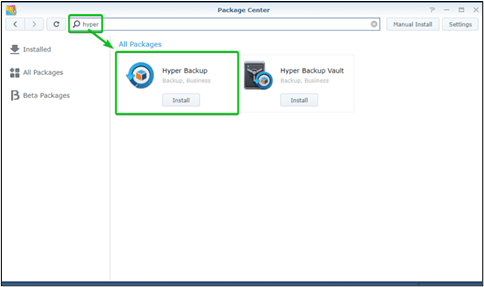
Step 3: To start a new backup task, click on the "Create" button and select your NAS as the backup destination.

Step 4: Select the external hard drive as the backup location.
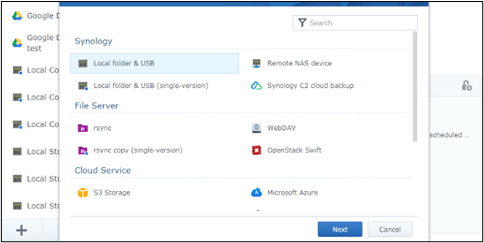
Step 5: Select the files and folders you want to back up, then click the "Next" button.
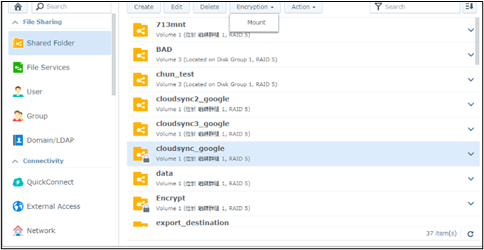
Step 6: In the backup wizard, you can customize your settings and choose a backup schedule to suit your needs.
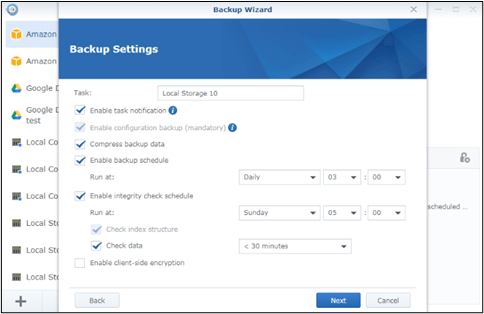
Step 7: Click the Create button.
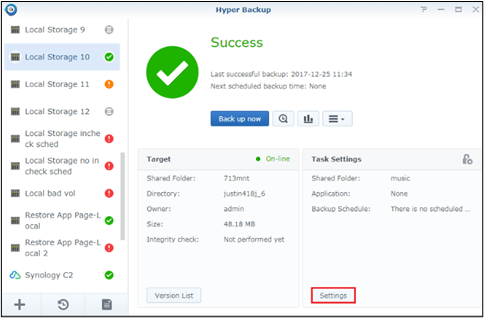
Hyper Backup will start copying data from your external hard drive to your Synology NAS, displaying a green check button if the backup is successful.
Method 2. Backup External Hard Drive with Qiling Disk Master Easily🔥
Although Synology's built-in tool is useful, it may require more time and basic knowledge of NAS backup settings. For a simpler alternative, Qiling Disk Master provides a Windows-based backup workflow for users who want to back up an external hard drive to NAS with less configuration.
Qiling Disk Master offers flexible backup types, disk cloning, encryption, scheduling, and retention policies. It also provides recovery options such as file recovery, system restoration, and dissimilar hardware recovery, and can help back up Windows to NAS with an intuitive interface.
Features of Qiling Disk Master:
| 🗳️Incremental and Differential Backup | Capturing only the changes made since the last backup reduces storage usage and backup time. You can also create a full backup when a complete data copy is required. |
| 🔑Strong Encryption | The software uses AES encryption to secure your data during transmission and storage, keeping it confidential and protected from unauthorized access. |
| 🔬Compression Technology | Qiling's advanced compression technology reduces the size of backup files without compromising data integrity, optimizing storage usage on your NAS while ensuring efficient data restoration. |
| 🪄Flexible Scheduling | You can set specific backup times and frequencies so important files are protected regularly. Scheduled backup helps ensure each file is automatically backed up to an external hard drive or to the NAS, reducing the risk of data loss. |
Share this post on Twitter if it helps you somehow:
To back up an external hard drive to Synology NAS, follow these steps:
Step 1. When using Qiling Disk Master for the first time, click on the "Backup" tab page to start backing up your files.
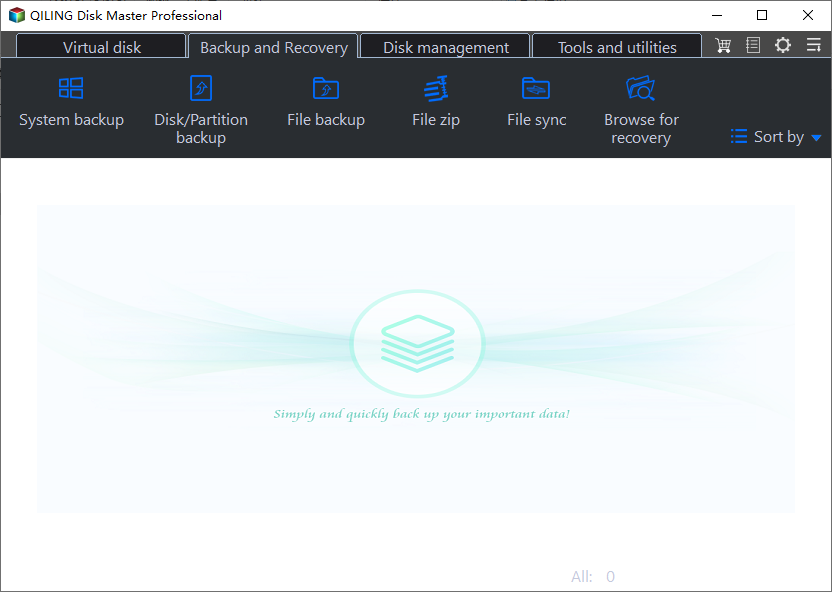
Step 2. Since you're going to back up files and folders on your computer, go on with the "File" backup mode, where you can select pictures, videos, documents and all other types of files to back up.
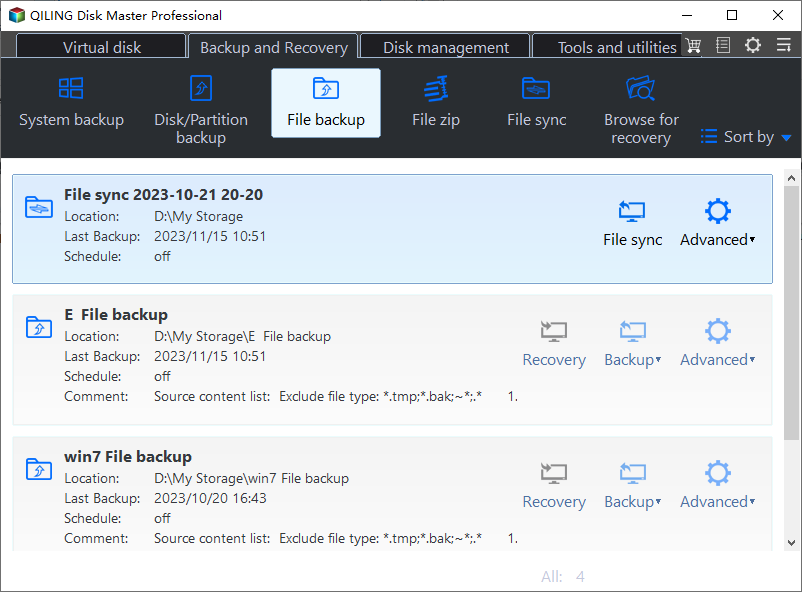
Step 3. Select the files, folders or directories you want to back up by following the paths.
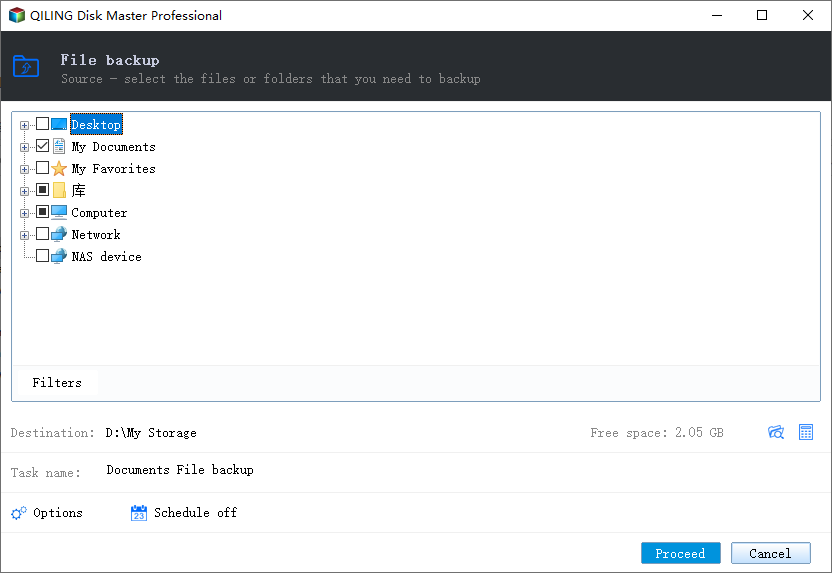
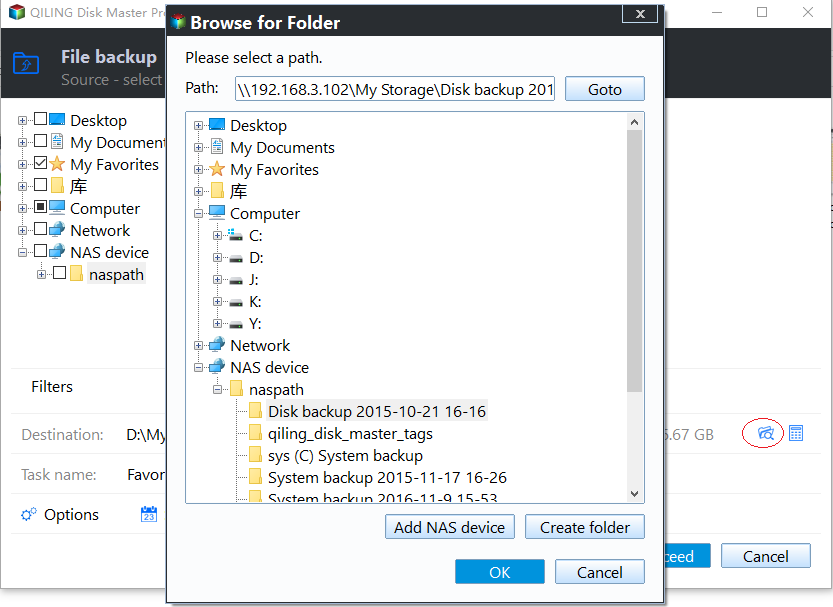
Step 4. Select a backup location, such as a NAS path, external hard drive, or cloud storage service, to store the backup safely.
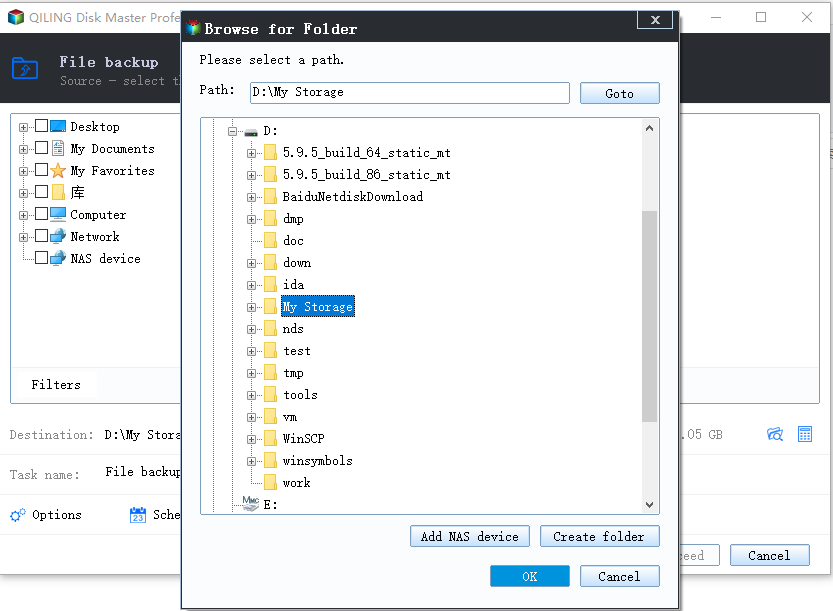
Step 5. Qiling Disk Master allows users to save backup files to local hard drives, external USB drives, SD cards, network drives, NAS drives, and cloud drives. Choose the NAS destination if your goal is to protect the external hard drive on Synology NAS.
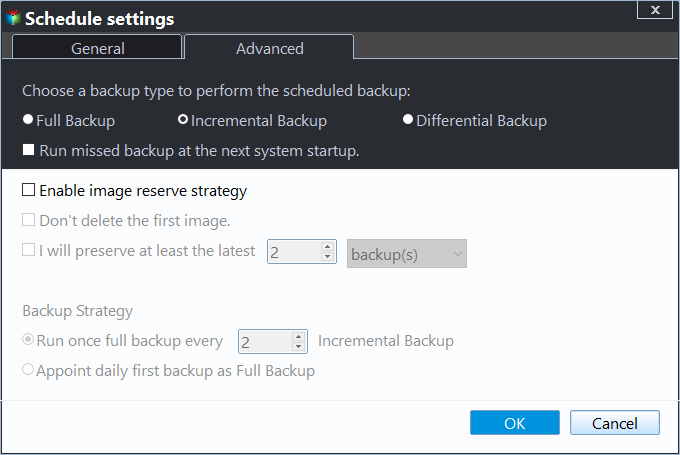
Step 6. To set up an automatic and intelligent backup schedule for the next file backup task, go to the "Options" setting. There, you can choose to encrypt confidential files, compress the backup image to save space, or customize a backup scheme to specify when the next backup should start.
Customize an advanced and automatic backup task here:
Step 7. Click "Proceed" to start the file backup process, which will display completed backup files in a card style on the left area.
You may also be interested in:

Backup Synology NAS to Cloud/External Hard Drive
Want to back up your Synology NAS to the cloud or an external hard drive? This tutorial will guide you through the process step-by-step, so you can easily protect your data and ensure it's safe and secure.
The Concluding Thoughts
In today's digital world, safeguarding data and keeping it accessible are both important. This guide introduced two efficient methods for backing up an external hard drive to Synology NAS: Synology Hyper Backup and Qiling Disk Master.
Hyper Backup is a solid choice for Synology users who want to manage backup tasks inside DSM. Qiling Disk Master is better for users who prefer a Windows-based backup tool with flexible backup options, encryption, scheduling, and recovery features.
FAQs on How to Backup External Hard Drive to Synology NAS
When managing your data and storage solutions, consider the best practices and available options. This FAQ section addresses common queries about transferring files from external hard drives to Synology NAS, providing guidance on the process and available solutions.
1. How do I transfer files from an external hard drive to a Synology NAS?
Transferring files from an external hard drive to a Synology NAS is a straightforward process.
- Connect the external hard drive to your computer.
- Access the Synology NAS web interface using a web browser.
- Navigate to the File Station app on your Synology NAS.
- Locate the external hard drive under "Local Drives" or "USB", then select the files or folders you want to transfer.
- Drag the selected files or folders to the desired shared folder on the Synology NAS.
- Once the files have been transferred to the NAS, you can access them from devices connected to the same network.
2. Is it OK to use a normal HDD in a NAS?
You can use a regular hard disk drive in a NAS because many NAS devices support standard SATA HDDs. However, NAS-rated drives are usually recommended for better reliability, durability, and continuous operation.
3. Is a NAS better than an external hard drive?
A NAS (Network-Attached Storage) is generally a better choice than external hard drives for users with extensive data management needs, offering superior functionality, scalability, and collaboration capabilities. In contrast, external hard drives are more straightforward but lack the advanced features and accessibility of a NAS, making them less suitable for users with complex data requirements.
Related Articles
- How to Do a System Backup on Windows 10 [2024 New Tutorial]
- How to Backup Dell Laptops in Windows 10 [Ultimate Guide]
- Backup Windows XP and Create a Windows XP System Image [Full Guide]
- How to Backup Photos to pCloud on Various Devices [Solved]🔥
- How to Move McAfee from one Computer/Drive to Another Without Reinstalling
You can transfer McAfee from one computer to another without re-downloading by using a PC data transfer tool, or move it from one drive to another with an App Migration Utility. - How to Move Microsoft SQL Server Compact Another Computer? [2022 Ultimate Guide]
Do you want to know how to move Microsoft SQL Server Compact to a new computer? This post will introduce you several valid methods to help you move your Microsoft SQL Server Compact. Go and have a try!
Products
Articles & Tutorials
- Data Recovery
- Data Backup
- File Recovery
- File Backup
- System Backup and Restore
- Disk and Partition Clone
- Technical articles
- Mobile articles
- Disk Master Help
- Windows Data Recovery Tutorials
- Windows Secure Delete Tutorials
- Windows Partition Management Tutorials
- Windows File Backup and Restore Tutorials
- Windows System Backup and Restore Tutorials
- Windows Disk Backup and Restore Tutorials
- Windows Clone Tutorials