Mac Software Update Not Working | 6 Proven Ways to Fix It [macOS Sonoma Included]
Using an outdated Mac can put your system at risk of virus infestation and hacker attacks, making it essential to update your software for better security. A newer macOS version can help protect your MacBook from potential threats, ensuring your device remains secure and reliable.
If your macOS is outdated, it becomes less secure. Updating to the latest macOS version is usually straightforward, but sometimes the Mac Software Update may not work. However, this article provides solutions for those experiencing issues with the update process.
| Workable Solutions | Step-by-step Troubleshooting |
|---|---|
| Fix 1. Restart Your Mac | Hit the Apple menu from the menu bar, and select the Restart option to restart your Mac...Full steps |
| Fix 2. Reset Preferences | Go to Finder, select Go on the top Finder menu bar, and opt for Go to Finder...Full steps |
| Fix 3. Kill softwareupdated Process | Open Activity Monitor from the Utilities folder and look for the software-updated process...Full steps |
| Fix 4. Delete macOS Install Data | Open Terminal, enter this command: sudo rm -rf /macOS Install Data and hit Enter...Full steps |
| Other Proven Fixes | Other fixes include setting Date & Time to automatic and booting your Mac in Safe Mode...Full steps |
MacBook users often express concern about software updates on Mac, including grayed out or stuck "Mac checking for updates" issues. To troubleshoot this, it's essential to understand why the Mac Software Update is not working, which can be due to various reasons such as incorrect date and time settings, corrupted cache, or issues with the App Store.
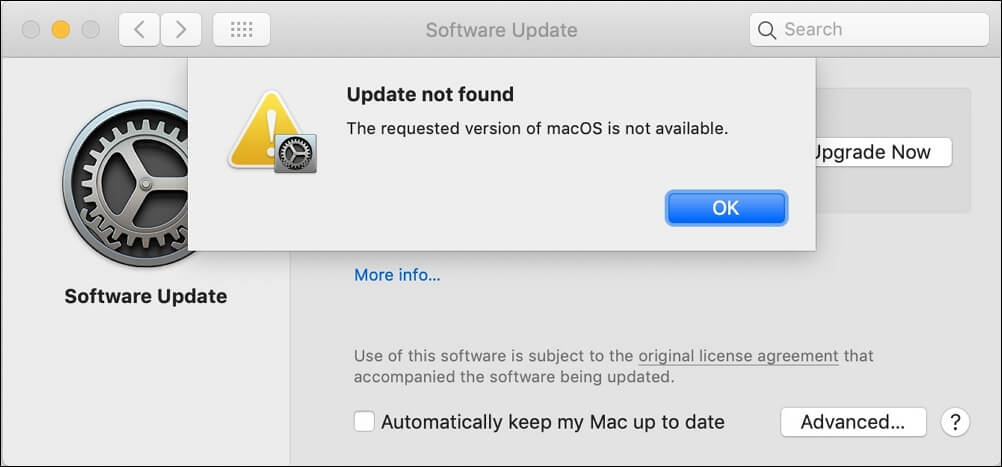
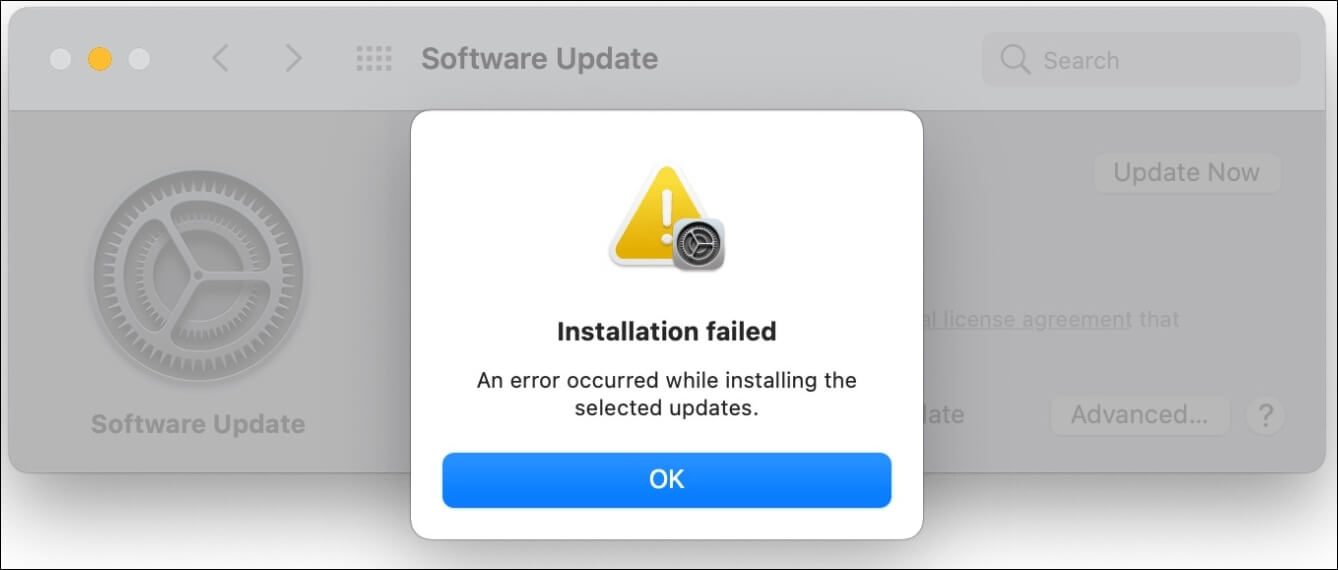
There may be reasons like an error while installing updates, insufficient disk storage, incompatibility with installing the latest macOS 14, or issues with Apple servers.
If you're having trouble updating your Mac, it's likely due to one of several possible causes, including issues with the App Store, outdated system software, or problems with your internet connection, which can be resolved by restarting your Mac, checking your internet connection, or reinstalling the App Store.
Why Mac Software Update Not Working
If you're experiencing issues with the Mac Software Update, such as stalling, freezing, or crashing, or if the macOS Ventura update is not found, it could be due to various reasons. These may include outdated software, corrupted system files, or issues with your internet connection. Additionally, problems with the App Store, a full disk, or malware on your Mac could also be contributing factors.
🌐Poor internet connection: To complete your macOS update, you need a stable internet connection. If your Wi-Fi is unreliable, you won't be able to download the latest software update from the App Store, which can cause issues like macOS Ventura failing to prepare the update due to a system unable to connect to upgraded servers.
💾Insufficient disk storage: There's a common myth that Mac users need a lot of space, similar to the size of the installation package, to install updates, but this isn't true. In reality, Macs can install updates even with limited storage, allowing users to keep their devices up-to-date without worrying about running out of space.
💻Incompatible Mac: Apple provides a detailed list of compatible Macs with each major macOS version release, meaning that if your Mac isn't on the list, you can't update it to the latest version.
If you're running an incompatible Mac, don't worry! You can still install the macOS version on your unsupported Mac machine by following the steps outlined in this article.
macOS Sonoma, also known as macOS 14, is now available for installation on compatible Macs. However, if you have an unsupported Mac, you can still install the new operating system using a few workarounds.
This article provides steps to install macOS Sonoma on an unsupported Mac: First, ensure you have a compatible Mac with a T2 chip or later, and a 16 GB or larger USB drive. Next, download the macOS Sonoma installer from the Apple website and create a bootable USB drive using the installer. Then, restart your Mac and hold down the power button to boot from the USB drive.
Quick Solutions to Fix Software Update Not Working
To keep your MacBook updated and secure, find the Software Update panel, search for and install available updates from the Apple server, then reboot your Mac.
If you're having issues with software updates not working on your MacBook, don't worry! You can try upgrading to macOS 14 Sonoma, which comes with trendy features. However, if that's not an option, there are three quick solutions to fix the issue:
Quick Solution 1. Check macOS Compatibility
To get your Mac ready for the new macOS Sonoma, first check if your Mac model is compatible with the update, as Apple discontinues support for some older devices with each new version, and by default, you cannot set up Sonoma on an incompatible Mac. To do this, you can simply check what macOS/OS X your Mac supports by following two easy steps.
Step 1. To find the Mac model information, go to the Apple menu and select "About This Mac".
Step 2. To determine if your MacBook is compatible with the desired macOS version, visit Apple's support page and check the compatibility list for your specific MacBook model.
Installing an unsuitable version of software can lead to system instability or even a complete system freeze. If this happens, downgrading the system to a more stable version may be the best solution.
Downgrade macOS Sonoma to Ventura | Uninstall Sonoma Beta
To downgrade macOS Sonoma to Ventura, follow these steps: first, ensure you have a Time Machine backup or create one before proceeding; next, go to System Settings, then click on General, and select Software Update; click on the "Update Now" button and select the "Restore from this backup" option; select the Ventura backup and click "Restore"; wait for the process to complete, which may take some time; once finished, restart your Mac and verify that you are running Ventura.
Quick Solution 2. Check Internet Stability
To successfully install the latest macOS update, it's essential to have a stable internet connection. If the installation fails, consider using an Ethernet connection instead of Wi-Fi, and if the internet is still unstable, restart your router to ensure a secure and stable condition.
Quick Solution 3. Check Mac Storage
The most recent release of macOS, from version 13.1 to 14, requires a significant amount of hard drive space, with a minimum of 3.5 GB to 4 GB needed for each update. Furthermore, switching between different versions, such as from Ventura to Sonoma, requires an additional 13 GB for the installer, and it's recommended to double the available space for a smooth experience.
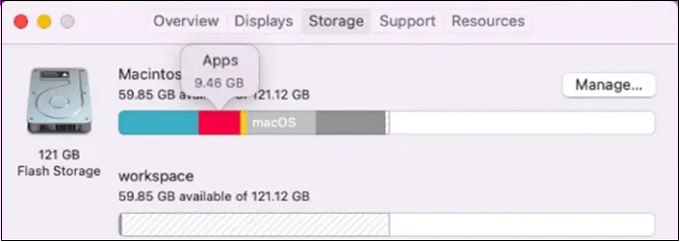
If you have insufficient disk space on your MacBook, you won't be able to download and install the macOS update. To resolve this, check the free space on your system and liberate space on your Macintosh HD.
Mac Software Update Not Working: 6 Proven Solutions
If the issue persists after considering the 3 initial fixes, further investigation and more advanced solutions may be necessary. These can include checking for software updates, reinstalling the application, resetting the device to its factory settings, performing a virus scan, using a system restore point, and seeking professional technical support.
Fix 1. Restart Mac to Fix the Software Update Not Working
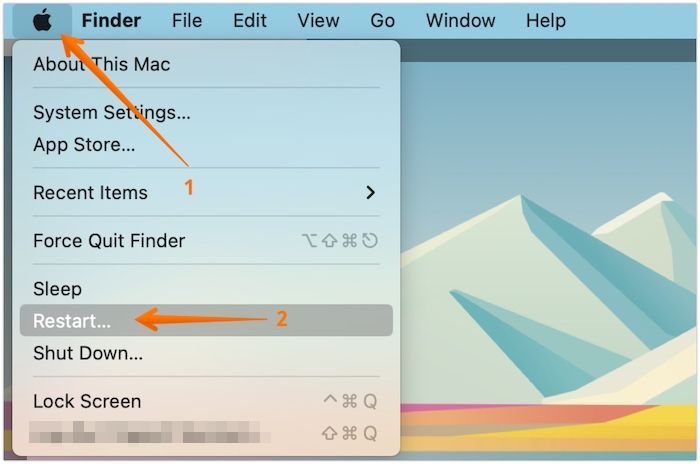
To restart your MacBook, click the Apple menu, select Restart, and confirm that you want to restart the computer. Alternatively, you can press the power button or press Command (⌘) + Option (⌥) + Power to force a restart. This will shut down and restart your MacBook, freeing up resources and preventing any issues caused by misbehaving processes.
Step 1. Hit the Apple menu from the menu bar.
Step 2. Select the "Restart" option.
Fix 2. Reset the Software Update Preferences
The software updating process may fail due to a poor network connection or other issues, potentially causing the Mac to download only a portion of the updated files. This can lead to update failure when attempting to re-download the updates.
To reset the software update preferences, also known as PLIST files, follow these steps:
Step 1. Go to the top Finder menu bar, select "Go", and it will open a dropdown menu.
Step 2. From the drop-down option, opt for "Go to Finder".
Step 3. Hit "Return" after typing /Library/Preferences/com.apple.SoftwareUpdate.plist into the search field.
Step 4. Drop the file into the Mac Trash bin by dragging it.
Step 5. To resolve the issue, you can try shutting down the Finder, restarting your MacBook, and then reopening the Software Update panel. This should allow the update to proceed normally.
If you're experiencing issues with the Mac Software Update, don't worry - it's a relatively common problem that can be easily fixed. The issue often arises when the update server is down or your Mac is having trouble connecting to it.
Fix 3. Kill the softwareupdated Process
Mac users found that reloading the update assist by killing the software update process in the Activity Monitor can resolve the issue when it's not working. To do this, follow these steps:
Step 1. Open "Activity Monitor" from the "Finder > Applications > Utilities".
Step 2. To update the software, you can search for the software update process on your device's search box. This provides a list of available updates, and you can follow the on-screen instructions to download and install the latest version.
Step 3. A new window will appear after double-clicking on the software update process.
Step 4. To quit the procedure, click on the "Quit" button and confirm by selecting "Quit" again. This will terminate the process.
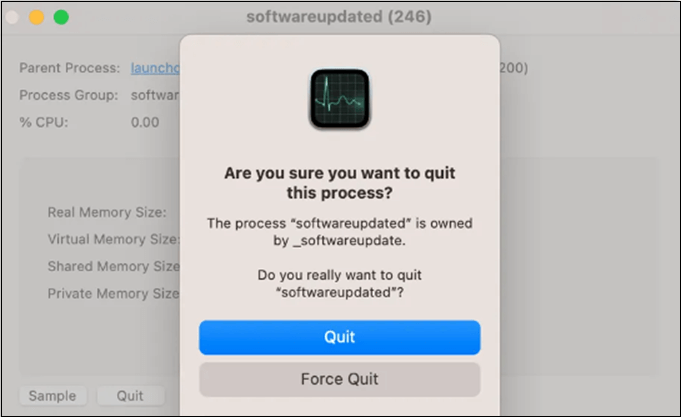
If the Quit button is unresponsive or not working, you can choose "Force Quit" to close an application on your Mac.
Apps Unresponsive? Force Quit on Mac when Frozen
When a Mac app becomes unresponsive, freezes, or fails to close normally, you can force quit it to resolve the issue. To do so, press Command + Option + Esc keys simultaneously, or go to Apple menu > Force Quit, select the unresponsive app, and click Force Quit. This will terminate the app and free up system resources.
Fix 4. Delete macOS Install Data
To resolve the issue of not being able to install macOS, you can try deleting the recent folder and restarting your MacBook, and then attempt to update the software again.
Step 1. Open Terminal on the Mac.
Step 2. Enter this command: sudo rm -rf "/macOS Install Data" and hit "Enter". Don't forget to enter your admin password.
Step 3. Restart your Mac, and try deleting macOS install data.
While trying to recover deleted files on your MacBook, you may accidentally delete confidential files. If this happens, professional data retrieval software like Deep Data Recovery for Mac can help recover unlimited data from an emptied trash bin, virus attack, unanticipated shutdown, and system crash.
It is the one-A reliable data recovery tool can help recover permanently deleted files on Mac and multiple devices, including those lost or deleted after a macOS update. It can assist in retrieving lost data, even after accidental deletion or a system crash. By following a few simple steps, you can recover your important files and get back to work with minimal disruption.
Note: To create a backup, click on "Disk Backup" on the left first. This allows you to recover data from a backup image if the disk is damaged or data is accidentally deleted or lost.
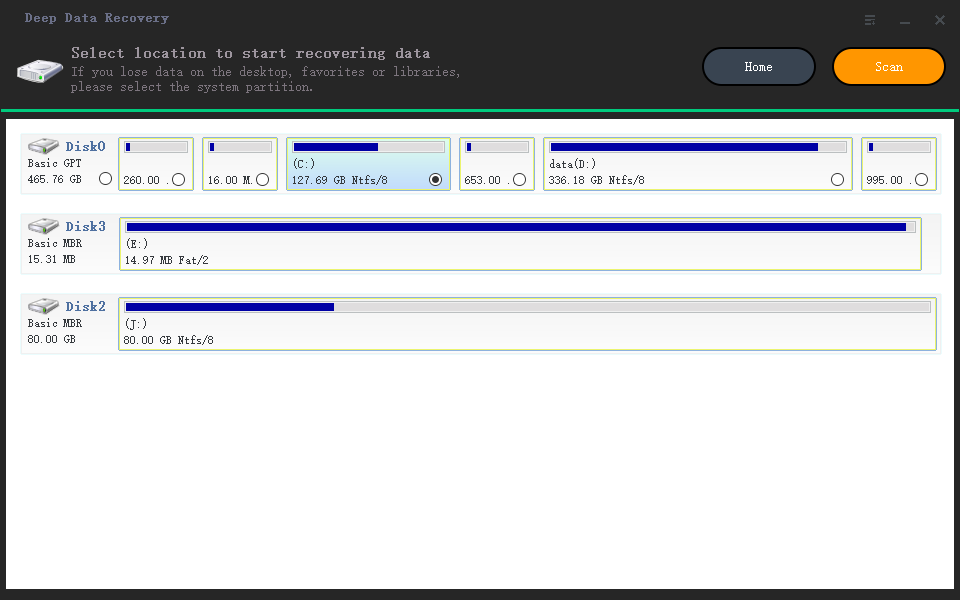
Step 1. Select the location
After updating to macOS Sonoma/Ventura/Monterey/Big Sur, select the disk where you lost your data, then click "Search for lost files" to initiate the recovery process.
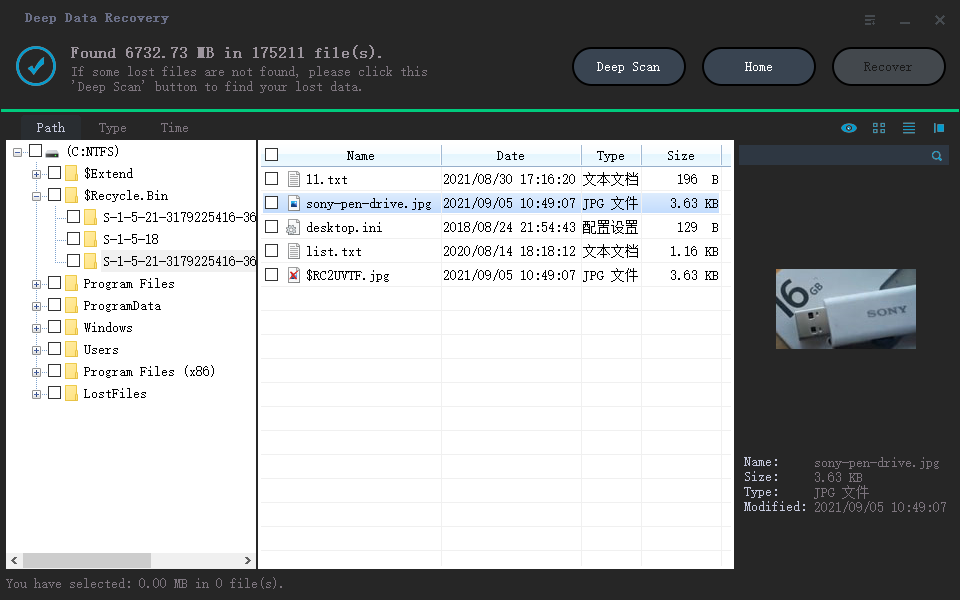
Step 2. Find lost data after the scan
Deep Data Recovery for Mac scans the selected disk volume and displays the results, allowing you to quickly find the desired data using file type and path.
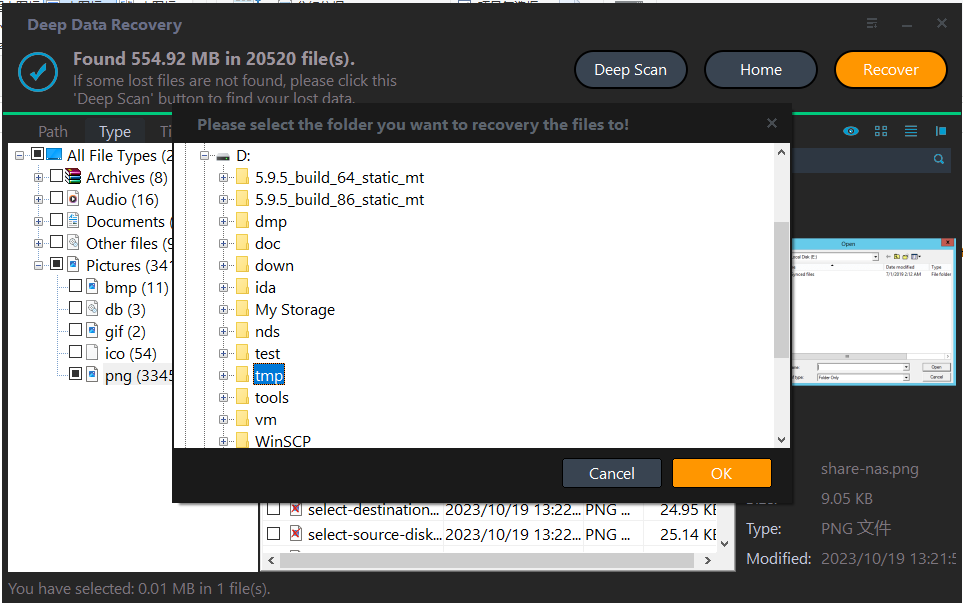
Step 3. Recover data after macOS update
Select the target files that were unknowingly lost during or after the update, and click the "Recover" button to retrieve them all.
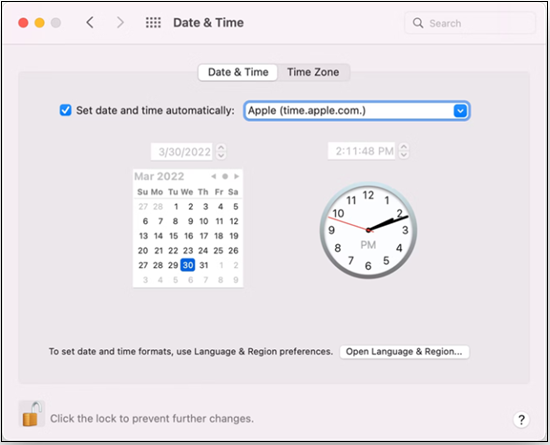
Fix 5. Set Date & Time to Automatic
Still having issues with the macOS update? You may try setting the date & time to Automatic. However, follow the steps below:
Step 1. Navigate to "System Preferences".
Step 2. Select the "Date and Time".
Step 3. Check the box to "Set Date & Time Automatically".
Fix 6. Boot Your Mac in Safe Mode
Mac Safe Mode is a simplified version of macOS that only runs essential programs for the Mac to function. If you're still experiencing issues, a system software update must be installed in Safe Mode. To access Safe Mode, follow these steps: (insert steps)
Step 1. Shut down the Mac, and wait for 10 seconds.
Step 2. Quickly press and release the "Shift" key on your keyboard until you see the Apple logo on your screen.
Step 3. Press the power button on your Apple Silicon Mac until the startup options screen appears.
Step 4. Opt for the Mac startup disk having macOS, and pick "Continue in Safe Mode" while pressing the Shift key.

Step 5. To retry the system software update after entering Safe Mode, go to System Preferences, then select Software Update.
Bonus Tip to Update macOS on Mac
The other options for updating macOS on a Mac include using a bootable installer or the App Store, in addition to Software Update.
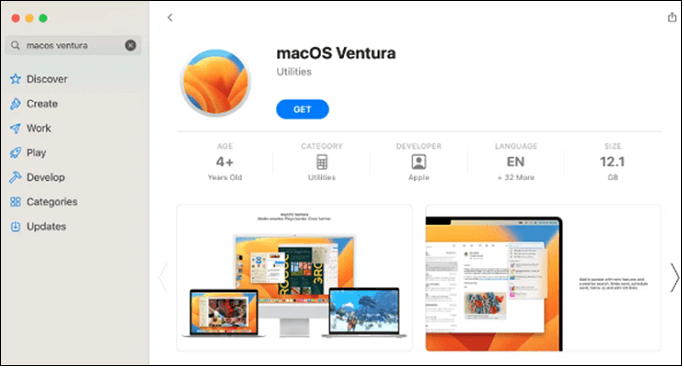
Update macOS from App Store: The Mac App Store is the best way to update the latest macOS version, but you cannot find earlier versions like Mojave, Catalina, Big Sur, or Monterey there since their indexes have been hidden.
To upgrade your Mac to Ventura, launch the App Store, search for "macOS Ventura", and follow the on-screen instructions to obtain and install it.
Update macOS with a bootable installer: If all the previously mentioned methods to resolve the Mac Software Update issue fail, it's suggested to update your macOS using a bootable installer.
3 Steps to Clean Install macOS from USB Bootable Installer
To download the macOS bootable installer to an external USB and then clean install macOS from USB, follow these steps: First, ensure you have an external USB drive that is at least 16 GB in size and is formatted to the APFS or GUID Partition Map. Next, download the macOS installer from the App Store, and then use the Terminal app to create a bootable installer on the external USB drive. Finally, restart your Mac in recovery mode, select the external USB drive as the startup disk, and then follow the on-screen instructions to clean install macOS.
Conclusion
When the macOS update resumes functioning, it's essential to exercise patience, as updates can take time even with fast connections. Avoid rushing through the process, as configuring and booting up the system can slow it down further. Be aware that attempting the mentioned methods may result in data loss, so consider downloading Deep Data Recovery for Mac if this happens.
Mac Software Update Not Working FAQs
Consider the below-mentioned FAQs to get a better understanding of the topic:
1. How do I fix my Mac stuck on checking for updates?
If your Mac gets stuck on checking for updates, you can try clearing the App Store cache and checking your Mac's storage, as accumulated caches can hinder the OS update process.
2. Why is my Mac update not working?
If you're having trouble updating your Mac, check if you have enough RAM and storage capacity first. Alternatively, try downloading the update while restarting your computer. If that doesn't work, try starting your Mac in safe mode or using Disk Utility to fix your hard drive.
3. What do I do when my Mac is stuck on a software update?
If your Mac is stuck on a software update, check your internet and network settings. You can try restarting your router or boosting the bandwidth by disconnecting inactive devices on private Wi-Fi.
4. Is My Mac too old if it won't update?
The most hassle-To determine if your MacBook is an older model, you can check the macOS version by going to the "Apple menu > About this Mac". This shows you the current operating system version, and you can verify if it's compatible with your MacBook's hardware.
Related Articles
- How to Install Dmg Files on Mac 13/12/11 [4 Fixes]
- Msvcr100.dll Is Missing? Here Is How to Fix It [2023 Updated]
- What Does Wipe Cache Partition Mean and How to Wipe the Cache Partition
- (4 Solutions) How to Fix Windows 7 Startup Repair Not Working
- Samsung Launches 'Repair Mode' to Protect Users' Data Security When Repairing Phones
Samsung has recently launched a repair mode, and this article provides the information about Samsung Repair Mode. - SAN vs. NAS: A Thorough Comparison Between SAN & NAS
SAN (Storage Area Network) and NAS (Network-Attached Storage) are both designed to share data across multiple devices, enabling multiple users to access the same storage database.
Products
Articles & Tutorials
- Data Recovery
- Data Backup
- File Recovery
- File Backup
- System Backup and Restore
- Disk and Partition Clone
- Technical articles
- Mobile articles
- Disk Master Help
- Windows Data Recovery Tutorials
- Windows Secure Delete Tutorials
- Windows Partition Management Tutorials
- Windows File Backup and Restore Tutorials
- Windows System Backup and Restore Tutorials
- Windows Disk Backup and Restore Tutorials
- Windows Clone Tutorials