How to Stop Apps from Opening on Startup Mac | Detailed Tutorial and Tips
Many Mac users are frustrated by the number of programs running simultaneously, especially when multiple apps are set to launch at startup, slowing down the boot process. Fortunately, there's a simple way to stop apps from opening on startup Mac, making it easier to get to work without unnecessary delays.
To make your Mac boot up faster, you can disable startup applications by editing the "login items". If your Mac is running slow after a macOS update, for example, disabling startup apps can help. To do this, follow the steps to edit the login items, and your Mac will launch with a faster and more streamlined experience every time you log in.
What Are Startup Apps on Mac
When you start your Mac, certain programs may launch immediately, which can slow it down and make it harder to get work done. To avoid this, it's a good idea to close unnecessary programs when you start your computer. This will help your Mac run more efficiently and make it easier to get started.
By changing your login items, you can choose which programs to launch immediately when you start up your Mac, which can improve system performance and efficiency. This is because some Mac programs may be set to launch automatically, taking up system resources and potentially slowing down your computer. By managing your login items, you can control which programs start up with your Mac, helping to streamline your system and make it run more smoothly.
- 1. Background-running apps, such as antivirus, cloud storage, and messaging applications, can operate in the background and may be customized to launch immediately on startup, ensuring they are always available.
- 2. Mac programs like iTunes, Calendar, and Reminders are automatically added to your login items list, launching automatically and potentially delaying your system and wasting resources if you don't use them often.
- 3. Some users may have added apps manually to their login items list, which can slow down their system and waste resources if there are too many.
Share this article on social media to read it anytime.
How to Stop Apps from Opening on Startup Mac in Dock
To prevent programs from launching automatically when you start your Mac, you can simply remove the application's icon from the Dock. This will prevent the program from launching automatically when you start your Mac, and you can still access it by searching for it in the Launchpad or Spotlight. Alternatively, you can right-click (or control-click) on the application's icon in the Dock and select "Options" > "Remove from Dock" to remove it. By doing so, you can customize your Mac's startup experience and only launch the programs you need.
Step 1. To access the app's settings, right-click the icon and select settings from the context menu.
Step 2. To disable the app's auto-start behavior when you log in to your Mac, remove the checkmark from Open at Login in the app's preferences.
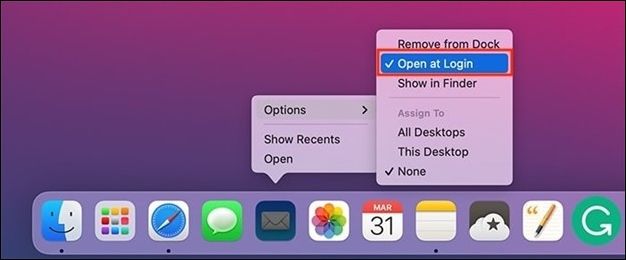
Step 3. To uninstall an app from the Dock, drag its icon out of the Dock and release the mouse button. The app's icon will disappear from the Dock, and a "Remove" button will appear, allowing you to confirm the uninstallation.

Step 4. You can control which programs launch on your Mac by dragging them from the Applications folder or elsewhere onto the Dock, allowing you to easily launch them.
Stop Apps from Opening on Startup Mac by Disabling Login Items
To disable login items on your Mac, go to System Preferences, then Users & Groups, select your username, click on the Login Items tab, and click the minus button next to each item you want to remove. Alternatively, you can also disable login items by going to System Preferences, then Users & Groups, select your username, click on the Login Items tab, and click on the "minus" button next to each item you want to remove. This will prevent the selected programs from launching automatically when you log in to your Mac.
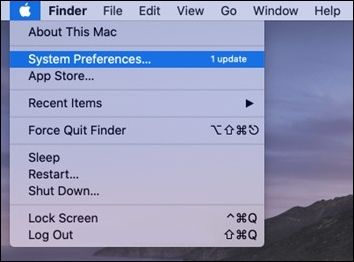
Step 1. Select "System Preferences" from the Apple menu.
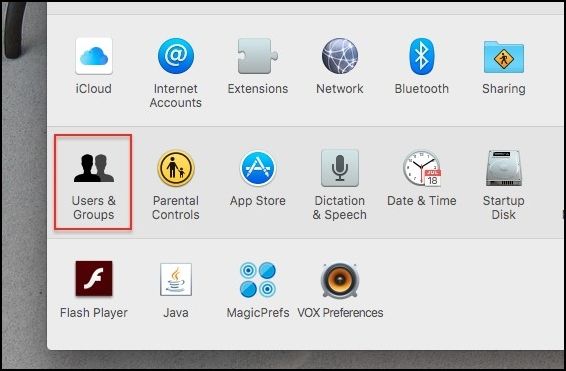
Step 2. To access your user account, go to "Users & Groups".
Step 3. The Login Items page displays software and services that run automatically when the computer boots up.
Step 4. To delete a login, select the one you want to delete and click the "-" button at the bottom of the list.
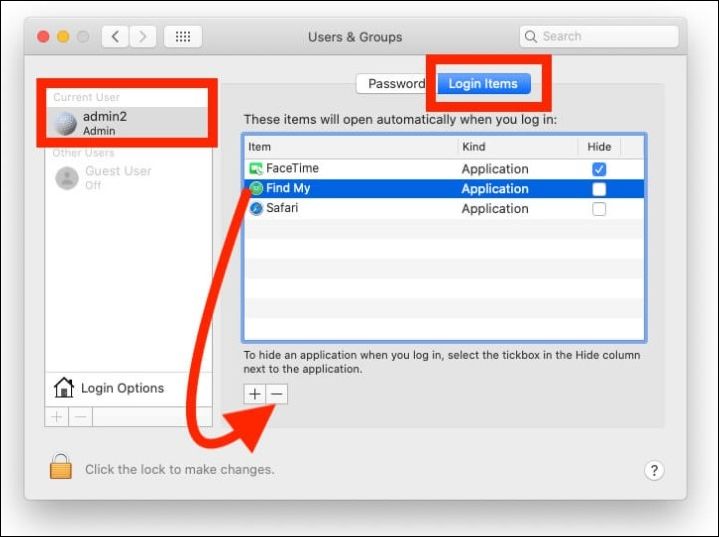
Step 5. To add a login item, click the addition (+) button and select an app or service from the Applications folder or elsewhere.
Step 6. Select the login item you want to conceal and click the hidden button. This will hide the app or service from view, but it will continue to run in the background.
Step 7. Disabling login items that are not used can help reduce Mac startup time and conserve system resources.
How to Stop Apps from Opening on Startup Mac in Library Folder
Applications or services on a Mac can be set to launch automatically when powered on, even if not listed in Login Items or Dock, utilizing launch daemons and agents, which can be useful but also unnecessary or potentially hazardous in certain scenarios.
To prevent programs or services from running automatically, you can locate and modify the associated files in the Library folder. To access the Library folder, follow these steps:
Step 1. Launch "Finder" and choose "Go" from the main menu.
Step 2. To access your account's secret Library folder, hold down the "Option" key and select "Library" from the dropdown menu. This will open the folder.
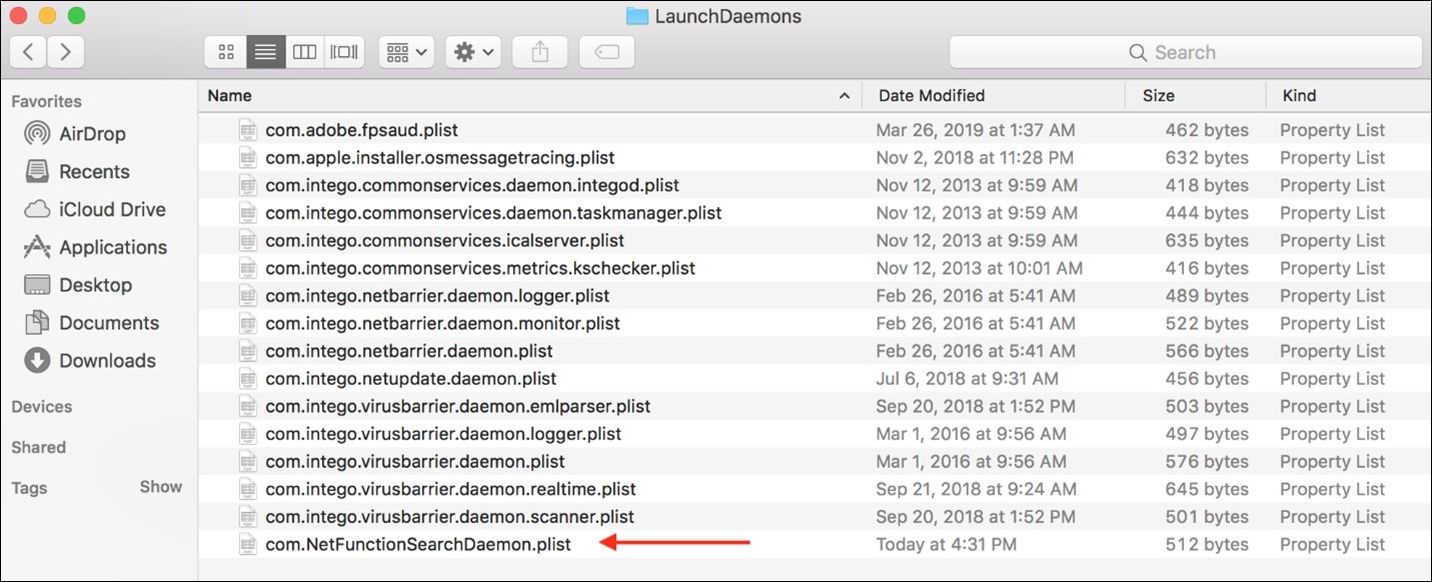
Step 3. Find the "LaunchAgents" and "LaunchDaemons" directories, which contain .plist files that manage the startup of programs and services.
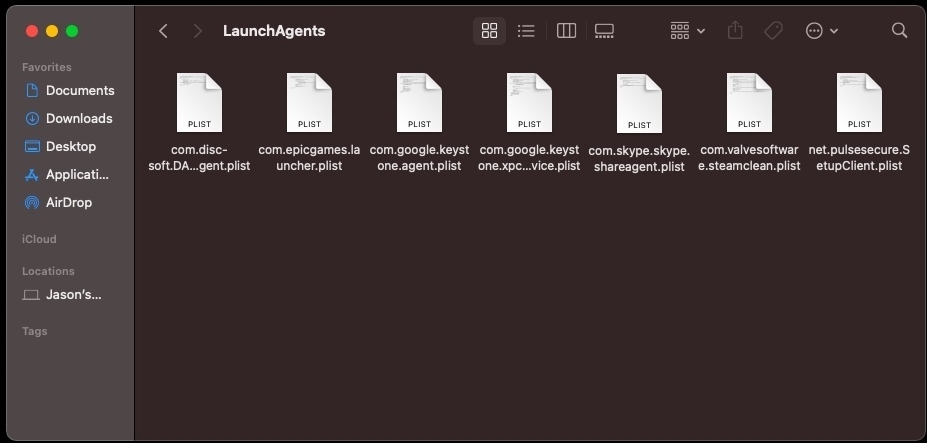
Step 4. To delete a launch daemon or agent, drag the .plist file to the Trash, but be cautious not to delete system or app-essential files, and search online or leave a file if unsure what it does.
Step 5. Renaming a .plist file to .disabled disables a launch daemon or agent without removing it, preventing the Mac from recognizing and activating the program or service at startup. For example, renaming com.apple.SafariBookmarksSyncAgent.plist to com.apple.SafariBookmarksSyncAgent.plist.
Step 6. To access the /Library/StartupItems folder for all Mac users, open Finder, press "Command + Shift + G", and navigate to /Library/StartupItems. This folder contains launch daemons and agents that can be deactivated or deleted.
Step 7. To prevent programs not in the Login Items or Dock from starting on startup on a Mac, one can access the Library folder and configure launch daemons and agents. However, this approach requires caution and technical expertise, as improper configuration can lead to system issues.
Bonus Tips: How to Improve Mac Startup Performance
Here are a few methods to improve your Mac's startup time outside of disabling startup apps:
1. Clearing cache on a Mac can help free up storage space by removing temporary data that has accumulated. To do this, go to Finder and press "Command + Shift + G" to access the cache folder. Enter or paste "/Library/Caches" and select everything in the folder to delete it. This will help remove cached files that are taking up space on your Mac.
2. Updating your macOS can fix issues, make it more secure, and boost performance by checking for upgrades in the Software Update pane of System Preferences and clicking "Update Now" to download and install an update, or by turning on the feature called "Automatic Updates" to have your Mac automatically install software updates.
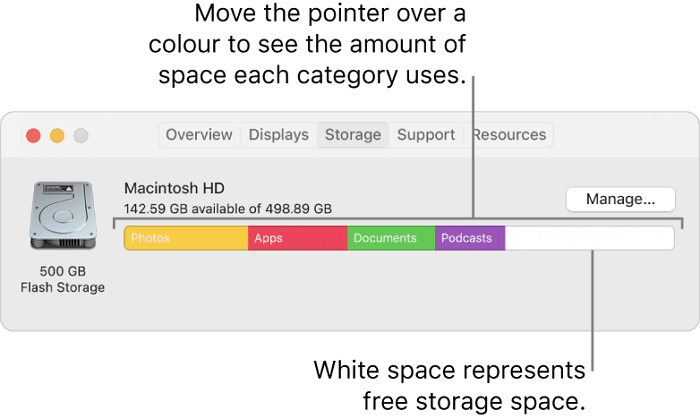
3. Clean up your Mac's hard drive by deleting unused files, relocating unnecessary items to iCloud, and automating the Trash to free up space and improve performance.
Not Enough Free Space for macOS Ventura Update/Installing/Downloading macOS 13
If you're running into issues with the macOS Ventura update due to insufficient free space, the steps below can help. It provides step-by-step solutions to help you free up space on your computer, allowing you to successfully update to the latest macOS Ventura. Read more >>
Recover Lost Files after Speeding Up Mac Startup
Performing maintenance tasks on your Mac, such as speeding up startup time, can sometimes lead to data loss. Tasks like clearing the cache or organizing hard data can inadvertently erase crucial information, while formatting or partitioning your disk can result in a complete loss of data. System problems or crashes can also render data unavailable.
Don't panic if you lose files on your Mac, as a reliable data recovery program like Deep Data Recovery can still help you retrieve them, even with the latest macOS and Apple Silicon Mac.
Deep Data Recovery
- To recover deleted files from Mac Trash, first, stop using your Mac immediately to prevent overwriting of deleted data. Then, check if the files are still in the Trash, and if so, restore them from there.
- The software supports the recovery of various file types, including Mac PDF file recovery and Word document recovery, among others.
- Support is provided for recovering data from various file system types, including NTFS partition recovery and APFS partition recovery.
To recover lost files after freeing up space on your Mac, follow these steps: first, check the Trash to see if the deleted files are still there; if not, use a data recovery software like Disk Drill or Deep Data Recovery Wizard to scan your Mac's hard drive for recoverable files; if you've already emptied the Trash, try using Time Machine to restore files from a previous backup; and finally, if none of these methods work, you can try contacting Apple Support for further assistance.
Step 1. Select the drive to be scanned
Select the desired drive from the list in the main Deep Data Recovery window, then click the "Search for lost files" button.
Note: Before attempting to recover data, it's recommended to click "Disk Backup" from the left sidebar to create a backup of your Mac, which will prevent further data loss. Once the backup is created, the software can recover data from it, allowing your computer to write new data again.

Step 2. Select your lost data/files
Deep Data Recovery for Mac will immediately scan your selected disk volume and display the scanning results on the left pane, allowing you to sort and find specific files if needed.

Step 3. Recover lost/deleted data
Once you have found the desired files, preview them and then click "Recover" to initiate the recovery of your deleted/lost Mac files.

Bottom Line
Controlling what programs launch automatically on your Mac can help reduce boot time and save resources. This can be achieved by managing programs in the Dock, Login Items, or the Library folder. By doing so, you can prevent unwanted programs from starting up when your Mac boots, allowing you to customize your startup experience and optimize your computer's performance.
Clearing the cache or cleaning your Mac's hard drive to speed up startup can be risky, as it may result in data loss. Improperly partitioning or formatting your disk can lead to losing everything, while cleaning the cache or hard drive can cause system breakdowns or data loss.
Don't worry if you find yourself in any of these predicaments. With the help of reputable Mac data recovery software, your deleted information may still be salvageable. Deep Data Recovery for Mac is a professional and powerful program that may help you recover lost data in any situation.
Stop Apps from Opening on Startup Mac FAQs
Here are questions people also ask when they search for how to stop Apps from opening on startup Mac; you can read them to learn detailed information.
1. How to speed up startup time on Mac?
To speed up a Mac's starting time, consider stopping unused programs from launching at startup, clearing cache, upgrading to the latest macOS, performing a disk cleanup, and resetting NVRAM or PRAM.
2. How to turn off the Mac startup sound?
To disable "Play sound on startup" on a Mac, go to System Settings, then select "Sound", and uncheck the box.
3. Can I stop Spotify from opening on Mac startup?
To prevent Spotify from opening on Mac startup, go to Spotify > Preferences > Show Advanced Settings > Startup and Window Behaviour and select "No" for "Open Spotify automatically after you log into the computer".
4. How do I stop applications from opening on Mac startup?
You can control which programs and services run when you log in to your Mac using the Dock, Login Items, or the Library folder.
Related Articles
- [Solved] How to Show Hard Drives on Mac Desktop
- How to Hard Restart Mac or MacBook [2023 Update]
- NVRAM Reset Not Working on Mac, 3 Steps to Fix!
- 5 methods-Windows Did Not Detect a Properly Installed Network Adapter
- PC Turns On, but No Display or Power to Keyword [Fixed]
If your PC turns on but shows no display or power to the keyboard, try unplugging all peripherals, pressing the power button for 30 seconds, and then plugging everything back in. If that doesn't work, try booting in safe mode, checking for loose connections, and updating your BIOS. - FIXED: PC Won't Boot to BIOS - 4 Ways Included
When you need to modify BIOS while your computer is running, you may find that it cannot enter BIOS. So what should you do if your PC cannot reach the BIOS? This article will describe how to fix the PC won't boot to bios issue. You can learn some troubleshooting advice in this post.