2 Most Effective Ways to Install/Run Windows 10 on Mac (2023 Guide)
| Workable Solutions | Step-by-step Troubleshooting |
|---|---|
| Fix 1. Run Boot Camp Assistant |
|
| Fix 2. Use Virtual Machine |
|
Here are the common reasons why some Mac users still want to run Windows 10 on Mac:
- Windows has more games and better performance compared with Mac.
- Some programs and apps are not compatible with Mac devices.
- Mac users have better hardware, and Windows users want to get it.
- If you're a developer, you must test your projects on the Windows system.
Choosing to run Windows on a Mac allows users to switch to macOS if needed, and also enables them to run Windows for better gaming performance.
First Aid: Recover Mac Data Before Install Windows 10
Before installing Windows 10 on your Mac, be aware that the system installation process may require erasing data, which could result in data loss. To avoid this, export or restore your data to an external hard drive beforehand. If you do experience data loss, consider using Deep Data Recovery for Mac, a software that can help you recover lost files, including those lost after the macOS Ventura update, and save them to a Cloud drive or local drive.
Your Reliable Mac Data Recovery Software
- Recover deleted files on macOS Ventura/Monterey/Big Sur/Catalina/High Sierra
- If your macOS 13 Ventura installation has failed, you can still retrieve your data. To do so, follow these steps: 1) Restart your Mac in Recovery Mode by pressing the power button and immediately holding down the Command (⌘) + R keys.
- Restore lost or deleted files, including photos, videos, documents, audio, and unsaved files, with improved effectiveness.
To recover and export your Mac data to a safe location, download and run this Mac hard drive recovery software.
Step 1. Select file types
Launch Deep Data Recovery software, select the desired file types, and click "Next" to initiate the recovery process.

Step 2. Select the drive to be scanned
Select the drive you need to recover lost/deleted files from, and click the "Scan" button in the main Deep Data Recovery window, which lists the drives connected to your Mac.

Step 3. Select your lost data/files
Deep Data Recovery for Mac will immediately scan your selected disk volume and display the scanning results on the left pane, allowing you to sort and find specific files if needed.

Step 4. Recover lost/deleted data
To recover deleted/lost Mac files, first locate the desired files, then preview them, and finally click "Recover" to initiate the recovery process.
2 Ways to Run Windows 10 on Mac (with Pictures)
You've successfully transferred your Mac data to a safe place, now it's time to install Windows 10 on your Mac. There are two practical ways to run Windows on Mac: you can either install Windows on a separate partition on your Mac's hard drive, or use a virtual machine like Boot Camp to create a Windows environment within macOS, allowing you to switch between the two operating systems seamlessly.
- Method 1. Install Windows 10 on Mac with Boot Camp Assistant
- Method 2. Run Windows 10 on Mac with a Virtual Machine
To run Windows on a Mac, you can use Boot Camp, which is a built-in feature that allows you to create a separate partition on your Mac's hard drive for Windows. This means you'll need to dedicate a portion of your Mac's storage space to Windows, but you'll be able to run it natively, just as you would on a PC.
Method 1. Install Windows 10 on Mac with Boot Camp Assistant
Before the installation process begins, there are some essential preparations and requirements to be aware of.
Preparations
- A Mac with an Intel processor.
- 64 GB or more of free storage space is required on the startup disk of a Mac for certain software and system updates to install. This is because some updates require additional space to store temporary files during the installation process.
- A USB flash drive with a storage capacity of at least 16GB is required.
- A 64-bit version of Windows 10 (Windows 10 full version free)
- To protect your files, back them up with Time Machine, which automatically saves changes to your documents, photos, and other important files, ensuring they're safe in case of a system crash or other disaster.
Requirements
- MacBook introduced in 2015 or later
- MacBook Air introduced in 2012 or later
- MacBook Pro introduced in 2012 or later
- Mac mini introduced in 2012 or later
- iMac introduced in 2012 or later1
- iMac Pro (all models)
- Mac Pro introduced in 2013 or later
How to Install Windows 10 on Mac
When ready for the installation, follow the steps below to install and run Windows 10 on Mac. The process can be a bit difficult, so it's suggested to watch the video to install Windows 10 on a Mac using Boot Camp Assistant first.
- 0:11 Download the Windows 10 ISO
- 1:08 Configure Boot Camp Assistant
- 2:49 Install Windows 10
- 5:17 Run Boot Camp Installer
- 6:24 Run Apple Software Update
- 7:11 Run Windows Update
- 7:38 Activate Windows
If you prefer a step-by-step guide, read on and install Windows 11/10/8/7 on Mac.
Step 1. Download Windows 10 ISO
Download the Windows 10 ISO file to a USB flash drive or external hard disk with at least 16GB of space.
Step 2. Check for Software Updates
- To prepare your Mac for a software update, log in as an administrator, quit all open apps, and log out any other users. This ensures that the update process can run smoothly without any interference or conflicts from other programs or user accounts.
- To install all available macOS updates, go to the "Apple menu", select "System Preferences", and click on "Software Update".
Step 3. Create a Windows Partition with Boot Camp Assistant
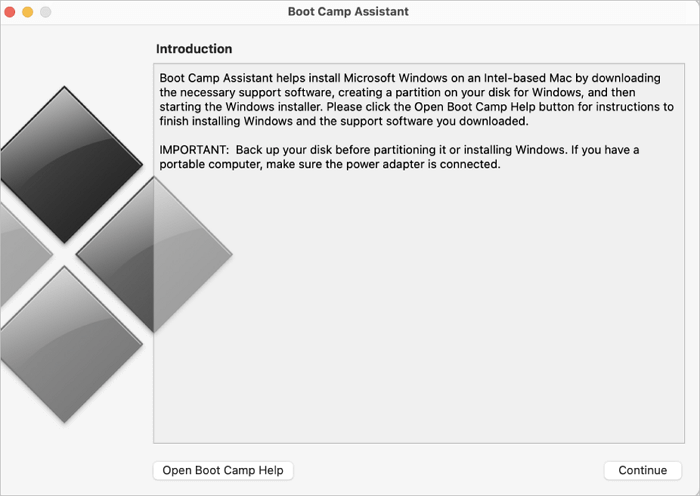
- To use Boot Camp Assistant, go to /Applications/Utilities and open Boot Camp Assistant on your Mac.
- Then, follow the onscreen instructions to create a Windows partition.
- If you're asked to insert a USB drive, plug your USB flash drive into your Mac.
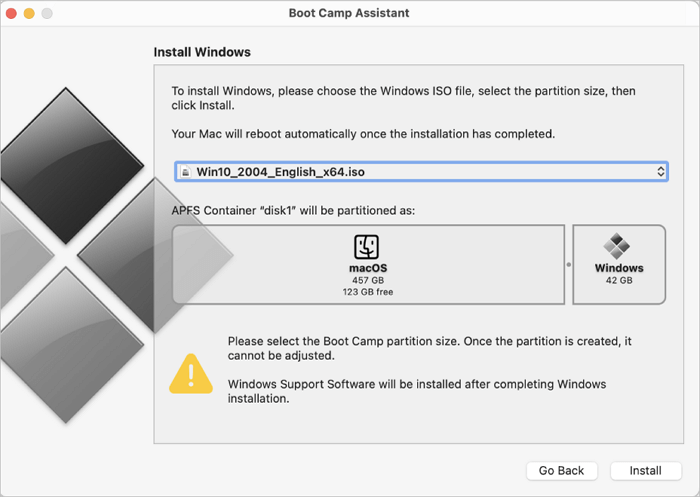
- If you're asked to set the size of the Windows partition, choose a size that fits your needs, as you won't be able to change it later.
Step 4. Format the Windows (BOOTCAMP) Partition
When Boot Camp Assistant is finished, your Mac restarts to the Windows installer, which usually automatically selects and formats the BOOTCAMP partition.
Step 5. Install Windows 10 on Mac
After clicking "Next", follow the onscreen instructions to install Windows 10 on Mac. Once the installation is complete, your Mac will start up in Windows, and a "Welcome to the Boot Camp installer" window will appear. Simply follow the onscreen instructions to proceed.
To switch between Windows and macOS after a restart, press and hold the Option key during startup.
Method 2. Run Windows 10 on Mac with a Virtual Machine
To install Windows 10 on a Mac without using Boot Camp, users can set up a virtual machine (VM) on their device. This can be done using software such as Parallels, VMware, or VirtualBox, with VirtualBox being a free and effective alternative. By following the steps to set up a VM with VirtualBox, users can easily run Windows on their Mac.
Step 1. Install VirtualBox on macOS
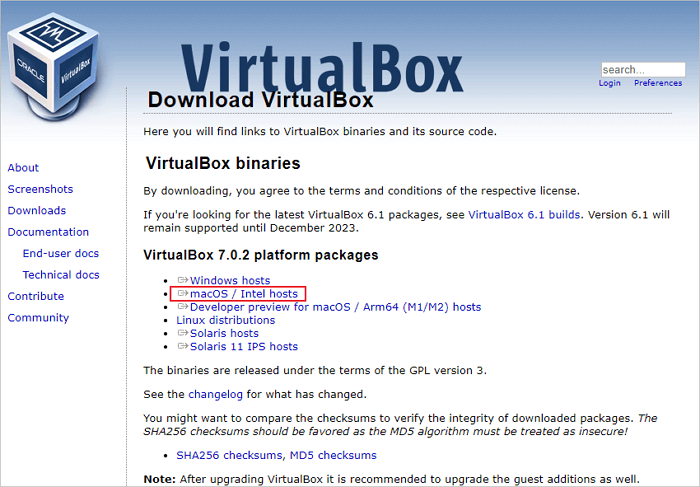
- Download the latest version of VirtualBox from its official site.
- Open the DMG file and Double-click "VirtualBox.pkg" to install VirtualBox on Mac.
Step 2. Install Windows 10 on VirtualBox
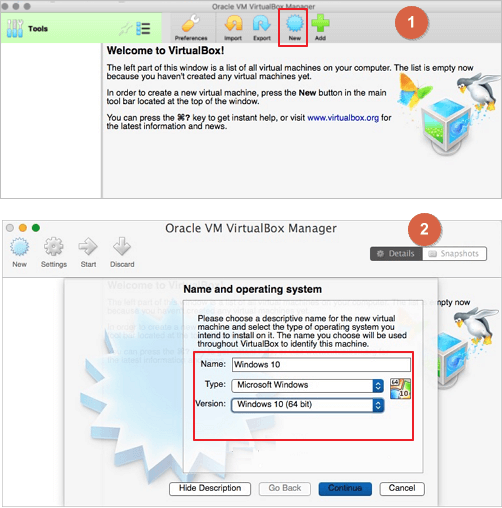
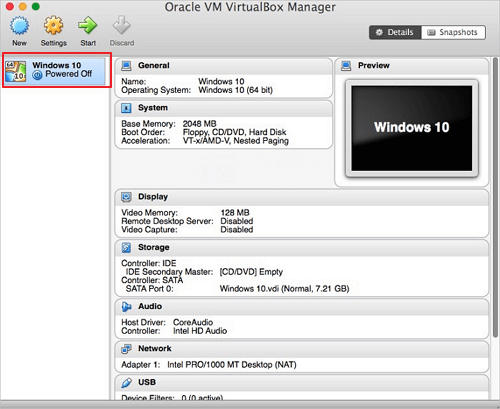
- To set up a Windows 10 virtual machine in VirtualBox, open the application, click "New", and create a new virtual machine by setting up the name, version, and type of Windows 10. Ensure you have downloaded the Windows ISO file in advance to complete the setup process.
- Select "create a new virtual hard drive", then choose "Continue".
- To start a new Windows 10 virtual machine in VirtualBox, go to the "VirtualBox" window, select the "New" button, choose "Microsoft Windows" as the operating system, and select "Windows 10" from the version dropdown. Then, click "Next" and select the amount of RAM to allocate to the virtual machine.
- To begin the installation process, you'll be prompted to select a virtual optical disk. Click on the Folder icon, choose the Windows 10 ISO file you downloaded earlier, and then click "Start" to proceed.
To install Windows 10 on a Mac using VirtualBox, follow the onscreen instructions to install Windows 10 on the virtual machine. Once the installation is complete, start the virtual machine and run Windows 10. Note that VirtualBox functions as a virtual PC on top of your existing Mac, and for a native Windows experience, you would need to refer to Method 1.
Conclusion
Installing Windows 10 on a Mac computer can be done using Boot Camp, which allows for a native Windows experience. Alternatively, you can use remote desktop software, Crossover, or Frame to access Windows on your Mac. However, if you want an authentic Windows experience, installing Windows 10 on Mac with Boot Camp is the recommended solution.
If you experience data loss on your MacBook or iMac, use Qiling Mac free data recovery software to recover lost files, including pictures, documents, audio, videos, and emails, with a simple and user-friendly process.
Install Windows on Mac PC FAQs
To get some additional help, read these questions and answers below. If you still have problems after reading the FAQs, contact us through Live Chat or email.
1. Does Boot Camp slow down Mac?
BootCamp doesn't slow down your Mac, it just requires you to partition your hard disk to run Windows and macOS separately.
2. Windows 10 installation failed; how to fix?
To fix can't install Windows 10:
- Free up disk space
- Run Windows 10 update
- Check third-party drivers
- Check Device Manager
- Repair hard drive errors...
3. How to install Windows 10 on Mac with USB?
To install Windows 10 on Mac with USB:
- Install Qiling OS2Go on your Windows computer
- Plug in a USB drive and click Next
- Qiling OS2Go will start to create the portable USB drive.
- Connect the USB to your Mac and boot from it.
Related Articles
- How to Fix It Looks Like Windows Didn't Load Correctly
- Will System Recovery Delete My Files? Answered Here!
- Fix: Windows 10 Upgrade Stuck at 75% or 76%
- How to Turn On/off Firmware Password on Mac [Fixed]
- Which USB Format to Boot Windows: FAT32, NTFS, or exFAT? [Best Solutions]
This passage will introduce which USB format to boot Windows: FAT32, NTFS, or exFAT. You can find the most suitable USB format for booting Windows and master how to format a bootable USB on Windows. - Why Does My Computer Keep Crashing? Top 8 Reasons Are Here!
Why does my PC keep crashing randomly? Computer crashing is a common problem for windows 10 users that are caused by a number of problems. Here are all the things you need to know if you are the victim of this error. If you run into data loss for PC crashing issue, use Qiling data recovery software to restore deleted or lost files efficiently.