How to Clone an SSD to a New SSD Without Reinstalling Windows
Replacing an SSD is one of the best upgrades for a laptop or desktop. You may be running out of space, want the speed of a newer NVMe model, or need to swap a failing drive before it dies. Cloning the old SSD to the new one keeps Windows, every installed program, every personal file, and all of your settings exactly where they are. You do not have to reinstall Windows or re-enter licenses.
This guide explains when SSD to SSD cloning makes sense, how to connect the new drive in a single-slot laptop, what capacity and alignment rules matter, and the exact steps to boot from the new SSD.
PAGE CONTENT
- When to Clone an SSD to Another SSD
- Hardware and Capacity Requirements
- Prepare Both SSDs Before Cloning
- Clone the SSD with Qiling Disk Master
- Boot from the New SSD
- FAQs About SSD to SSD Cloning
- Back Up the Source SSD First
When to Clone an SSD to Another SSD
- Capacity upgrade. Move from a 256 GB SSD to a 1 TB or 2 TB model when the drive is nearly full.
- Speed upgrade. Replace a SATA SSD or an older PCIe 3.0 NVMe with a faster PCIe 4.0 model.
- Failing drive replacement. Swap an SSD that shows bad blocks, SMART warnings, or read errors before it fails completely.
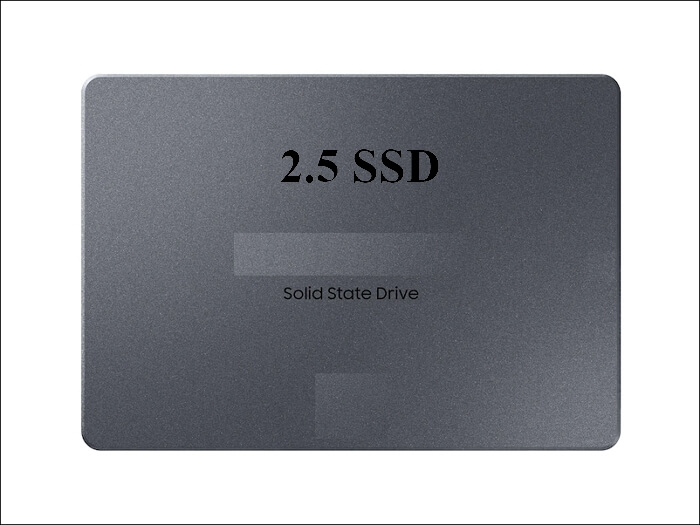
- Form factor change. Move from a 2.5 inch SATA SSD to an M.2 NVMe SSD, or from a 2230 to a 2280 drive.
- System transfer. Put the same Windows installation onto a new machine by cloning the system disk.
Cloning is the fastest path because it copies the entire operating environment in one pass. It is faster than reinstalling Windows, every driver, and every program, and it leaves no missing files behind.
Hardware and Capacity Requirements
- Enough free capacity. The new SSD must be at least as large as the used space on the old SSD, not the total size.
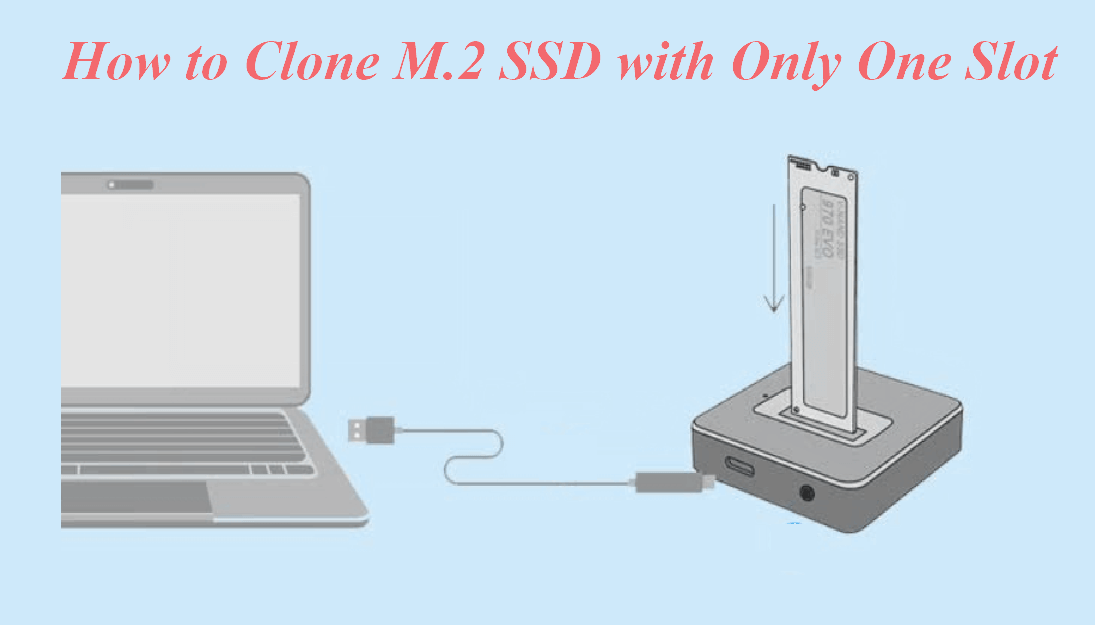
- USB enclosure for one-slot laptops. If the laptop only has one M.2 slot, put the new SSD in a USB NVMe enclosure to clone it.
- Same or larger target disk. Intelligent clone only copies used sectors, so a larger target is fine and a smaller target fails.
- 4K alignment. The clone tool must align partitions to 4096 byte sectors so the SSD runs at full speed and lasts longer.
- SSD optimization. Enable partition alignment and the SSD option so the tool does not copy empty space and keeps TRIM working.
For a single-slot laptop, the most reliable workflow is to connect the new drive in a USB enclosure, run the clone, shut down, swap the drives, and then boot from the internal slot. An NVMe enclosure must support the same PCIe generation as the drive to get full speed.
Prepare Both SSDs Before Cloning
- Clean up the source SSD. Empty the Recycle Bin, remove old downloads, and uninstall apps you no longer use to reduce the clone size.
- Run a check disk. Open Command Prompt as administrator and run chkdsk C: /f to fix file system errors before the copy.
- Update the SSD firmware. Check the manufacturer tool for firmware updates on both the source and target drives.
- Disable fast startup. Turn off Windows Fast Startup so the source volume is fully shut down and not in a hibernated state.
- Disconnect extra drives. Unplug any other internal drives so the clone tool only shows the source SSD and the target SSD.
A clean source drive produces a faster, more reliable clone. If the old SSD already has bad sectors, back up your personal files first and then clone; a failing drive can throw read errors during the copy.
Clone the SSD with Qiling Disk Master
Qiling Disk Master handles SSD to SSD cloning with intelligent sector copy, 4K alignment, and automatic boot repair. It works for SATA to SATA, SATA to NVMe, and NVMe to NVMe transfers.
Watch the video tutorial below to clone the drive step by step with Qiling Disk Master.
Step 1. Open Qiling Disk Master, choose Clone, and then select Disk Clone.

Step 2. Pick the old SSD as the source disk and click Next to continue.

Step 3. Choose the new SSD as the destination and accept that all of its data will be overwritten.

Step 4. Enable SSD Alignment in the clone options and review the partition layout on the target.

Step 5. Click Proceed, wait for the clone to finish, then shut down before swapping or reconnecting any cables.

Boot from the New SSD
- Disconnect the old SSD. Boot with only the new SSD connected so Windows cannot confuse the two identical copies.
- Enter BIOS. Press Del, F2, or F10 at startup and open the boot order menu.
- Set the new SSD first. Put the new SSD at the top of the boot list and save the change.
- Boot into Windows. Start the system and confirm it loads from the new SSD without errors.
- Reconnect the old drive later. Use the old SSD as a backup or extra storage only after the new drive boots reliably.
If the system boots into Windows but shows the wrong drive letter, disconnect the old drive and assign C to the new SSD in Disk Management. If it will not boot at all, run Startup Repair from a Windows install USB to rebuild the boot records.
FAQs About SSD to SSD Cloning
Do I need to format the new SSD before cloning?
No. The clone tool overwrites the target SSD and creates its own partition layout, so formatting beforehand is unnecessary and will be erased anyway.
Can I clone a larger SSD to a smaller SSD?
Only if the used space on the large SSD fits inside the smaller one. Intelligent clone copies only used sectors, so a 500 GB SSD with 200 GB used can clone to a 256 GB SSD.
Will the cloned SSD boot without changing BIOS?
Usually not. You must open BIOS and set the new SSD as the first boot device, otherwise the machine may try to start from the old drive or fail to find Windows.
Does cloning an SSD reduce its lifespan?
A single clone writes about as much data as the used space on the drive. For a modern SSD this is a tiny fraction of its write endurance, so the impact is negligible.
Can I keep the old SSD as a backup after cloning?
Yes. After the new SSD boots correctly, reconnect the old SSD and use it as extra storage. Keep it disconnected on the first boot of the new drive to avoid drive letter conflicts.
Back Up the Source SSD First
Cloning is generally safe, but a power loss or a read error on the old SSD can interrupt the process. A system image backup gives you a restore point if the clone fails or leaves the new SSD unbootable.
Watch the video tutorial below to back up Windows and restore it if the clone fails.
Step 1. Open Qiling Disk Master and select System Backup to capture Windows and the boot partitions.

Step 2. Save the image to a third drive, never to the target SSD, and start the backup.

Step 3. Click Proceed to start the backup and wait for it to finish. You can tick the option to shut down when the operation is completed.

Step 4. If the cloned SSD does not boot, restore the system image to the new SSD and then rebuild the BCD from Windows Recovery.

Conclusion
Cloning an SSD to a new SSD is the cleanest way to upgrade capacity, speed, or replace a failing drive. Check that the new SSD has enough room for the used data, connect it with a USB enclosure if the laptop has only one slot, use a tool with 4K alignment, and set the new drive first in BIOS. Keep the old SSD as a backup until the new one boots reliably.
For more help after the clone, see Cloned Drive Won't Boot? Fix It, How to Clone the Windows 11 System Reserved Partition, Cloned SSD Not Showing Full Capacity, and How Long Does a Disk Clone Take?.
Related Articles
- Clone an SSD to a Larger SSD
Move Windows and all data to a bigger solid-state drive. - Clone a Larger SSD to a Smaller SSD
Downsize to a smaller SSD when used space allows it. - Clone an SSD to the Same Size SSD
Replace a same-capacity SSD for speed or reliability. - Clone a SATA SSD to an NVMe SSD
Switch from a 2.5 inch SSD to a faster M.2 NVMe drive. - SSD Not Detected After Cloning
Find and fix a new SSD that BIOS does not see.
Products
Articles & Tutorials
- Data Recovery
- Data Backup
- File Recovery
- File Backup
- System Backup and Restore
- Disk and Partition Clone
- Technical articles
- Mobile articles
- Disk Master Help
- Windows Data Recovery Tutorials
- Windows Secure Delete Tutorials
- Windows Partition Management Tutorials
- Windows File Backup and Restore Tutorials
- Windows System Backup and Restore Tutorials
- Windows Disk Backup and Restore Tutorials
- Windows Clone Tutorials