How to Clone a Toshiba (KIOXIA) SSD to a New Drive
Toshiba Memory renamed itself KIOXIA in October 2019, so a drive with a Toshiba label and a drive with a KIOXIA label often leave the same factory. The hardware is identical, but the software situation is awkward: the official KIOXIA utility checks firmware and health, and it cannot copy your Windows installation to a new disk.
This guide shows how to clone a Toshiba or KIOXIA SSD or hard drive to a larger target, whether it is a 2.5-inch SATA model in a laptop bay or an OEM M.2 NVMe drive buried under a notebook cover.
PAGE CONTENT
- Toshiba and KIOXIA: One Drive, Two Names
- Prepare the Target Drive
- Keep the EFI Partition Bootable
- Clone with Qiling Disk Master
- Boot From the New SSD
- FAQs About Toshiba and KIOXIA Clones
- Back Up Before the Clone
Toshiba and KIOXIA: One Drive, Two Names
- The brand changed, not the drive. Toshiba Memory became KIOXIA in 2019, and both labels appear on drives built to the same specification.
- Retail names are friendly. Consumer drives sold as TR200, RC100, or XG belong to the earlier Toshiba era and carry standard model numbers.
- OEM names are cryptic. Laptop drives such as KXG60ZNV1T02 or BG4 are sold only to manufacturers and have no retail packaging.
- KIOXIA SSD Utility is not a clone tool. It updates firmware, sets over-provisioning, and reads SMART data, but it has no migration function.
- Old Toshiba utilities are unsupported. The management software for TR200-class drives no longer receives updates, so a disk imaging program is the reliable option.
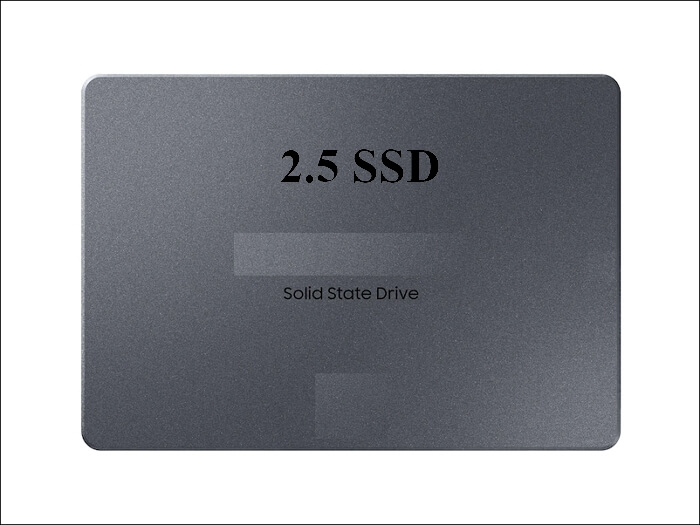
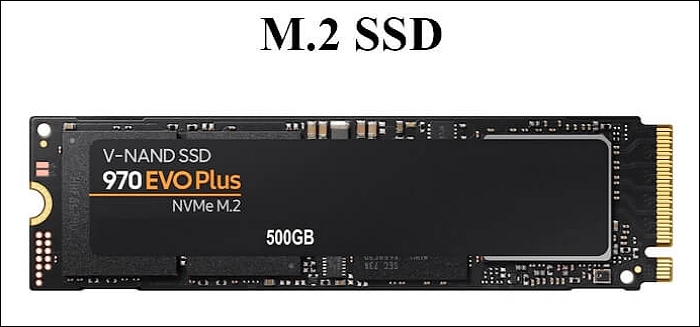
Identify the drive before you buy anything: the label tells you the form factor and bus, and that decides whether the clone runs over SATA or PCIe.
Prepare the Target Drive
- Match the interface. A 2.5-inch Toshiba SSD needs a SATA port or a USB-to-SATA adapter; an NVMe model needs an M.2 M-key slot wired for PCIe.
- Set the SATA controller to AHCI. A drive that was cloned in IDE or RAID mode can fail to start once the firmware setting changes.
- Size the target by used data. The destination must hold every partition with data on it, not just the size of the C volume.
- Suspend BitLocker. Encryption tied to the old drive's security hardware will not unlock on the new one; pause protection before the copy.
- Clear the destination. Delete its old partitions and initialize it as GPT for UEFI firmware or MBR for a Legacy BIOS machine.
All five checks happen before the clone starts. Fixing a controller mode or a short target afterwards means repeating the whole copy.
Keep the EFI Partition Bootable
- Clone the whole disk. Disk-level cloning carries the EFI system partition, the MSR, the recovery partition, and Windows in one job.
- Never copy only C. A partition clone leaves the boot loader behind, so the new drive contains Windows but cannot start it.
- Check the boot order. UEFI setup must list Windows Boot Manager on the new drive ahead of the old one.
- Read the entries with bcdedit. Running bcdedit /enum shows whether the device path still points at the previous disk.
- Test with one drive connected. Unplugging the Toshiba drive for the first start proves the EFI files really moved.
If the firmware entry still names the old disk, run bcdboot from the new Windows volume. The boot files are already on the clone; only the entry needs rebuilding.
Clone with Qiling Disk Master
With no official migration utility for Toshiba or KIOXIA drives, a disk-level clone from a third-party program is the practical route. The steps below keep the boot partitions in the copy.
Watch the video tutorial below to clone the drive step by step with Qiling Disk Master.
Step 1. Open Qiling Disk Master, choose Clone, and then select Disk Clone.

Step 2. Select the Toshiba or KIOXIA disk as the source and click Next.

Step 3. Select the new SSD as the destination and confirm that its existing data will be replaced.

Step 4. Pick the clone mode and check that the EFI and recovery partitions are included on the target.

Step 5. Click Proceed, wait for the copy to finish, then shut the machine down before you remove any cable.

Boot From the New SSD
- Remove the old drive for the first boot. Power off, unplug the Toshiba disk, and start the machine with the clone alone.
- Confirm the firmware entry. The boot menu should show Windows Boot Manager on the new drive, not a generic disk name.
- Check TRIM. Run fsutil behavior query DisableDeleteNotify; a result of 0 means TRIM is active on the SSD.
- Watch for a driver prompt. Moving from SATA to NVMe usually loads the inbox stornvme driver on the first start.
- Reconnect the old disk later. Attach it through an adapter and wipe it only after two clean boots from the new drive.
A black screen at this point usually means the SATA controller still runs in RAID or IDE mode, or the boot order picked the old disk. Fix the firmware setting before considering a second clone.
FAQs About Toshiba and KIOXIA Clones
Does cloning a Toshiba SSD void its warranty?
No. Cloning reads the drive and writes to another disk, and the original hardware is untouched, so the KIOXIA warranty still applies.
Can I clone the Toshiba NVMe drive that came with my laptop?
Yes, although OEM models such as the KXG series have no vendor tool. Use a disk-level clone and a USB NVMe enclosure when the laptop has a single M.2 slot.
Why does the cloned drive report less capacity than the label?
A 1 TB drive shows about 931 GB in Windows because of decimal versus binary units. A far smaller figure means the tool copied one partition instead of the full disk.
Does KIOXIA SSD Utility clone a drive?
No. It handles firmware updates, health monitoring, and over-provisioning only; a migration needs a separate cloning program.
What should I do if the PC will not boot after cloning a Toshiba drive?
Start from a Windows USB, run bcdboot against the new Windows folder, then set the new disk first in the boot order.
Back Up Before the Clone
A clone overwrites the destination and can leave the source unbootable if the partition layout is mishandled. Capture a system image first so a failed copy costs nothing.
Watch the video tutorial below to back up Windows and restore it if the clone fails.
Step 1. Open Qiling Disk Master and select System Backup to include the EFI and recovery partitions.

Step 2. Save the image to a drive other than the target disk and start the backup.

Step 3. Click Proceed to start the system backup and wait patiently until it finishes. You can also tick Shut down the computer when the operation is completed to power off automatically.

Step 4. If the cloned Toshiba drive will not boot, restore the image to the original disk and retry with a disk-level clone.

Conclusion
Toshiba and KIOXIA labels describe the same drives, and neither brand offers a cloning utility. Confirm the form factor and interface, set the SATA controller to AHCI, suspend BitLocker, and clone the entire disk so the EFI and recovery partitions travel with Windows. Boot with the old drive disconnected, check the boot order and TRIM, and keep the source disk intact until the new SSD has started reliably twice.
For more on drive families and copy results, see Cloned Drive Won't Boot? Fix It, Clone an MBR Disk to a GPT SSD, Clone an SSD to a Larger SSD, and How Long Does a Disk Clone Take?.
Related Articles
- How to Clone a Crucial SSD to a New Drive
Crucial ships no clone software; copy the disk and keep the boot entry intact. - How to Clone a Western Digital SSD
Clone WD Blue and Black drives and carry the EFI partition across. - How to Clone a Kingston SSD to a New Drive
Copy A2000 or KC3000 drives and fix the boot order afterwards. - Clone a Hard Drive to a SanDisk SSD
Move Windows from a hard drive to a SanDisk SSD without a reinstall. - Kioxia SSD Utility Clone: Move Windows to a Kioxia Drive
Clone to a Kioxia drive with the official utility.
Products
Articles & Tutorials
- Data Recovery
- Data Backup
- File Recovery
- File Backup
- System Backup and Restore
- Disk and Partition Clone
- Technical articles
- Mobile articles
- Disk Master Help
- Windows Data Recovery Tutorials
- Windows Secure Delete Tutorials
- Windows Partition Management Tutorials
- Windows File Backup and Restore Tutorials
- Windows System Backup and Restore Tutorials
- Windows Disk Backup and Restore Tutorials
- Windows Clone Tutorials