How to Partition Western Digital Hard Drive on Windows 11/10/8/7
Partitioning your Western Digital (WD) hard drive allows you to divide your storage space into separate sections, each functioning as an independent drive, providing better management of your data. This can be beneficial for both professionals and individuals dealing with extensive files.
This article provides a comprehensive guide on how to partition Western Digital hard drives, catering to users with varying levels of technical knowledge. It covers multiple methods and tools, ensuring a thorough understanding of the process on Windows 11/10/8/7, making it a helpful resource for those looking to manage their hard drive space.
How to Partition Western Digital Hard Drive - 2 Efficient Ways
Partitioning a Western Digital (WD) hard drive can be achieved through two main methods. The first involves using the built-in Windows tool, Disk Management, while the second utilizes a third-party tool, such as Qiling Disk Master, to accomplish the task.
The two options, Disk Management and Qiling Disk Master, offer distinct advantages and considerations, allowing users to choose the approach that best suits their needs. A comparison of the two tools reveals their differences in functionality, with Disk Management providing a built-in Windows feature for managing disks, and Qiling Disk Master offering a more comprehensive and user-friendly interface for disk management and partitioning. Ultimately, the choice between the two options depends on individual preferences and requirements.
| Comparison | 🏅Qiling Disk Master | 🥈Disk Management |
|---|---|---|
| 👍Pros |
✔️Comprehensive partitioning features. ✔️User-friendly interface ✔️Partition merging and disk cloning |
✔️Available on all Windows versions. ✔️Basic partitioning functions. |
| 👇Cons | You need to download it from the website. | Limited advanced features. |
| 💡Efficiency | High - This professional tool has been extensively tested and proven effective in various scenarios. Its versatility is further highlighted by the numerous partitioning options it provides, catering to a wide range of needs. | Medium - The software may occasionally fail to detect your hard drive, and the partition options might be unavailable. |
| 🧑💻Operation Difficulty | Easy - 3 steps | Moderate - 4 steps |
Qiling Disk Master offers a wider range of features and effectively ensures user privacy, making it suitable for all users. A step-by-step guide for both methods will be provided, allowing users to choose their preferred option.
Solution 1: Partition Western Digital Hard Drive via Qiling Disk Master
Qiling Disk Master is a robust third-party disk management and partitioning tool that makes Western Digital hard drive partitioning simple with its user-friendly interface and extensive feature set.
Using Qiling Disk Master, you can perform various partitioning operations such as creating new partitions, resizing existing ones, merging or splitting them, converting partition types, and securely erasing partitions, offering advanced functionality beyond what the built-in Windows Disk Management tool can do.
To partition a Western Digital hard drive using Qiling Disk Master, first, download and install Qiling Disk Master. Then, launch the software and select the Western Digital hard drive you want to partition.
Step 1. Launch Qiling Disk Master to check for free space at the Partition Manager section.
- If your hard drive has unallocated space, jump to Step 3 to create partition.
- If the hard drive has no unallocated space, proceed with the next step.
Step 2. Shrink a disk partition to create unallocated space.
Right-Click on the target drive partition with a lot of free space and select "Resize/Move" to free up space for the new OS.

To free up unallocated space, drag either end of the partition to the right or left to shrink its size. This will be reflected in the "Partition size" area, showing the amount of space that has been decreased.
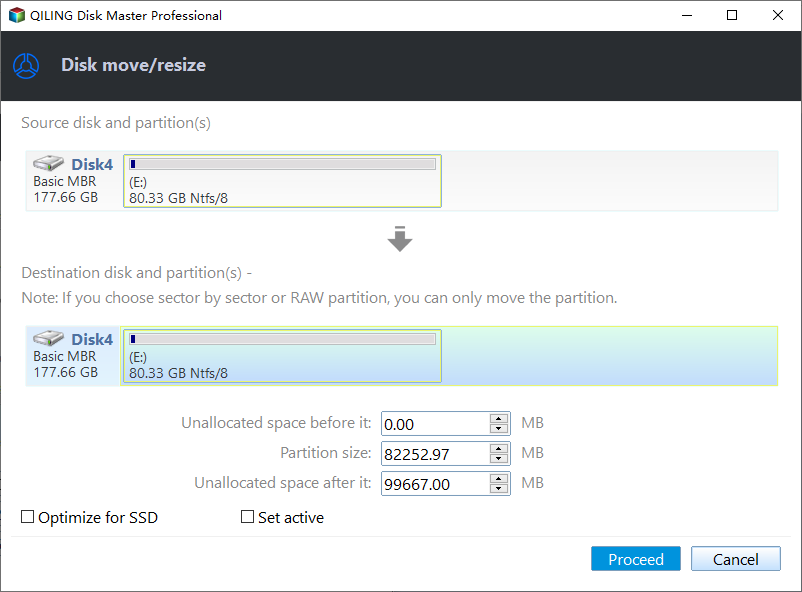
Click "Proceed" to save all the changes.
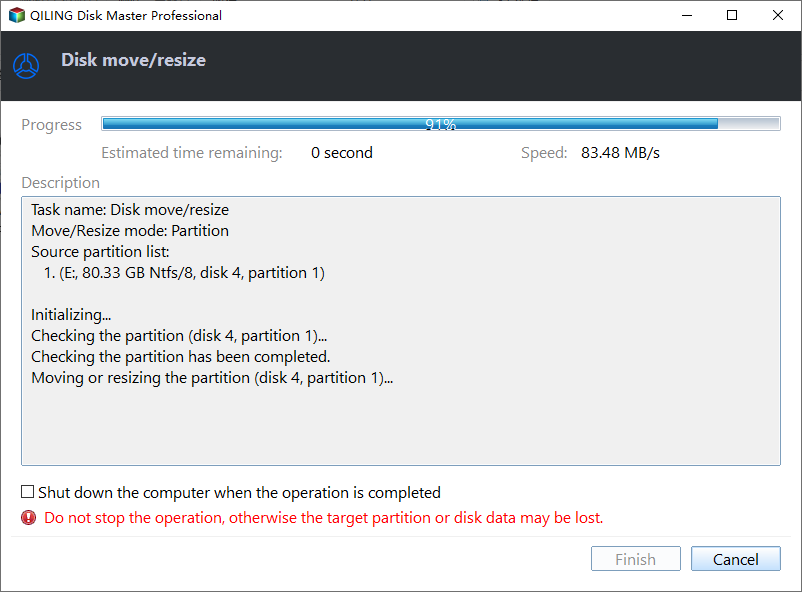
After deleting the old partition, go back to Partition Manager and you should see unallocated space appearing on the same disk. You can then create a new partition on your hard drive using this unallocated space.
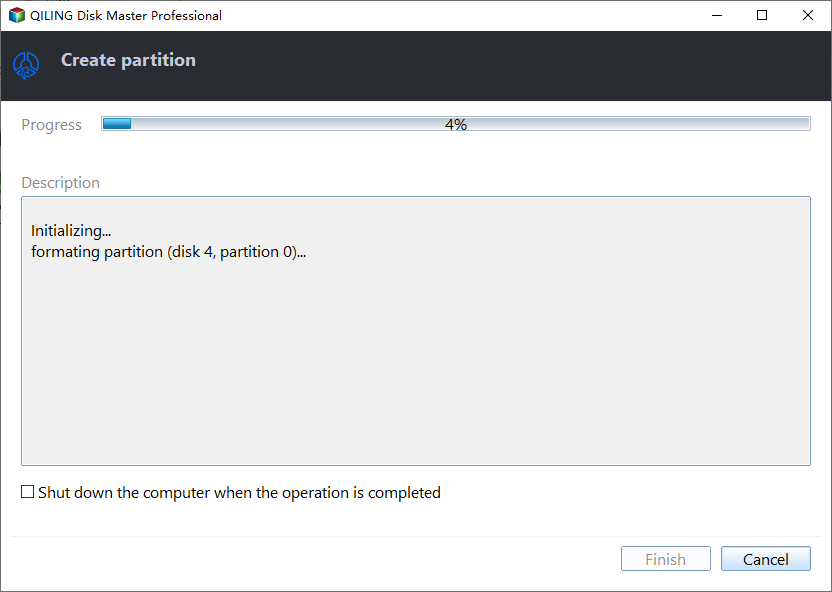
Step 3. Create a new partition with unallocated space on the target hard drive.
Right-click on the unallocated space and choose "Create".

The user can customize various settings for a partition, including the partition size, drive letter, label, file system (such as NTFS, FAT32, EXT2/3/4, or exFAT), and other options in the Advanced Settings.
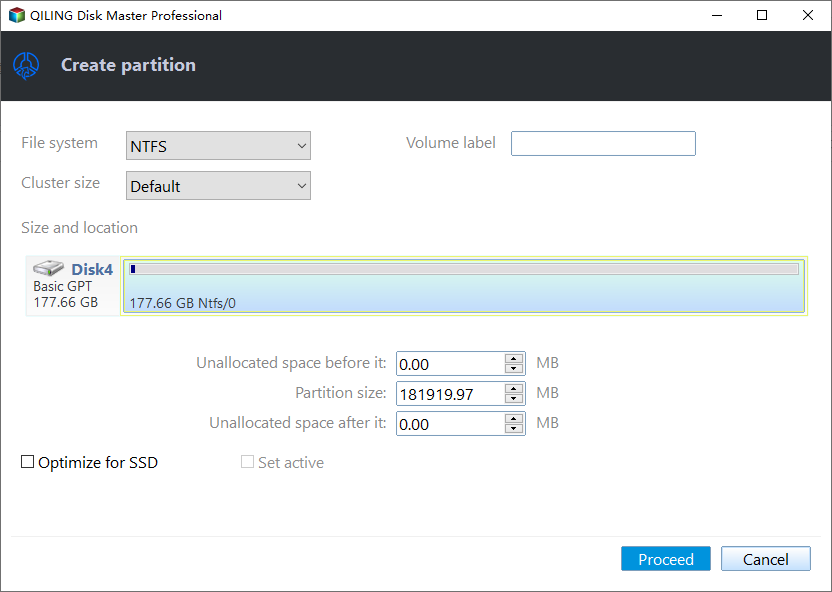
To create a new partition on your disk, first, select the unallocated space on your hard drive. Then, click on "New" and choose the partition type (e.g.
We highly recommend trying Qiling Disk Master when partitioning a hard drive, as its user-friendly interface, comprehensive functionality, and additional features make it a valuable tool for efficient disk management.
Qiling Disk Master offers advanced features for managing Western Digital hard drives, including disk partitioning, formatting, and cloning, as well as data recovery and wiping. Its user-friendly interface allows for easy navigation and management of disk operations, making it a valuable tool for users looking to optimize their hard drive usage.
Solution 2: Partition Western Digital Hard Drive via Disk Management
Here are the steps to partition your WD hard drive using Disk Management:
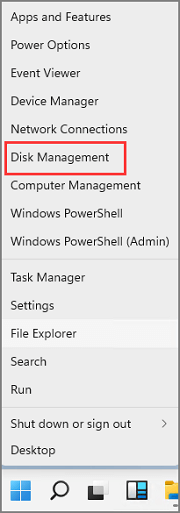
Step 1: To access Disk Management, start the procedure by clicking the "Win + X" button and selecting "Disk Management" from the menu, or right-click the Start button and choose "Disk Management" from the context menu.
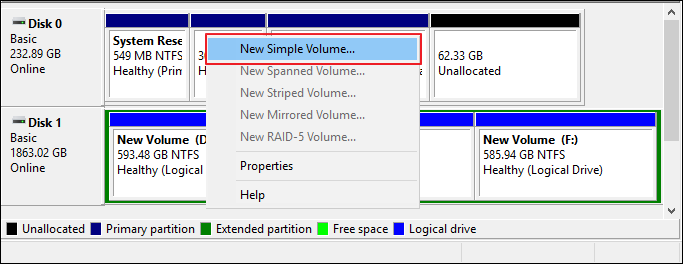
Step 2: To locate the WD hard drive in the Disk Management window, look for any unallocated space on the drive, which will appear as a black bar. If not, you can also shrink the volume of the WD hard drive.
Step 3: To create a new simple volume, right-click the unallocated space and select "New Simple Volume." This will open the New Simple Volume Wizard, which you should follow to complete the process.
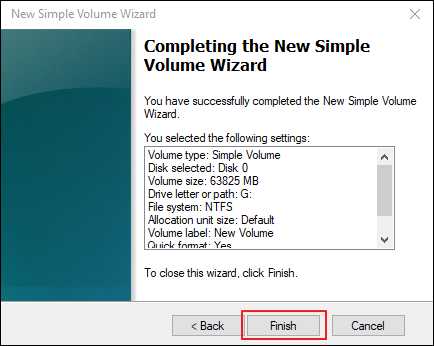
Step 4: To create a new partition, specify the desired size, assign a drive letter, and choose the file system (NTFS is recommended). Select the formatting options and assign a volume label, then click "Finish" to complete the process.
Partitioning a Western Digital hard drive involves following a series of steps to optimize data management and storage. This comprehensive guide provides a helpful resource for professionals and individuals seeking to efficiently manage their data, and sharing it with others can be beneficial. The steps outlined in this guide can prove invaluable for those looking to partition their Western Digital hard drive.
Why Do I Need to Partition Western Digital Hard Drive
We have explored the different methods of partitioning a Western Digital (WD) hard drive. Partitioning is essential, and below are some compelling reasons to consider it: it allows for better organization and management of your data, provides a safeguard against data loss in case of a system failure, enables you to install multiple operating systems, and even helps to improve system performance by isolating resource-intensive programs.
- Easy Data Backup: You can designate one partition solely for data backups by creating separate partitions, ensuring that your important files are stored separately from the operating system and other applications, thereby reducing the risk of data loss in system failures or crashes.
- Manage Storage Space: Partitioning your hard drive allows you to divide it into separate sections, each with its own storage space, making it easier to organize and access your files.
- Installation of Multiple Operating Systems: Partitioning your hard drive allows you to install multiple operating systems on a single physical drive, making it ideal for users who need different OS for various purposes, such as installing Windows and Linux on the same drive.
- Use Unallocated Space: When you buy a new hard drive or add space to an existing one, it may show up as unallocated. Partitioning lets you use this space efficiently, making the most of your Western Digital hard drive's storage capacity.
By partitioning your WD hard drive, you can create separate sections for different types of data, such as operating system, programs, and personal files, making it easier to manage and organize your data, improve system performance, and provide more flexibility in your computing environment.
Conclusion
This article provides a detailed, step-by-step guide to partitioning Western Digital hard drives, covering various methods and tools to ensure a clear understanding regardless of technical expertise. By following the instructions, users can customize their WD hard drive, optimize its performance, and safeguard valuable data on Windows 11/10/8/7.
Qiling Disk Master is the best solution for partitioning your Western Digital hard drive, offering a user-friendly interface, robust features, and reliable performance. With this tool, you can easily create, resize, and manage partitions on your WD hard drive efficiently and effectively.
FAQs About How to Partition Western Digital Hard Drive
What are some common questions about partitioning a Western Digital hard drive, and how are they addressed?
1. How can I partition WD external hard drive on Mac?
You can use the built-To partition a WD external hard drive on a Mac, open Disk Utility, select the drive, go to the Partition tab, click the "+" button to add a new partition, adjust the size and format as desired, and click "Apply" to partition the drive.
2. What is the best WD 4TB hard drive partition software?
Qiling Disk Master is a highly recommended software option for partitioning a WD 4TB hard drive, offering a user-friendly interface, cutting-edge capabilities, and reliable performance to make partitioning and managing the drive effortless.
3. How to format WD external hard drive Windows 10?
To format a WD external hard drive on Windows 10, start by plugging the drive into a USB port and waiting for it to be detected by the operating system. Next, open File Explorer and right-click on the drive in the left-hand menu to select "Format.
Step 1: Connect your WD external hard drive to your Windows 10 computer, then open File Explorer and locate your WD external hard drive.
Step 2: To set up a new drive, select the drive and choose "Format" from the context menu by right-clicking on it, then select the desired file system (such as NTFS) and allocation unit size.
Step 3: To start the formatting process, click Start, and once the format is complete, the WD external hard drive can be used on Windows 10.
Related Articles
- Setup Was Unable To Create a New System Partition or Locate an Existing System Partition Windows 7
- [Server Helper] Convert NTFS to FAT32 in Server 2008/2012/2016/2022 without Data Loss
- Does Deleting a Partition Erase All the Data? | Solid Way to Recover
Deleting a partition can indeed erase all the data stored on that partition, as it essentially removes the file system and formatting associated with it. However, the data itself is not immediately lost and can often be recovered using specialized software or techniques. - How to Format EFI Partition in Windows 11/10? [Your Guide Here 2024]
Formatting the EFI partition in Windows can lead to system crashes and difficulties with booting. It's not recommended to format the EFI partition unless absolutely necessary, such as when reinstalling Windows. - NTFS or exFAT for External Hard Drive: Which Format is Better for External Hard Drive
Choosing the right format for your external hard drive can be a challenge. To help you decide, we'll compare exFAT and NTFS formats. If you need help with formatting your external hard drive, consider using a professional software like Qiling Partition Master, which offers disk management and can easily format your drive to either NTFS or exFAT. - 4 Ways to Recover NTFS Partition Without Losing Data
Free NTFS partition recovery software can recover damaged, formatted, lost or deleted NTFS partitions, as well as FAT and NTFS5 file systems. This software, also known as Deep Data Recovery, can quickly restore lost partitions with a free download.