How to Perform Xbox Series S Internal SSD Upgrade💡
Key Takeaways:
- Xbox Series S owners face storage limitations due to the small internal SSD, making it necessary to upgrade to expand game storage and improve performance.
- Upgrading the internal SSD on the Xbox Series S requires a three-stage process to achieve a noticeable improvement in gaming performance. Firstly, the user needs to purchase a compatible M.
- 1️⃣Prepare a new SSD for Xbox Series S upgrade
- 2️⃣Clone old Xbox Series S SSD to new SSD
- 3️⃣Install and set up new SSD in Xbox Series S
Upgrading the internal SSD of the Xbox Series S can be necessary due to limited storage or other reasons, and doing so can enhance gaming performance and optimize console performance. To upgrade the SSD, you can follow a straightforward process that allows you to easily replace the internal SSD with a new one, improving your gaming experience.
Can I Perform Xbox Series S Internal SSD Upgrade?
It's possible to upgrade the Xbox Series S SSD, but it's not often necessary due to its built-in custom NVMe M.2 2230 SSD.
Upgrading to a larger SSD can be beneficial if your storage capacity is insufficient for larger game installations, game data saves, and media storage. To upgrade, transfer old data to the new SSD to preserve data, settings, programs, and games. If the new SSD isn't proprietary, transfer data to the new computer instead.
If you found this article helpful in upgrading your Xbox Series X's SSD, you can click the social buttons to share it with others in need.
How to Perform Xbox Series S Internal SSD Upgrade?
Upgrading the SSD of the Xbox Series S involves various stages that can be broken down into three steps. These stages should be followed in order to ensure a successful upgrade. The process is divided into three distinct stages, each with its own set of tasks and considerations.
Stage 1. Prepare for the Xbox Series S Internal SSD Upgrade
#1. Choose a suitable new SSD for the Xbox Series S.
To upgrade the Xbox Series S SSD, first, install a better SSD that meets the Xbox Series' requirements, and then ensure the console recognizes it. This upgrade can improve the gaming experience by providing more storage for games, or it can simply give you a bigger gaming storage capacity.
- Recommendation by Gameradar:
- WD Black C50 Expansion Card: For quick game recovery, it's essential to maximize the value and functionality of your games. This means ensuring that your games are properly backed up, restored, and optimized to minimize downtime and get you back to playing as soon as possible.
- Seagate Official Storage Expansion Card is a good choice for greater capacity.
Guide 2. Format New SSD to exFAT format.
To ensure compatibility between the SSD and the Xbox Series, you'll need to format the Xbox SSD to a suitable format first, which will erase all data on the drive. This process is necessary to configure the SSD for use with the Xbox Series console.
- Insert the new SSD into an SSD enclosure.
- Connect the SSD to your computer as a removable storage.
- Initialize the new SSD in Disk Management.
- Run a third-You can use Qiling Disk Master, a dedicated SSD formatting tool, to format your SSD to exFAT. This tool is specifically designed for SSDs and can help you overcome the limitations of Windows' built-in formatting tools. By using Qiling Disk Master, you can ensure that your SSD is properly formatted and ready for use with exFAT file system. This is especially useful when you need to format your SSD to a specific file system that the Windows built-in tool can't handle.
Complete Guide: Format External Hard Drive for Xbox
Guide 3. Remove the old SSD from your Xbox Series S.
Step 1. To access the Xbox's internal components, start by turning off the console and disconnecting all cables. Next, use tweezers to carefully remove the screw covers, followed by unscrewing the back panel to gain access to the interior.
Step 2. Remove the plastic case and detach the power button, Wi-Fi, and Bluetooth boards.
Step 3. As I continue to disassemble the computer, I remove the power supply, fan, and motherboard screws, and carefully disconnect the motherboard from the rest of the system, including the SSD card.
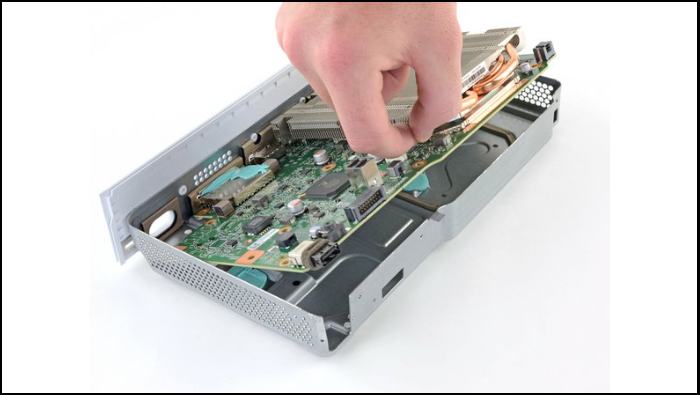
Step 4. Unplug the old Xbox Series SSD with your game data from the Xbox console and insert the SSD into an SSD enclosure.
Note: When you get the new SSD with your Xbox data, as shown in Stage 2, follow these steps in reverse order to reassemble it, starting with attaching the SSD bracket and screws, then the SSD itself, and finally the case cover and screws.
Stage 2. Upgrade Xbox Series S Internal SSD without Data Loss
After connecting both old and new SSD disk drives to your computer, you can initiate the cloning process to safely transfer the Xbox Series S's data, programs, and games to the new drive, ensuring no data is lost during the transition.
Qiling Disk Master is a handy tool that clones the original SSD and assists in upgrading the SSD without data loss, simplifying the complex process with an intuitive interface that doesn't require technical expertise.
To upgrade the hard disk without losing game data, follow the steps to clone the original SSD: select "Clone Data Disk" mode.
Step 1. Select the source disk.
- To clone an OS or data disk, click on the "Tools" tab page, select either "Clone OS Disk" or "Clone Data Disk", and proceed by clicking "Next".
- Choose the source disk and click "Next".
Step 2. Select the target disk.
- Select the desired hard drive or solid state drive as your destination and click "Next" to proceed.
Step 3. View the disk layout and edit the target disk partition size.
To install Windows, you'll need to wipe the target disk and install Windows on it. First, insert the Windows installation media into your computer. Then click on the "Start" button and select the "Settings" icon. Click on "Update & Security" and then click on "Recovery".
You can choose your own disk layout, or select the default option, which leaves more space for the C drive.
Step 4. Click "Proceed" to start the disk cloning process.
Read Warning message and confirm "Yes" button.
Stage 3. Install the New SSD to Xbox Series S Console
After cloning your old internal SSD to the new one using Qiling Disk Master, you'll need to install the new SSD in your Xbox Series S. To do this, follow the steps in reverse order from stage 1, inserting the new SSD in the same place and reassembling your Xbox Series S in the reverse order of the steps you followed initially.
For more detailed steps, you can check the video from YouTube:
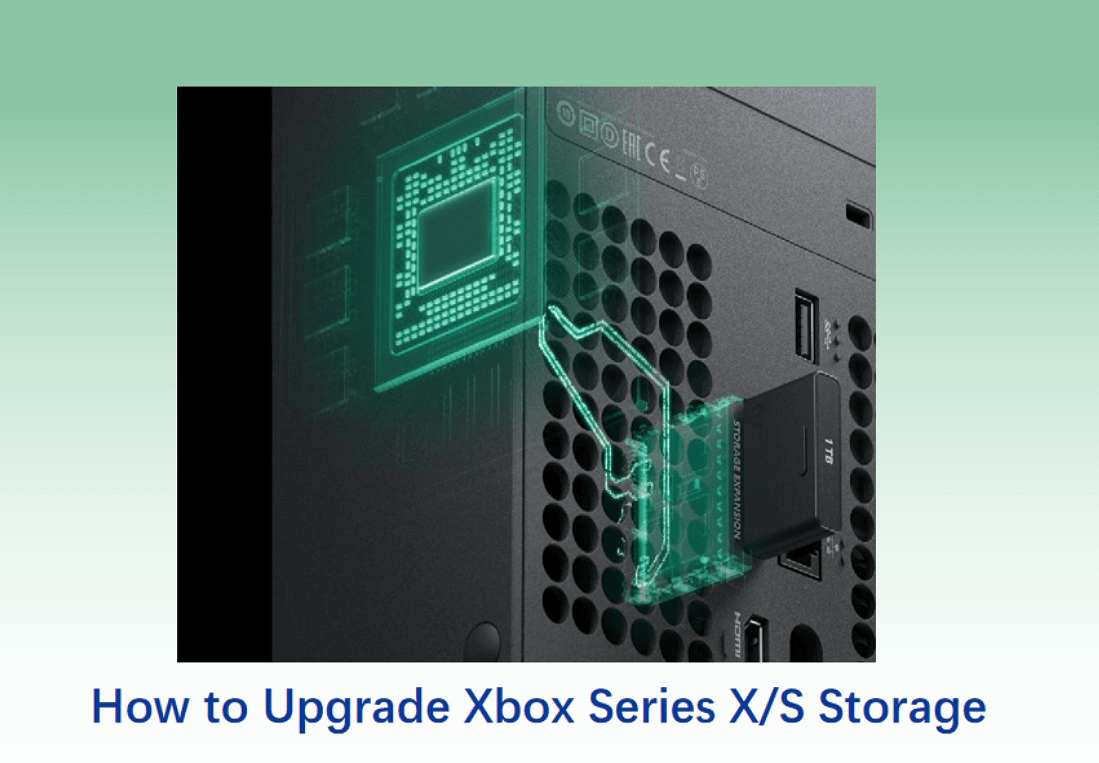
Bonus Tip: How to Upgrade Xbox Series S Storage?
Upgrading your Xbox Series S storage is a relatively straightforward process that doesn't necessarily require replacing the internal SSD. For a more detailed guide, you can click on the provided link.

How to Upgrade Xbox Series X/S Storage [Ultimate Guideline]
Upgrading the storage device on your Xbox Series X/S is a straightforward process that can be done in two effective methods. Firstly, you can use an external hard drive to expand your storage capacity, which can be easily connected to the console via a USB port.
You can enhance your storage capacity by either using an official Xbox Series S Expansion Card or adding external storage. This allows you to expand your storage capacity.
Guide 1: Expand Storage with Xbox Series S Expansion
- The official Xbox Series S Expansion Card is the simplest and most seamless way to increase your storage capacity.
- The expansion card makes it easy to upgrade your Xbox Series S by simply plugging it into the dedicated expansion slot, and you're ready to go.
- It provides high-speed storage that matches the internal SSD performance.
Guide 2: Add External Storage to Xbox Series S
- The Xbox Series S is a more affordable console option that can be expanded with external storage, providing a cost-effective way to increase storage capacity.
- To complete this task, you will need an external USB 3.0 or USB 3.1 storage device with sufficient capacity.
- Format the drive to the appropriate file system and connect it to one of the Xbox's USB ports.
- The Xbox Series S will recognize the external drive as additional storage, allowing you to use it for game installations and other purposes.
You May Also Like:
Conclusion
Upgrading the internal SSD of your Xbox Series S is significant for various reasons, such as storage limitations or optimizing the gaming experience. However, it's not always necessary as you can expand the storage limit with the Xbox Series S Expansion Card and external storage, making the upgrade optional. If you do decide to upgrade, Qiling Disk Master is a smooth and seamless option.
FAQs About Xbox Series S Internal SSD Upgrade
If you have any queries or want to learn more about upgrading your Xbox Series S's internal SSD, follow the FAQs below.
1. Is any SSD compatible with the Xbox Series S?
The Xbox Series S requires a specific type of SSD, a custom NVMe M.2 2230 SSD, which not all SSDs are compatible with. It's essential to choose a compatible SSD for the upgrade to ensure it works properly.
2. How fast is the Xbox Series S internal SSD?
The Xbox Series S has a fast internal SSD that can access 2.4 GB/s of data per second, significantly reducing loading times and improving the gaming experience.
3. How to upgrade the internal SSD on Xbox Series X?
To upgrade the internal SSD on the Xbox Series X, choose a suitable internal SSD for your device, following the procedure similar to upgrading the Xbox Series S SSD, but taking into account the different form factor used by the Xbox Series X.
Related Articles
- MBR2GPT Disk Layout Validation Failed | 3 Proven Fixes
- How to Speed Up a USB 3.0 External Hard Drive in Windows 10/8/7
- Troubleshoot and Bypass SMART Failure in Windows 2024 [Full Guide]
This tutorial will guide you through step-by-step solutions to troubleshoot and bypass SMART failure issues in Windows, ensuring optimal performance of your disk. - How to Check Disk Space in Windows 7 [Step-By-Step Guide]
If you're still using Windows 7, this post can help. It provides two simple methods to check disk space on Windows 7. - Formatting Stuck in Disk Management? Try Qiling Partition Format!
Formatting stuck in Disk Management? Do you encounter such an error and hesitate to cancel the formatting? Follow Qiling to figure out the 'format take so long' issue. - 8 Free Disk Space Analyzer Recommend and Download in 2024
If you're struggling to manage your disk space, this guide can help. Discover the best free disk space analyzer for Windows 11 and Windows 10, and optimize your storage effortlessly with their assistance.