How to Fix PC Won't Boot After Installing M2 SSD - Full Guide
Users reported that their computers or laptops could not start normally after installing an M.2 SSD, with some experiencing issues after installing the drive.
To troubleshoot the issue of a computer not starting after installing a new M2 SSD, we need to identify the root cause of the problem. This involves exploring various possible reasons, such as incorrect installation, BIOS settings not updated, or compatibility issues with the existing hardware. By understanding the underlying cause, we can take the necessary steps to resolve the issue and get the computer up and running smoothly.
Why PC Won't Boot After Installing M2 SSD
Your computer won't boot after installing an M.2 hard drive due to various reasons, including a loose connection between the M.2 SSD and the motherboard, a faulty SSD, or incorrect SSD configuration in the BIOS.
Ⓜ️M.2 SSD may not be properly connected to the motherboard. If an M.2 SSD is not properly installed on the computer motherboard, it may not be recognized, which can prevent the computer from booting properly from the SSD.
💡The M.2 SSD might not be properly configured in the BIOS. If the new SSD is your startup disk but not set as the startup disk in the BIOS, your computer won't start Windows normally.
🔎The M.2 SSD may be damaged or malfunctioning. This error will also appear if the SSD is unhealthy or has other quality issues.
💻The PC's operating system or the motherboard may not be compatible with the new M.2 SSD. Windows 11 and Windows 10 have specific installation requirements; ensure your SSD is compatible with the corresponding operating system when installing.
We've explored solutions to a common issue where a computer won't start after installing an M.2 SSD. These fixes can be shared with friends who may encounter this problem.
Fix PC Won't Boot After Installing M2 SSD Using Qiling Disk Master
Qiling Disk Master is a software that helps manage and organize devices, fixing startup problems with a one-click "Boot Repair" function, which can resolve issues caused by BIOS startup sequence, outdated drivers, missing BCD files, and other problems.
Qiling Disk Master is a tool that helps users solve startup problems and common errors with ease. By studying various startup issues, it provides a one-click solution for users to tackle modern computing complexities, whether they're tech-savvy or not. For a seamless startup experience, downloading this tool is a great starting point.
Step 1. After connecting the external drive/USB to your computer, launch Qiling Disk Master and navigate to the "Bootable Media" section. From there, click on "Create bootable media" to proceed.

Step 2. To create a bootable USB drive or CD/DVD, select a suitable storage media and click "Create." Alternatively, you can burn the Windows ISO file onto the chosen media.

Step 3. Connect a bootable drive to a new computer, boot from it by pressing F2/Del to enter the BIOS, set the drive as the boot disk, and exit the BIOS by pressing F10.
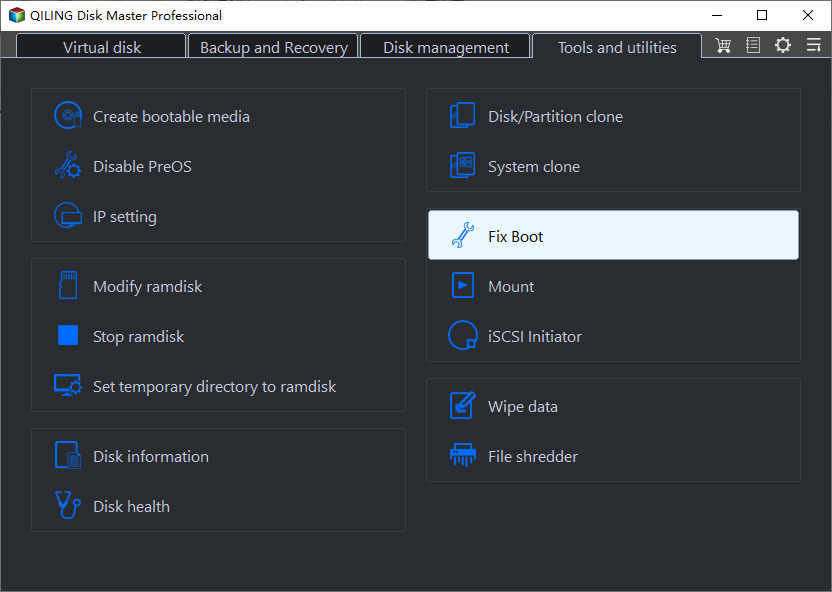
Step 4. Boot the computer again and enter the WinPE interface. From there, open Qiling Disk Master and click "Boot Repair" under the "Toolkit" option.
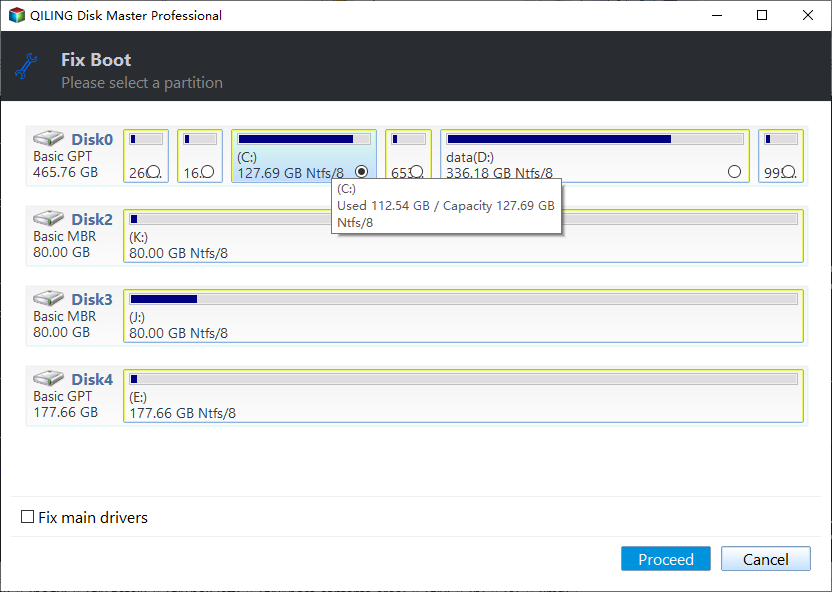
Step 5: Select the system you want to repair and click "Repair."
Step 6. Wait a moment, and you will receive an alert that the system has been successfully repaired.
⭐Professional Support
What are the steps to solve the problem using the support engineers?
Qiling experts provide 24/7 manual services to fix Windows boot errors, BSOD, and computer boot loops. They offer free evaluations, diagnose and resolve system boot failures, Windows stop codes, and OS lagging issues using their decades of experience.
- 1. Fix BSOD - blue/black screen of death error due to Windows update or other reasons.
- 2. To resolve Windows boot errors like "no bootable device found" or BCD file corruption, you can try the following steps: Boot from a Windows installation media, go to the "Repair your computer" option, and select "Troubleshoot" > "Advanced options" > "Command Prompt". From the Command Prompt, type "bootrec /fixmbr" and press Enter to repair the Master Boot Record.
- 3. 0X000_error codes on Windows system or OS boot loop issues can be resolved by running the System File Checker tool, using the SFC command in Command Prompt, and checking for corrupted system files. Additionally, running the DISM command to scan and repair the Windows image, and checking for any hardware issues that may be causing the problem.
How to Fix PC Won't Boot After Installing M2 SSD
M.2 SSDs are designed for high-performance storage in thin, power-constrained devices like ultrabooks and tablets. However, some users have encountered issues where their computer won't boot after installing a fresh M.2 SSD. To troubleshoot this, users can try a few solutions, such as checking the SSD's compatibility with their system, ensuring proper installation, and verifying that the SSD is recognized by the BIOS. If none of these steps resolve the issue, further troubleshooting may be necessary to identify the root cause of the problem.
Fix 1. Check the Compatibility
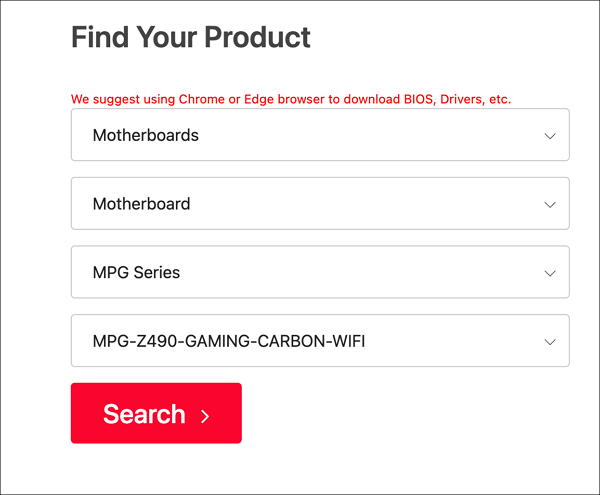
To verify compatibility, you need to identify your computer's motherboard model and specifications. Check the motherboard itself, its manual, box, or the manufacturer's website for the exact model number. Additionally, for M.2 SSDs, ensure your motherboard has an M.2 slot and supports the specific key type required for SSDs, such as M Key or B Key.
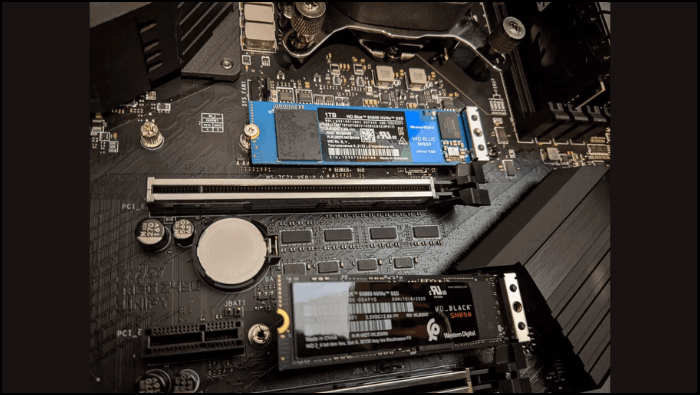
Fix 2. Reinstall M.2 SSD
After installing the M.2 SSD, the computer won't start normally. This might be due to incorrect installation. Try turning off the computer, unplugging the power cord, and opening the case or back cover. Remove the M.2 SSD, reinsert it securely into the M.2 slot, and ensure proper alignment and securing.

How to Install M.2 SSD [Beginner's Guide⭐]
Want to boost your computer's performance? Installing an M.2 SSD is a great way to do so. For a step-by-step guide on how to install a second SSD, check out this post.
Fix 3. Update BIOS
Follow the steps below to quickly help you update the BIOS settings to allow your system to reboot from the M.2 SSD.
Step 1. To identify the current BIOS version, you need to restart your computer and press a specific key (usually F2 or Del) during startup to enter the BIOS settings. From there, you can check the BIOS version.
Step 2. To find the BIOS version number on your device, navigate to the Home screen or the System Information screen, where you should be able to locate and view the BIOS version number. This information is typically displayed as a series of numbers and letters that identify the specific version of the BIOS software installed on your device.
If you're using a Lenovo or ASUS computer, click the link below to find out about the specific Boot menu key for your device.
Step 2. Check for updates by visiting the manufacturer's website, looking for a BIOS update for your specific model or motherboard, and downloading it to your computer.
Step 3. Restart your laptop or computer and enter the BIOS setup again. Look for the "Update BIOS" option and navigate to the location where you saved the BIOS update file. Select the file to start the update process, following the on-screen instructions provided by the manufacturer.
You can share this article on your social media by clicking the buttons provided. This will help more users find and read the article.
Fix 4. Change Boot Order
To change the boot order on your laptop or desktop, you'll need to access your computer's BIOS settings. This can usually be done by pressing a specific key (such as F2, F12, or Del) as soon as your computer starts up.
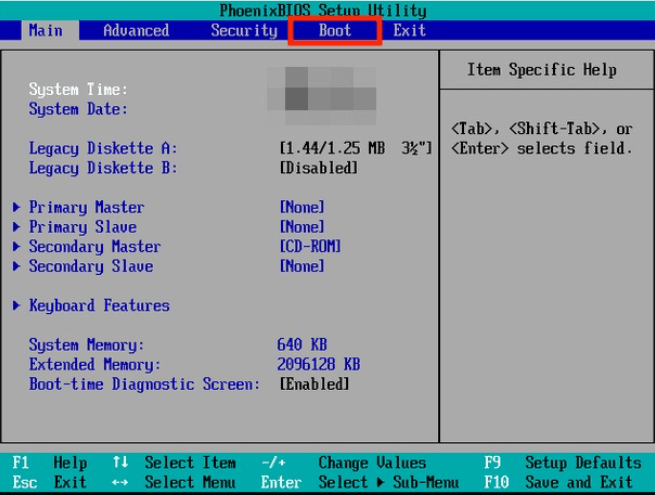
Step 1. Restart the laptop, then quickly press the specified key (such as F2, F10, Del, or Esc) before the Windows logo appears to enter the BIOS.
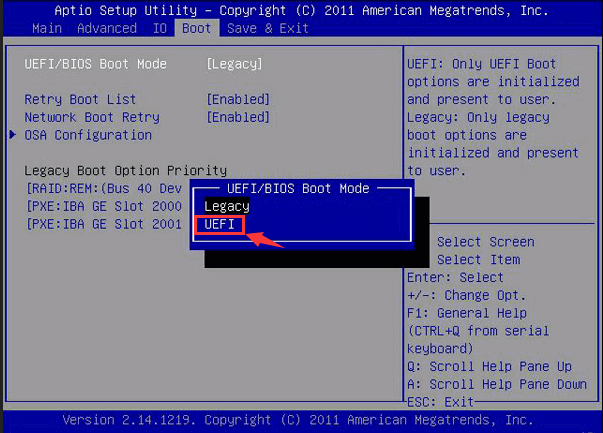
Step 2. To access the Boot Options in BIOS setup, navigate to the Boot or Boot Sequence section using the arrow keys.
Step 3. To enter the BIOS settings, press the designated key (usually F2, F12, or Del) when your computer first starts up. This will take you to the boot options menu, where you can select your M.2 SSD as the primary boot device. Once selected, save your changes and exit the BIOS to apply the changes.
Solved - Windows Not Booting After Installing New SSD
Your new SSD should boot Windows without issues after installation; however, if it doesn't, then continue reading, as this article will help you resolve the issue.
Fix 5. Test M.2 SSD on Another PC
If you've tried all the previous fixes and still can't boot from the M.2 SSD, it's possible that the issue lies with your computer or the SSD itself. To troubleshoot, try connecting the M.2 SSD to another working computer to see if it boots normally. If it does, the problem might be specific to the computer you're currently using.
If your computer can't start normally after installing an SSD, you can try troubleshooting hardware issues first. However, if that doesn't work, we recommend using a third-party tool to help resolve the startup problem, as it's a more straightforward solution.
Further Reading:
How to Fix BIOS Recognizes SSD But Won't Boot
If your BIOS recognizes your SSD but won't boot, there are several effective fixes and solutions to resolve this issue. The problem may be caused by a faulty SSD, incorrect BIOS settings, or a failing motherboard.
Conclusion
This article addresses the issue of a computer failing to boot after installing a new M.2 SSD, providing a detailed solution. The solution was found using Qiling Disk Master, which helped resolve multiple startup problems, possibly due to its powerful algorithm. If you need further assistance, you can refer to the related topics linked below.
PC Won't Boot After Installing M2 SSD FAQs
Installing an M.2 SSD can sometimes cause issues with your PC's boot process. The most common cause is a mismatch between the SSD's firmware and the motherboard's UEFI settings. To resolve this, you can try updating the SSD's firmware or adjusting the UEFI settings to match the SSD's requirements. If the issue persists, you can also try resetting the UEFI settings to their default values.
1. Why won't my PC boot after installing a new SSD?
The most common reasons are below:
- Incorrect installation of the SSD: Make sure your SSD is securely connected to the computer motherboard and power supply.
- Incorrect boot order in BIOS: To resolve this issue, you can try resetting the boot order in the BIOS settings. This will allow you to choose which device to boot from first. Typically, you'll want to set the SSD as the primary boot device.
2. How do I boot after installing a new SSD?
To set the new SSD as the boot drive, follow these steps:
- Restart your PC and press F2/F12/Del/Esc keys to enter BIOS.
- To change the boot order and set the operating system to boot from a new SSD, go to the boot options, change the original order, and select the new SSD as the primary boot device.
- Save all your changes, exit BIOS, and restart your PC.
3. Why is the SSD not showing up after installing M.2?
If your M.2 SSD isn't showing up, check the BIOS settings to see if M.2 SSDs are enabled. If it still doesn't show up in Windows, it might be due to a missing drive letter, outdated disk driver, or a problem with the BIOS settings.
Related Articles
- Solutions to Wsappx Takes High Disk and CPU Usage on Windows 11/10
- How to Remove Write Protection and Format Write Protected SSD [6+ Fixes]
- Tutorial: How to Fix Hard Drive Failure on Windows 10
- How to Check Samsung SSD Health on Windows [100% Working Solutions]
- Best Free PC Cleaner for Windows OS [2022]
Are you looking for a free PC cleaner for your Windows computer? If you still have no choice, here you may find the best free PC disk cleaner. - How Often Should PC Be Cleaned?
Most PC users know that cleaning their PC is important, but only a few of them know how often should PC be cleaned. So in this post, we will provide you the answer and 2 easy ways to clean your PC.