Fix macOS Could Not Be Installed on Your Computer (8 Ways)
Users who encounter the "macOS could not be installed on your computer" error are not alone. This issue has been reported by several Mac users, who are eager to resolve it promptly.
| Workable Solutions | Step-by-step Troubleshooting |
|---|---|
| Fix 1. Verify and Repair Disk Issues | One of the best ways to resolve the installation error is to verify and repair disk issues...Full steps |
| Fix 2. Create a New macOS Installer | Another method is to re-download and create a new macOS installer...Full steps |
| Fix 3. Free Up Disk Space | The simplest solution to resolve the macOS Could Not Be Installed on Your Computer...Full steps |
| Fix 4. Check for Software Compatibility | Checking the compatibility between the device and the operating system is necessary...Full steps |
| More Fixes | The other 4 fixes are available here for you to follow, and fix macOS couldn't be installed...Full steps |
macOS updates can take a significant amount of time, but sometimes the process gets stuck and halted midway. This doesn't mean the installation has failed permanently, but rather it's a temporary issue that can be resolved by trying different methods.
The "macOS could not be installed on your computer" error can be frustrating, but there are ways to resolve it. This issue can arise due to various reasons such as a corrupted installation process, outdated firmware, or incompatible hardware.
Method 1. Verify and Repair Disk Issues Using Disk Utility
One of the best ways to resolve the installation error is to verify and repair disk issues. For that, you can use the Disk Utility. Check out the steps here -
1. Accessing Disk Utility from macOS Recovery mode
To access Disk Utility from macOS Recovery mode, follow these steps –
Step 1. Shut down the system.
Step 2. Turn it on.
Step 3. Press the Command and R keys and hold them. Release these keys when you see the Apple logo. (For Intel-based Macs)
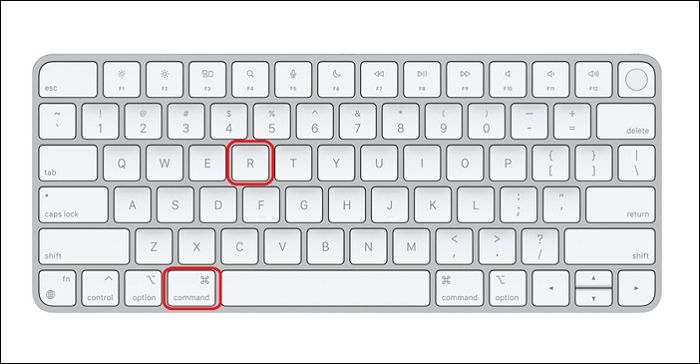
For Silicon-based Macs, press the power button and hold it until you see the startup options window. Release the power button when you see this window. Select Options and Continue.

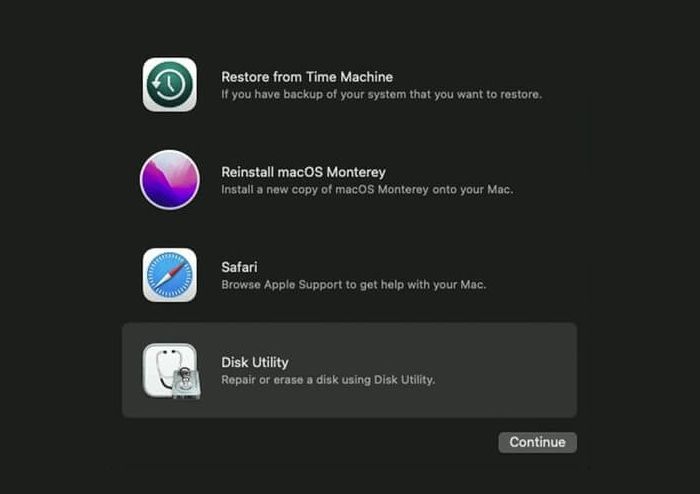
Step 3. On the macOS Utilities window, choose the Disk Utility option.
2. Checking and repairing disk errors
Here are the steps to check and repair disk errors in one paragraph:
Step 1. Select "View".
Step 2. Choose "Show All Devices".
Step 3. You will see a list of Mac disks in the sidebar. The list will show all the disks that are currently connected to your Mac, including internal and external disks.
Step 4. Choose the disk you want to repair.
Step 5. Select the "First Aid" option.

Step 6. Click "Run".
Step 7. Wait for the process to finish. Select "Done".
3. Formatting or resizing the disk if necessary
You can resize or format disks as needed. To do this, follow these steps:
Step 1. Select "View".
Step 2. Choose "Show All Devices".
Step 3. Select the disk you want to format.
Step 4. Select "Erase".

Step 5. Choose the Format pop-up menu.
Step 6. Select the file system format you want.
Step 7. Enter name.
Step 8. Select "Erase".
Step 9. Click "Done".
Method 2. Re-Download and Create a New macOS Installer
Another method is to re-To download and create a new macOS installer, follow the instructions below. This process allows you to create a fresh copy of the operating system, which can be useful for various purposes. By following the steps, you can obtain a new macOS installer and use it to install the operating system on a Mac or other compatible device.
1. Steps to re-download the macOS installer
To re-Here are the steps to download the macOS installer:
Step 1. Go to the App Store.
Step 2. To access the Purchased section in the App Store, click on your name at the bottom left-hand corner of the screen. This will open the Purchased section, where you can view all your previously downloaded and purchased apps.

Step 3. The macOS installer is a software package that contains the operating system and is used to install macOS on a computer. It is a large file that can be downloaded from the official Apple website.
Create Monterey USB Installer on Mac
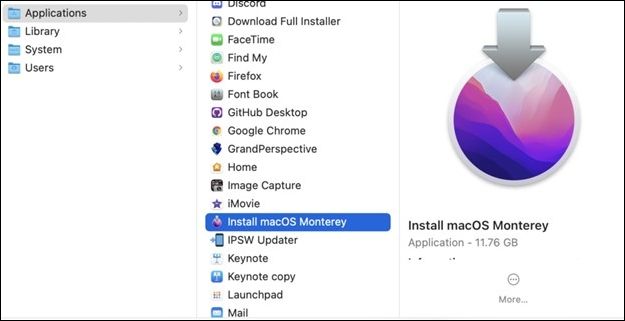
macOS Monterey was launched with several intriguing innovations, and you may wish to install macOS on your Mac. However, due to some issues, Apple has stopped signing the macOS Monterey installer. This means that you can no longer download the installer from the App Store and install it on your Mac.
2. How to create a new bootable installer
To create a bootable installer, follow these steps: Insert the USB drive into your computer. Download the bootable installer from the official website. Open the Terminal app on your Mac and navigate to the downloaded file.
Step 1. Connect the USB flash drive.
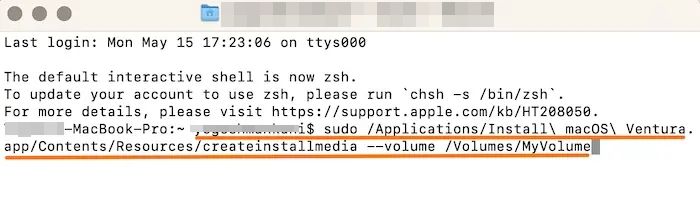
Step 2. Go to Terminal on Mac.
Step 3. Run the command `sudo /Applications/Install\ macOS\ Ventura.app/Contents/Resources/createinstallmedia --volume /Volumes/MyVolume` in the Terminal, replacing "MyVolume" with the name of the USB drive you want to use to create the macOS installation media. This will create the installation media on the specified volume.
Step 4. Hit "Return".
Step 5. Type the admin password when asked.
Step 6. Type Y to erase the volume.
Step 7. Press "Return".
Step 8. When you see a pop-up asking permission to access files on the removable volume, click "OK".
Step 9. Quit the Terminal and disconnect the USB drive.
Method 3. Free Up Disk Space on the Target Drive
To resolve the "macOS Could Not Be Installed on Your Computer" error, simply remove large files to free up sufficient space on the disk, which is necessary for installation.
Identifying and removing large or unnecessary files
The process is straightforward. Follow these steps –
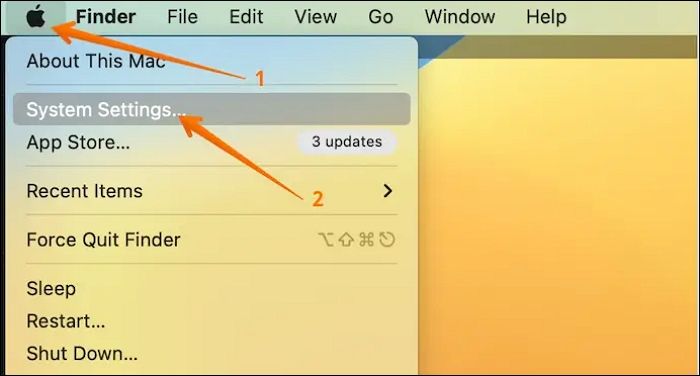
Step 1. Go to the Apple menu.
Step 2. Select System Settings.
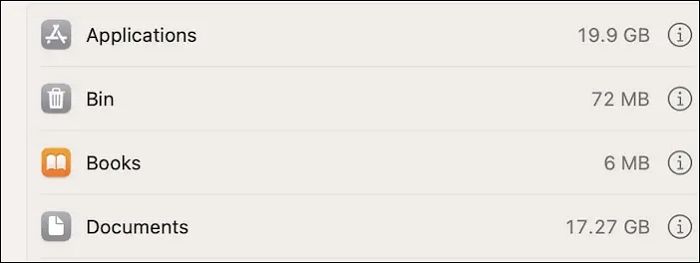
Step 3. A new settings window will open, allowing you to navigate to the General option and then select Storage on the right-hand side.

Step 4. You can select the category you want and know more about it. Select what you want to delete from your account.
Step 5. Click Delete.
Method 4. Check for Hardware and Software Compatibility
Checking the compatibility between the device and the operating system is necessary to avoid wasting time trying updates on a computer that cannot support them.
1. Ensuring your Mac model supports the desired macOS version
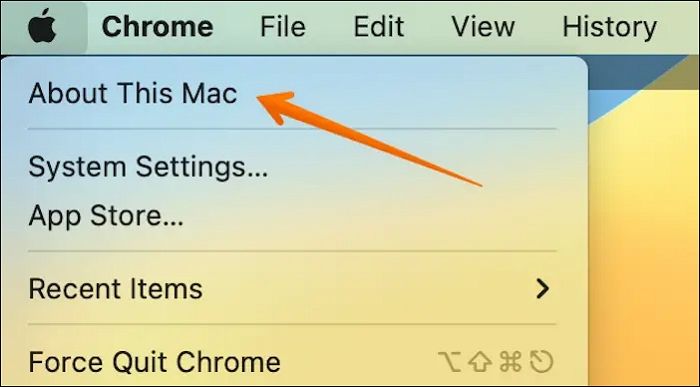
To check if your Mac model supports the desired macOS version, go to the Apple menu, select About This Mac, and view the information about your device. Then, search online to find out which updates your model supports.
2. Updating or removing incompatible software before installation
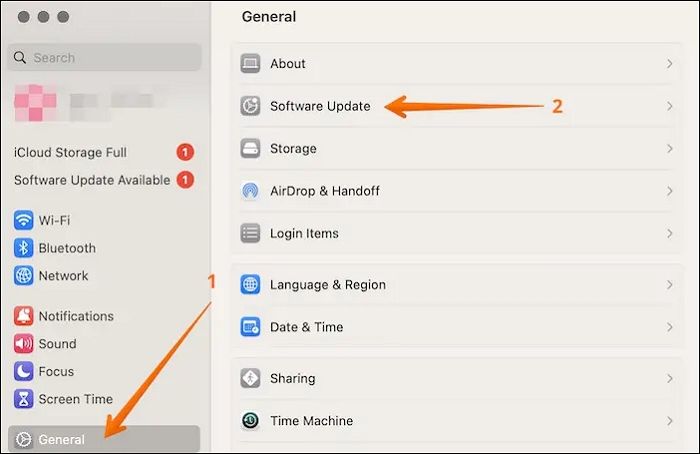
Before installation, it is crucial to either update or remove incompatible software. To update, follow these steps:
Step 1. Go to the Apple menu.
Step 2. Select System Settings/System Preferences.

Step 3. Choose "Software Update".
Step 4. Here, you will find updates (if any)
To remove incompatible apps, check out these steps –
Step 1. Go to the Applications folder.
Step 2. Drag the software to Trash.
Step 3. You can also remove apps using Launchpad. Open "Launchpad".
Step 4. Select the software and hold it.
Step 5. Click on the X icon

| Here are the other 4 fixes |
| 5. Update Firmware and System Software |
| 6. Ensure the Correct Date and Time Settings |
| 7. Reset NVRAM/PRAM and SMC |
| 8. Perform a Clean Installation of macOS |
Method 5. Update Firmware and System Software
Checking firmware updates is a great way to resolve installation issues, as it ensures that the device's software is up-to-date and compatible with the system, which can often resolve installation problems.
How to check for firmware updates
To check for firmware updates, you can follow these steps: check your device's settings or control panel for an update notification, visit the manufacturer's website to see if any updates are available, or use a software update tool to scan for updates. By following these steps, you can ensure your device is running with the latest firmware and stay up-to-date with any new features or security patches.
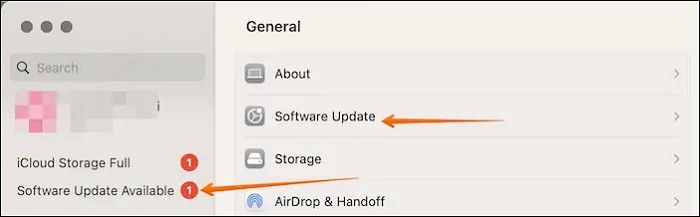
Step 1. Click on the "Apple menu".
Step 2. Choose "System Settings".
Step 3. Select "General".
Step 4. Go to "Software Update".
Method 6. Ensure the Correct Date and Time Settings
To check and modify the date and time in macOS Recovery mode, you can follow these steps: 1. Restart your Mac and immediately hold down the power button until the computer shuts down, then release the power button.
Step 1. Enter the Recovery Mode.
Step 2. Go to Utilities.
Step 3. Open Terminal.
Step 4. Type the Date to check.
Step 5. If it is incorrect, type date {month}{day}{hour}{minute}{year}
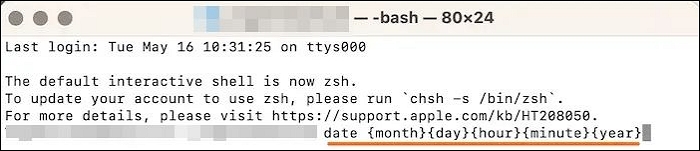
Step 6. Press Enter.
When an OS or App Store requests an update from Apple servers, it first checks the client time against the current Apple server time. If the timestamps don't match, the update or installation fails.
The checks for security certificates, synchronization, and compatibility issues are also performed apart from the time check. These additional checks help ensure the system's overall security and reliability.
Method 7. Reset NVRAM/PRAM and SMC
1. How to reset NVRAM/PRAM on Mac
To reset NVRAM/PRAM on Mac, follow these easy steps –
Step 1. Turn off the system.
Step 2. Press the power button.
Step 3. Press and hold Cmd, Option, P, and R keys simultaneously.
Step 4. Release the eyes when you hear the startup sound or the Apple logo appears and disappears for the second time.
2. How to reset SMC on different Mac models
To reset SMC on Macs with Apple T2 Security Chip, here are the steps –
Step 1. Turn off the system.
Step 2. Press the power button and hold it.
Step 3. Restart it.
Step 4. If the function doesn't work, press the Shift key, left Control key, and left Option key and hold them.
Step 5. At the same time, press and hold the Power button.
Step 6. Release the keys.
Step 7. Restart the system.

How to Reset NVRAM/PRAM on Your MacBook Pro/Air
Doing an NVRAM reset is one of the most effective Mac troubleshooting methods when your MacBook has problems. It's a simple process that can resolve issues such as a frozen or unresponsive screen, login issues, and other problems that may be caused by a corrupted NVRAM cache. To reset NVRAM, simply shut down your MacBook, locate the power button and the Command (⌘) + Option (⌥) + P + R keys, and press them all at the same time while powering on your MacBook. Hold them down for 20 seconds, then release them.
Method 8. Perform a Clean Installation of macOS
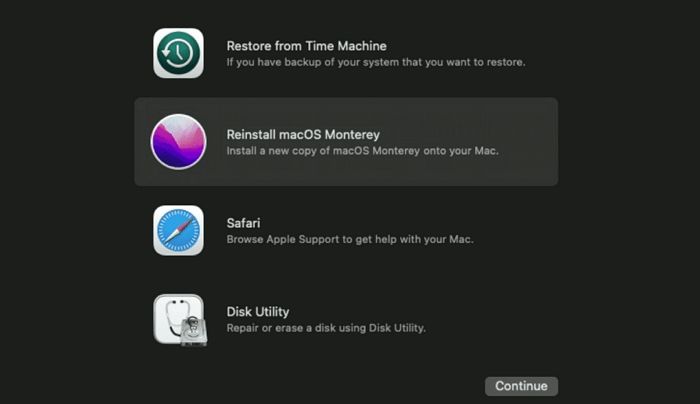
A clean installation of macOS can be done in various ways, one of which is through the Recovery Mode.
Step 1. Enter the Recovery Mode.
Step 2. Erase the Mac before reinstallation of macOS.
Step 3. Quit Disk Utility.
Step 4. Select Reinstall macOS from the utility window.
Causes of the "macOS Could Not Be Installed on Your Computer" Error
The "macOS Could Not Be Installed on Your Computer" error occurs due to various reasons such as a corrupted installation package, insufficient free space on the target disk, incompatible hardware, or a problem with the bootable installer. To resolve this issue, you can try reinstalling macOS, checking the target disk for sufficient free space, ensuring the hardware is compatible, or using a different bootable installer. Additionally, running a disk utility, checking for malware, and resetting the System Management Controller (SMC) and Power Management Unit (PMU) may also help resolve the issue.
-
💾Corrupted or incomplete macOS installer
To resolve the issue, try downloading the installer again from the official Apple website, ensuring a stable internet connection. If the issue persists, verify the integrity of the downloaded file by checking its hash or using a tool like `sha256sum` to ensure it's not corrupted. Additionally, try running the installer in verbose mode to see if it provides any clues about the cause of the error. If none of these solutions work, you may need to contact Apple support for further assistance.
-
💽Insufficient disk space on the target drive
macOS updates require a significant amount of space, so it's essential to ensure the target drive has sufficient space to avoid the error and complete the installation.
-
⚙️Incompatible hardware or software
Ensuring the system and operating system are compatible is crucial. If the hardware can't support the update, users may encounter the "macOS Could Not Be Installed on Your Computer" error, and can check the list of eligible models to resolve the issue.
-
🗓️Incorrect date and time settings
Incorrect date and time can also cause installation errors, so manually setting the time and date may resolve the issue.
Recover Data from Corrupted macOS After Installing
The "macOS Could Not Be Installed on Your Computer" error is a common Mac issue, but it's not the only problem you might face. Unfortunately, a corrupted macOS installation can also lead to data loss, which can be a significant surprise for many users.
If you're experiencing issues with your Mac and want to recover lost data, it's essential to back up your data first. However, if you haven't done so, you can use professional data recovery software like Deep Data Recovery for Mac to recover your data.
The Deep Data Recovery for Mac is a powerful data recovery software that allows users to easily retrieve lost data, regardless of the cause, and features a user-friendly interface that is popular among both experts and beginners.
Highlights:
- Easy data recovery from Mac-Based on the type of device, the data recovery process can vary. For example, in the case of a solid-state drive (SSD), data recovery may involve using specialized software to scan the device's firmware and retrieve deleted files.
- To recover lost photos, music files, videos, emails, documents, and other data on a Mac, start by stopping using the affected device immediately. Then, check if the files are still in the Trash or Recycle Bin, and restore them if possible.
- Send data to cloud storage services like Google Drive, Dropbox, etc. for storage and retrieval.
- The file filter feature allows you to quickly locate specific files you want to recover by filtering them based on various criteria such as file name, file type, and date modified. This feature enables you to narrow down the search results and focus on the files that are most relevant to your recovery needs.
Check out Deep Data Recovery for Mac today!
Conclusion
The "macOS Could Not Be Installed on Your Computer" error can be frustrating, but it's often caused by incorrect date and time settings or an incomplete macOS installer. Fortunately, this issue has several solutions that can help resolve the problem.
To resolve the issue, ensure there's sufficient disk space, verify the accuracy of time and data, and consider updating firmware or checking software and hardware compatibility.
If data loss occurs, the best solution is to use a reliable data recovery tool, such as Deep Data Recovery for Mac, which is user-friendly, powerful, and has a wide range of features, making data recovery simple and hassle-free.
macOS Could Not Be Installed on Your Computer FAQs
Here are the possible solutions to resolve the installation error in one paragraph:
1. How do you fix macOS that could not be installed on your computer?
If your macOS won't install, there are a few solutions to try. You can restart your system and reinstall macOS, or free up space on the target drive to see if that resolves the issue. Additionally, resetting the NVRAM and PRAM may also help. These troubleshooting steps can often resolve the problem and get your computer up and running with the latest macOS.
2. Why is my Mac saying macOS could not be installed?
Your Mac is saying macOS couldn't be installed due to various reasons, possibly including insufficient space on the drive, incorrect date and time, or a corrupted macOS installer.
3. How do I force install macOS?
To force install macOS, follow these steps –
- Start the system in Recovery mode.
- Now, choose Reinstall for your macOS release.
- Select Continue and follow the instructions on the screen.
Related Articles
- How to Format External SSD for Mac [Newest & Effective Ways]
- How to Improve SSD Read and Write Speed [100% Working Solutions]
- How to Backup iCloud Photo Library to Anywhere
- [Fixed] The File Is Corrupted and Cannot Be Opened in Excel/Word
- What Is SSD TBW and How to Check TBW on SSD
If you're curious about the Total Bytes Written (TBW) of your Solid-State Drive (SSD), you'll find the answer here. To check the TBW of your SSD, you can follow a simple method to determine how many bytes have been written to it. - What Is 8K Resolution? [All You Should Know 2022]
8K resolution is the future of videos, with its high resolution and detailed pictures. It has a resolution of 7680 x 4320 pixels, which is four times higher than 4K resolution. 8K content is ideal for large screens, such as TVs and monitors, and is also suitable for use in virtual reality and augmented reality applications. Its high resolution and detailed pictures make it a great choice for everyday life, such as watching movies and sports on TV, and using it in gaming and other interactive applications.