How to Fix the Recovery Server Could Not Be Contacted on macOS Sonoma/Ventura
If you encounter the error message "The recovery server could not be contacted" on your MacBook, don't worry, as this article will guide you through the meaning, possible causes, and practical solutions to fix the issue. The error message indicates a problem with contacting the recovery server, which may be caused by various factors, including internet connectivity issues, software glitches, or hardware problems. To resolve the issue, you can try restarting your MacBook, checking your internet connection, or running a System Report to identify any hardware or software issues.
| Workable Solutions | Step-by-step Troubleshooting |
|---|---|
| Fix 1. Check Mac Internet Connection | Check your network's status to ensure that the network is workable and stable...Full steps |
| Fix 2. Check Apple Server's Status | Go to Apple's System Status website to check the System Status of the Apple Server...Full steps |
| Fix 3. Synchronize Date and Time | Go to the Apple menu, and select System Settings or Preferences on earlier versions...Full steps |
| Fix 4. Erase Mac | Boot Mac into Recovery Mode, choose Disk Utility, and click Continue. Click View...Full steps |
| Other Practical Fixes | Install from App Store, use Terminal command, and create USB bootable installer...Full steps |
The recovery server could not be contacted When updating or installing macOS on your MacBook Pro/Air, you may encounter issues.
Unfortunately, you're experiencing a common issue with reinstalling macOS High Sierra. The error message "The recovery server could not be contacted" indicates that your Mac is unable to reach the Apple recovery server, which is required to download the installation files. This can be due to a variety of reasons, such as a weak internet connection, a problem with your Mac's network settings, or a corrupted installation process. To resolve this, try restarting your Mac, checking your internet connection, and ensuring that your Mac's date and time are set correctly. If the issue persists, you may need to try a different method, such as using a bootable USB drive or seeking assistance from Apple support.
The problem has been reported on several macOS versions, including Ventura, Monterey, Big Sur, and possibly Sonoma, indicating it's a persistent issue across multiple releases.
What Does the Recovery Server Could Not Be Contacted Mean
The recovery server could not be contacted, which means your Mac failed to connect to the Apple server. This may occur when your Mac is unable to access the internet, has a weak internet connection, or has issues with its network configuration. It can also happen if there's a problem with the Recovery Mode, or if your Mac's date and time are not set correctly.
- Update, install, or reinstall macOS
- Start Mac in Recovery Mode
- Use Internet Recovery Mac
The actions of downloading or updating macOS require contacting the Apple recovery server, which can result in an error message "The recovery server could not be contacted" if your Mac is unable to connect to the Apple server.
How to Fix the Recovery Server Could Not Be Contacted
If you encounter an error, don't worry as we have 8 practical solutions to help you fix the problem. Read on to find the suitable fix for you!
🌐Fix 1. Check Mac Internet Connection
To resolve the recovery server could not be contacted issue on your Mac, simply check your network's status to ensure it's stable and working properly, as a faulty network connection is often the culprit.
😊Fix 2. Check Apple Server's Status
Sometimes this error is not your problem but a temporary outage of Apple's system, which you can check on Apple's System Status website.

⏱️Fix 3. Synchronize Date and Time
To resolve the issue where the recovery server could not be contacted, ensure that your system clock is accurate. If your system clock is not set correctly, macOS may not be able to contact the recovery server. Check your system clock and set it to the correct date and time. If this resolves the issue, you may need to adjust your system's time zone as well.
Step 1. On your Mac, go to the Apple menu, select "System Settings" or "System Preferences" (depending on your macOS version), and follow the on-screen instructions to reset your password.
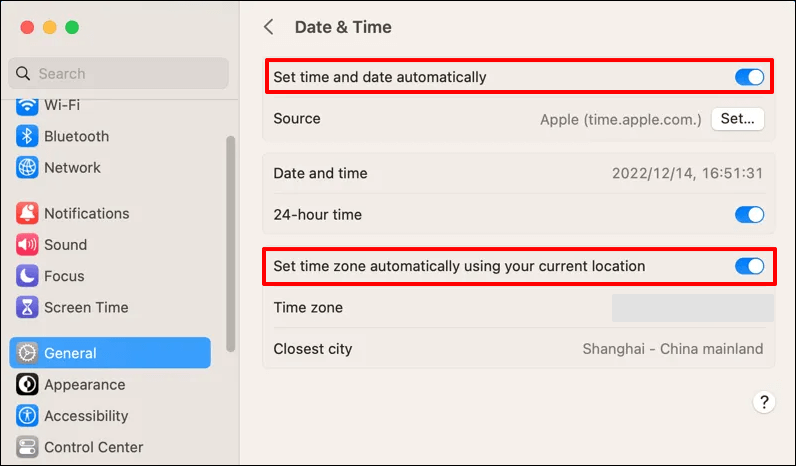
Step 2. Click "General > Date & Time".
Step 3. To set your date and time automatically, go to your device's settings, then select "Date and time" or a similar option, and toggle the switch to "On" for "Set date and time automatically". Additionally, ensure that the "Set time zone automatically using your current location" option is also enabled.
💾Fix 4. Erase Mac
Erasing all content on your Mac's startup disk and performing a clean install of macOS can resolve the error "The recovery server could not be contacted". However, this process will delete all data on your Mac, so it's essential to back up your important data before proceeding.
Follow the steps below:
Step 1. Boot Mac into Disk Utility.
Step 2. Click "View > Show All Devices".
Step 3. Select the first disk, which is named similar to Apple SSD, and click "Erase" to proceed with the process.
Step 4. To format the drive, give it a name, choose the file system format (APFS or Mac OS Extended), and set the partition map scheme to GUID Partition Map.
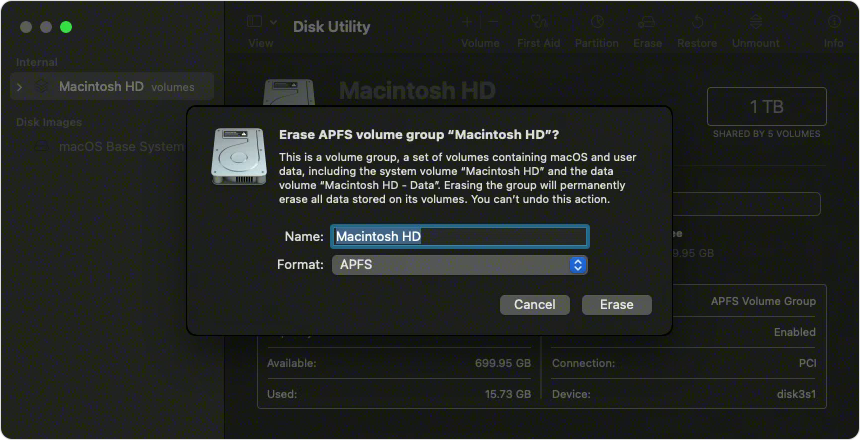
Step 5. Click "Erase" again and wait for the process to end. Quit "Disk Utility" and reinstall macOS.
After erasing your Mac and fixing the Recovery Server error, you can restore from a Time Machine backup.
If you've lost your data and don't have a backup, you can use a data recovery tool like Deep Data Recovery for Mac to retrieve your files. It's a professional tool that can recover lost or deleted data with ease.
The Qiling Mac recovery software can recover permanently deleted files on a Mac, allowing you to retrieve lost data even after erasing the disk in just a few clicks.
Step 1. Scan for lost data on the fusion drive
Select the Fusion Drive partition where data and files were lost, then click "Search for lost files". If unsure, click "Search from your disk" to identify the partition.
Note: Before attempting data recovery, it's recommended to click "Disk Backup" from the left sidebar to create a backup of your Fusion drive, which will prevent further data loss. Once the backup is complete, the software can recover data from the Fusion Drive backup, allowing you to use it again.

Step 2. Find lost files after the scan
Deep Data Recovery for Mac scans the Fusion disk partition and displays the scanning results, allowing users to filter files by type and path.

Step 3. Recover files on the fusion drive
To recover deleted files, select them in the scan results, click "Recover" and they will be restored.

If you're experiencing the error "The recovery server could not be contacted" on your Mac, don't worry! This issue is usually caused by a problem with the Recovery Mode, which is a built-in feature that helps you restore your Mac to its default settings.
🍏Fix 5. Install from App Store
When updating macOS and encountering the error "The recovery server could not be contacted", try installing from the App Store. Note that a failed installation may leave a residual installer that needs to be removed before reinstalling from the App Store to install the latest macOS version.
Step 1. If you downloaded the installer, find it in the Applications folder. Otherwise, go to step 3.
Step 2. Right-click the downloaded installer and choose "Move to Trash" or press "Command + Delete" to delete it.

Step 3. Go to App Store, and install the macOS version.
Apple released the latest version of macOS, macOS Sonoma, at WWDC 2023. If you're having trouble installing it, this article can help you troubleshoot the issue.
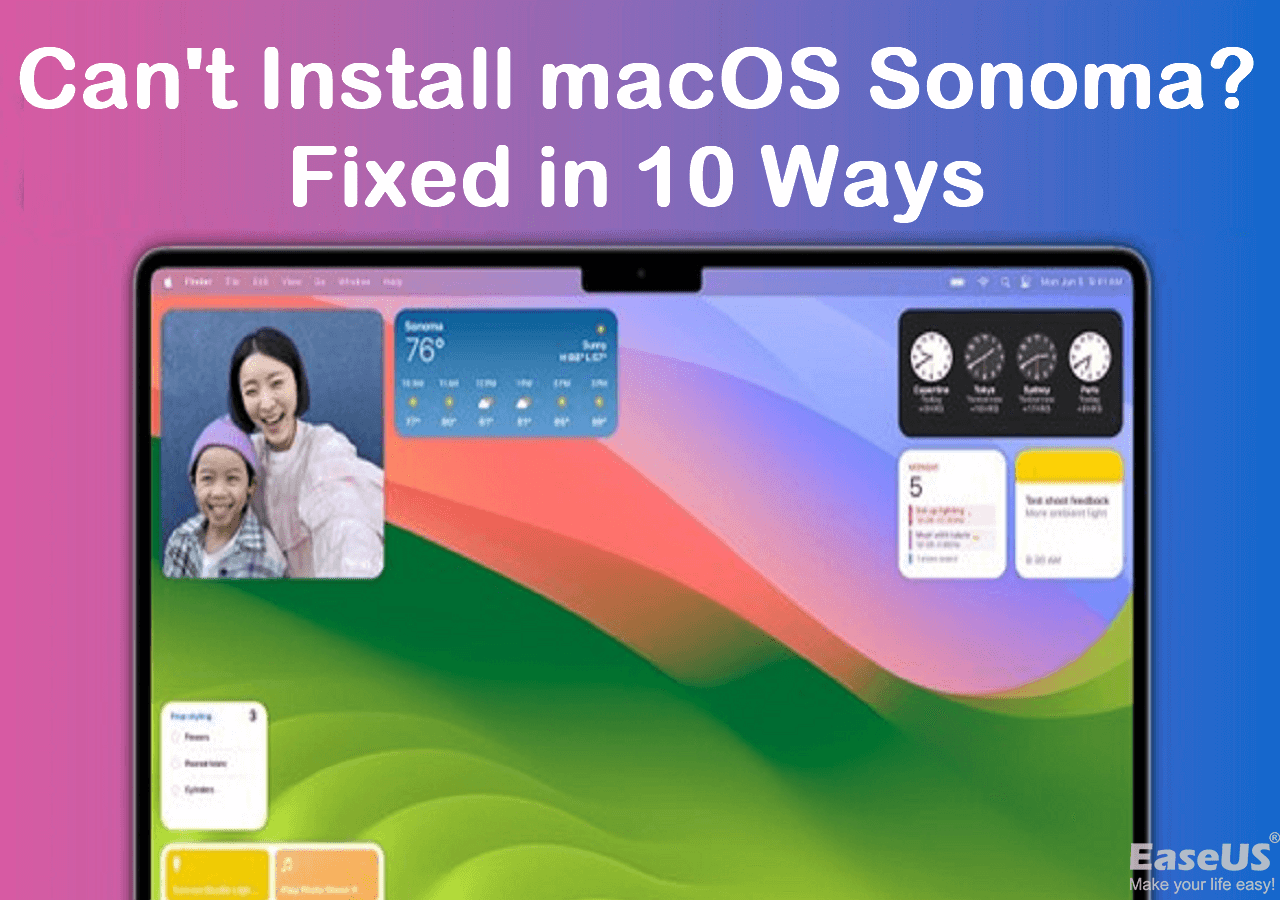
Can't Install macOS Sonoma? Fixed in 10 Proven Ways (2023)
The article discusses the possible causes and solutions to fix the issue of being unable to install macOS Sonoma, and provides additional information on the topic.
⚠️Fix 6. Use Terminal Command
This method may not work for everyone, but if you're familiar with Terminal, it's very easy to understand. Check out the steps here:
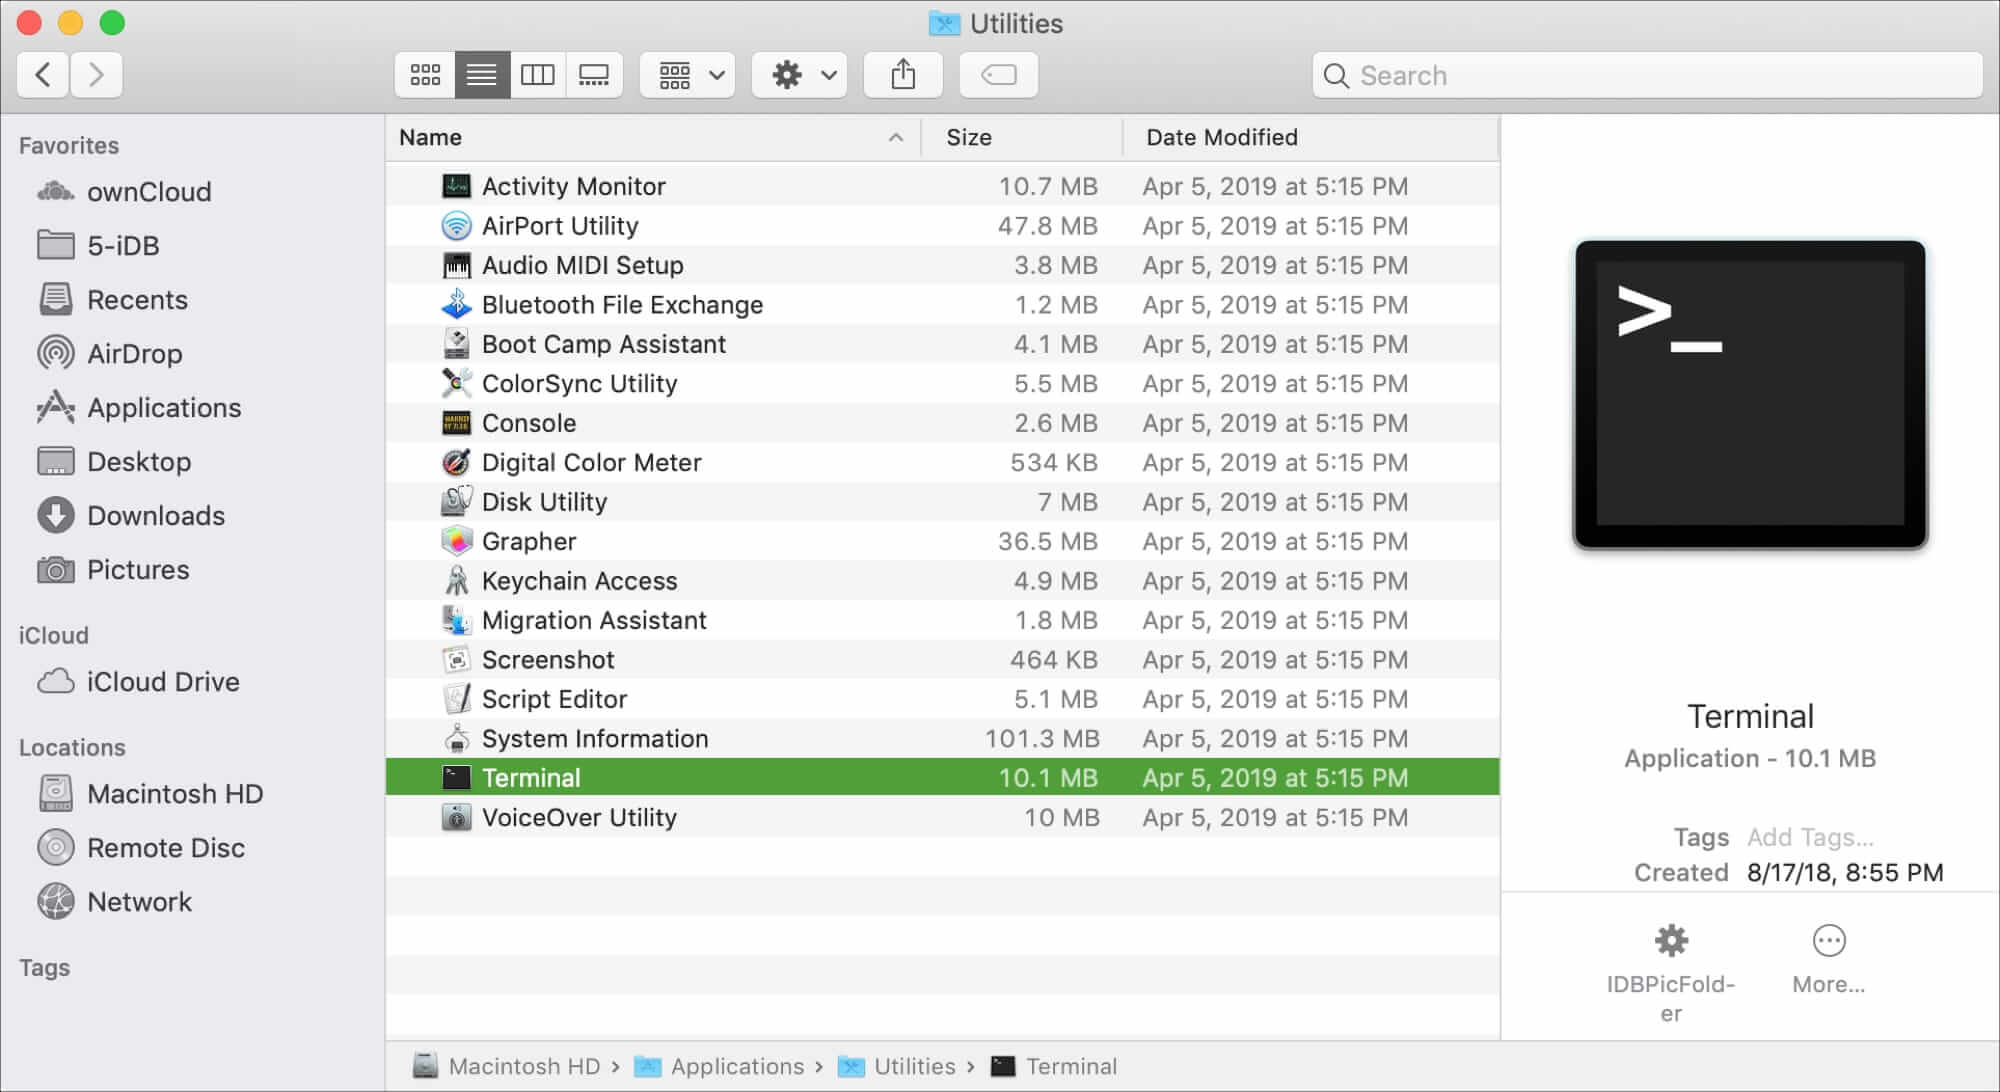
Step 1. Open Terminal in the Utilities folder.
Step 2. Type the command softwareupdate -l, and hit "Enter".
Step 3. Run the command "softwareupdate --install 'label'" and replace 'label' with the specific update you want to install, such as "macOS Sonoma".
🧩Fix 7. Create USB Bootable Installer
To create a USB bootable installer, you should first format your USB flash drive to FAT32 on a Mac, or another compatible file system format, and then follow the steps below.
Step 1. Download the macOS version resource for the bootable USB drive.
Step 2. Create a bootable USB installer.
Step 3. Install the macOS version with a USB bootable installer.
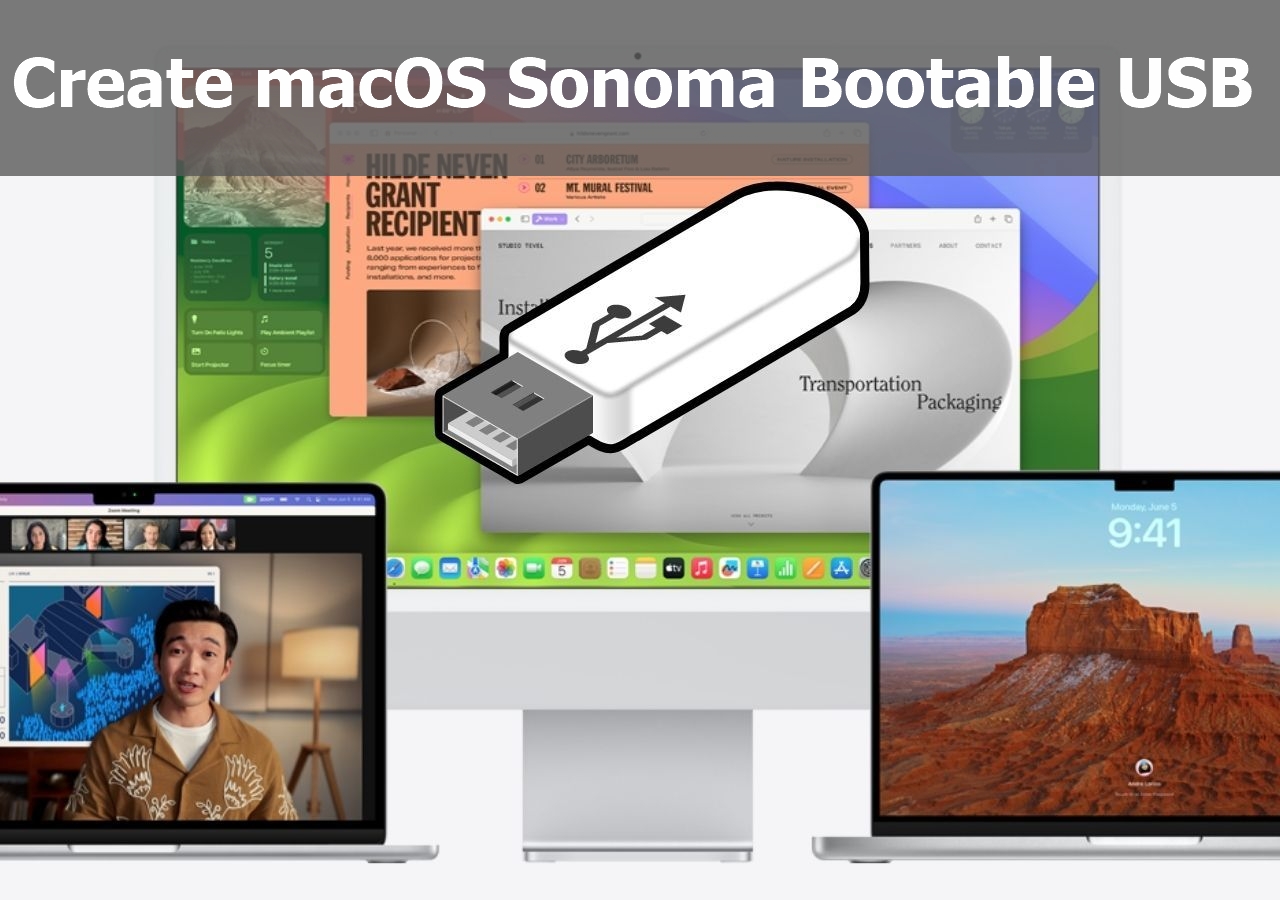
Create macOS Sonoma Bootable USB Installer [Create macOS 14 Installer]
To create a macOS Sonoma bootable USB installer, follow these steps: first, download the macOS Sonoma installer from the App Store or Apple's website. Next, create a USB drive with a minimum capacity of 16GB. Then, open the Terminal app on your Mac and type the command "diskutil list" to identify the USB drive's identifier.
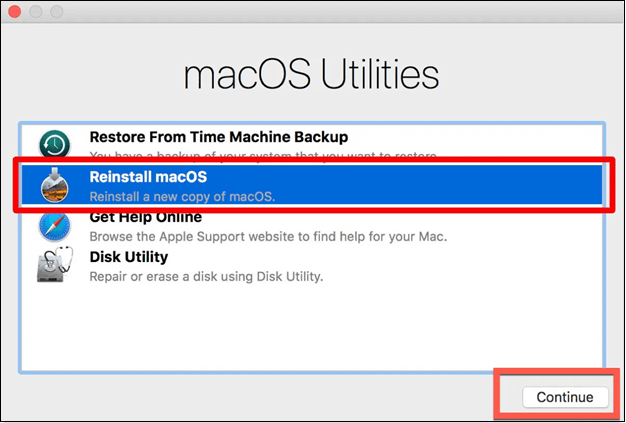
💻Fix 8. Install in Internet Recovery [Intel-based Mac Only]
If your Mac is an Intel-based Mac, you can install the lasted macOS version that is compatible with your Mac. Check out the steps:
Step 1. To reset your Mac's NVRAM, turn off your Mac, press the power button, and immediately hold down the Command (⌘) + Option (⌥) + R keys. Keep holding them until you see the Apple logo and a progress bar.
Step 2. Release the keys once you see the logo.
Step 3. Click "Reinstall macOS" and follow the instructions on the screen, making sure your network connection is stable and working properly.
Conclusion
The "recovery server could not be contacted" error on a Mac occurs when the device can't reach the Apple server, likely due to an internet connection issue or an Apple server status problem. To resolve this, check your internet connection and verify that the time and date on your Mac match those on the Apple server. This should allow your Mac to successfully contact the recovery server.
If the error persists, try effective methods and find a suitable one to resolve it, being cautious not to lose data in the process. If data is lost or deleted accidentally, Deep Data Recovery for Mac can quickly recover lost and deleted data.
The Recovery Server Could Not Be Contacted FAQs
When searching for the recovery server could not be contacted on Mac, people often ask what it means, how to fix it, and what are the possible causes. They also inquire about troubleshooting steps, system requirements, and how to reset the recovery server.
1. Why can my Mac recovery server not be contacted?
The error "The recovery server could not be contacted" on Mac can occur due to various reasons such as an unstable or disconnected network, Apple Server downtime, or a mismatch in system time.
2. What to do when the recovery server cannot be contacted?
To resolve the recovery server cannot be contacted error, try the following methods: Restarting the server, checking the internet connection, verifying the recovery server URL, checking for updates, running a virus scan, checking for disk space, running a system file checker, and reinstalling the recovery software. If none of these methods work, it may be necessary to seek further assistance from a technical expert.
- Fix 1. Check Mac internet connection
- Fix 2. Check the Apple server's status
- Fix 3. Synchronize the date and time
- Fix 4. Erase Mac
- Fix 5. Install from App Store
- Fix 6. Use Terminal command
- Fix 7. Create a USB bootable installer
- Fix 8. Install in Internet Recovery [Intel-based Mac only]
3. How do I reinstall the macOS Mojave recovery server could not be contacted?
To reinstall macOS Mojave when the error occurs, follow these steps: restart your Mac in Recovery Mode by holding down the power button until the Apple logo appears, then select your language and click on "Continue", select your country or region and click on "Continue", click on "Reinstall macOS" and follow the on-screen instructions to download and install macOS Mojave, and finally, select your startup disk and click on "Reinstall" to complete the process.
Step 1. If you downloaded the installer, find it in the Applications folder. If you didn't download it, go to step 3.
Step 2. Right-click the downloaded installer, and choose "Move to Trash", or use the shortcut "Command + Delete".
Step 3. Go to App Store, and install the macOS version.
Related Articles
- Windows 11 White Screen? Top 9 Ways to Fix It!
- Fix: Blue Yeti Not Recognized on Windows 10/11 [Step by Step]
- How to Change Partition to Primary Using Diskpart
- Upgrade Hard Disk to Fix 100% Disk Usage Error in Windows 10 & More Tips
- Guide on Diskpart Create FAT32 Partition | How to Create FAT32 Partition with Diskpart
To create a FAT32 partition using Diskpart, follow this guide. - Guide on Diskpart Fix Raw Partition: How to Use Diskpart to Fix Raw Partition
A Raw partition is an unrecognizable file system that makes it impossible to access the data on it. Fortunately, this article provides a detailed guide on how to fix a Raw partition using Diskpart, and also introduces a professional alternative to Diskpart for those who need a more reliable solution.