Tutorial: How to Resize External Hard Drive on Windows 10/11
External hard drives have become a necessity for tech enthusiasts and those who need a compact space to store large volumes of data. However, sometimes resizing an external hard drive is necessary to meet specific requirements, and for those less familiar with technology, the process may seem daunting, but Qiling Software is here to help.
This article provides an overview of external hard drives, explains when and why resizing may be necessary, and introduces efficient tools like Qiling Disk Master and Disk Management for resizing an external hard drive.
Resizing an external hard drive becomes necessary in various scenarios:
- 🚩When your external hard drive is running low on storage space, resizing it allows you to accommodate more data and files, ensuring you have enough room for your storage needs.
- 🚩Resizing an external hard drive allows for the creation of additional partitions, improving data organization and management efficiency.
- 🚩Resizing allows you to adapt your storage allocation to changing needs, repurpose the drive, or meet evolving storage demands as your requirements change over time.
When it comes to resizing disks, two popular options are Qiling Disk Master and Disk Management. A comparison of the two tools will help you determine which one is better suited for your needs.
| Tool | 🥇Qiling Disk Master | 🥈Disk Management |
|---|---|---|
| 🚩Duration |
|
|
| 💻Complexity |
|
|
| 💡Pros |
|
|
| 🔨Cons |
|
|
Qiling Disk Master is a better choice for resizing external hard drives as it is easier to use and has fewer errors compared to other disk management tools.
Resize External Hard Drive on Windows via Qiling Disk Master
Qiling Disk Master is a user-friendly software that makes resizing external hard disks on Windows easier, compatible with multiple Windows versions, and allows extending drives and shrinking their volume, adjusting the external hard drive size safely without losing any data.
Guide 1. Extend Partitions on External Hard Drives
Step 1. Shrink partition to free up space to extend partition.
If the hard drive has enough unallocated space to extend the target partition, jump to Step 2, and continue. If not, free up space by deleting unnecessary files, extending other partitions, or removing the operating system and reinstalling it to free up space. Then, proceed.
- At the Partition Manager section, right-click on a partition next to the target partition and select "Resize/Move" to change the size of the target partition.
- Drag the partition ends to free up space, leaving enough unallocated space behind the target partition, then click "Proceed".
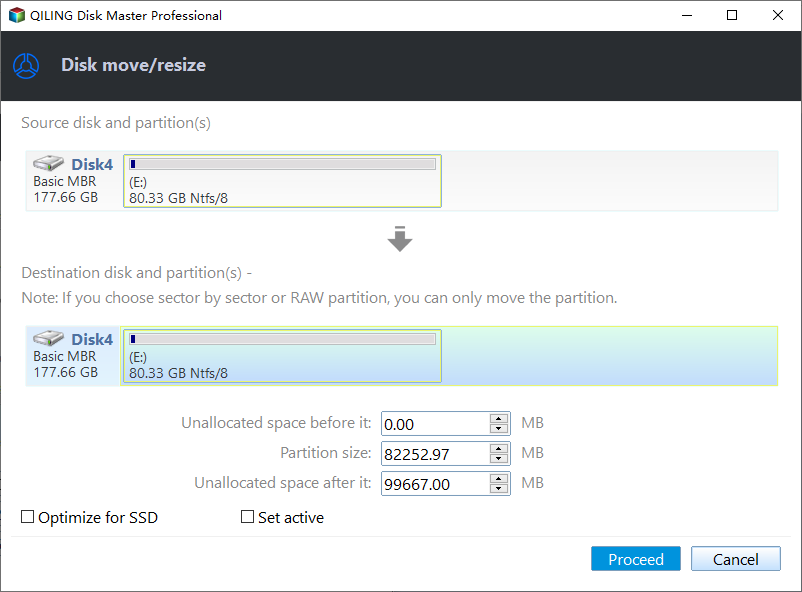
Step 2. Extend the target partition.
Right-To extend the target partition, click on it in the list, then select the "Resize/Move" option.

To extend the target partition, simply drag the partition handle into the unallocated space, effectively increasing the partition size. This action allows you to utilize the available unallocated space for the partition, making it larger.
Step 3. Keep all changes.
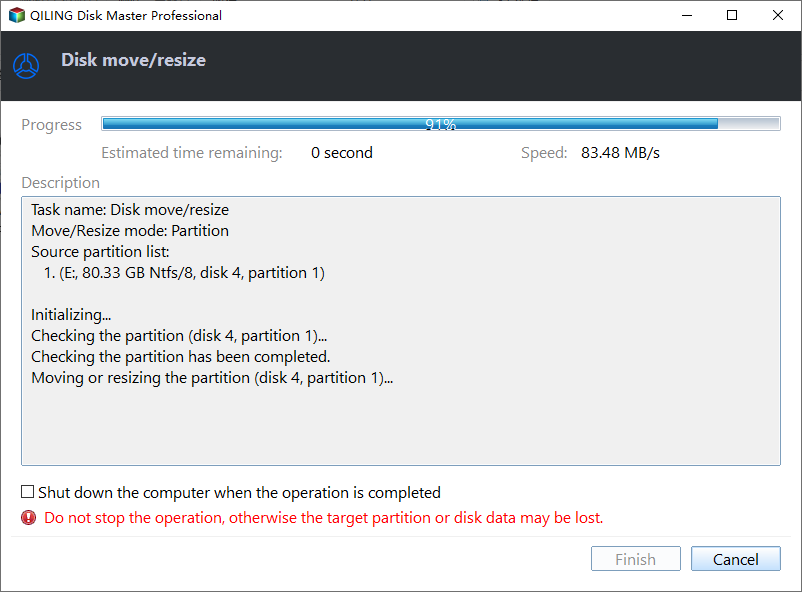
Click the "Proceed" button to keep all changes.
Guide 2. Shrink Volumes on External Hard Drives
Step 1: Locate and select target partition to shrink
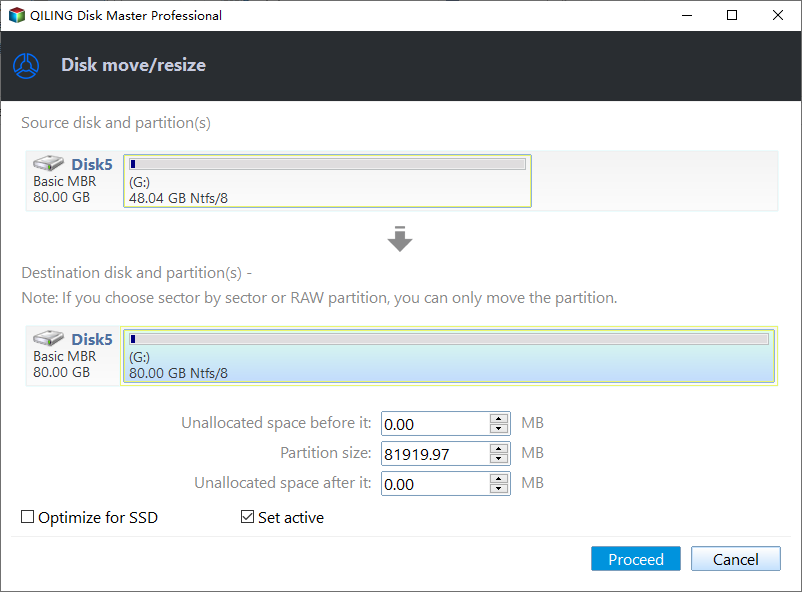
To shrink a partition, go to the Partition Manager section, right-click on the partition you want to shrink, and select "Resize/Move".
Step 2: Adjust to shrink partition
To shrink a partition, use your mouse to drag the end of the target partition to the desired size. This will reduce the partition space.
You can also adjust the partition size box to shrink the target partition. Once done.
Step 3: Execute operation
Click the "Proceed" button to keep all changes.
Read the links below, and you can get more information on shrinking a volume:
Qiling Disk Master is your best choice to shrink or extend volumes on your external hard drive because it offers a reliable and efficient solution. With its user-friendly interface, you can easily manage your disk space, making it a convenient option for those who need to free up space on their external hard drive.
- Intuitive Interface: Qiling Disk Master offers a user-friendly interface that simplifies the resizing process, making it easy for users to navigate and complete tasks without confusion.
- Partitioning: This utility simplifies the process of resizing partitions on your external hard drive, making it easy to adapt to changing storage needs.
- Data Protection: Qiling Disk Master uses advanced algorithms to safeguard data during resizing, preventing damage and loss.
- Fast and Efficient: Qiling Disk Master efficiently performs disk resizing tasks with its optimized algorithms, saving time.
- Preview Functionality: You can preview the resizing operation to see the potential outcome before making any changes, ensuring you are satisfied with the results.
Download this tool today and enjoy a hassle-free experience with its user-friendly interface and powerful features, making complicated resizing procedures a thing of the past.
Resize External Hard Drive On Windows Via Disk Management
Disk Management, a built-in Windows utility, is a valuable tool for resizing external hard drives. It offers several functions to effectively resize storage devices, allowing users to extend or shrink the volume by allocating unallocated space or shrinking available capacity. With Disk Management, the file system is resized appropriately, ensuring data is preserved, making it easy to store files.
Step 1: Open Disk Management
To format an external hard drive on Windows, connect the drive to your computer and type "Disk Management" in the search box. This will open the Disk Management utility, where you can select "Create and Format hard disk partitions" to initiate the formatting process.

Step 2: Locate the External Hard Drive
Here you'll see the connected storage devices and find the external hard drive from the list, noting the available space to determine how much formatting it requires.
Step 3: Shrink or Extend the Volume
To resize a disk volume, select the "extended volume" or "shrink volume" option based on your needs. If you need more space, choose "extend volume" to increase the available space. If you want to free up space, select "shrink volume" to reduce the disk's capacity. This will allocate the saved space to another partition or make it available for use.
Sometimes, you may meet errors at this step; if so, click the links to fix them:
Step 4: Confirm the Resize Operation
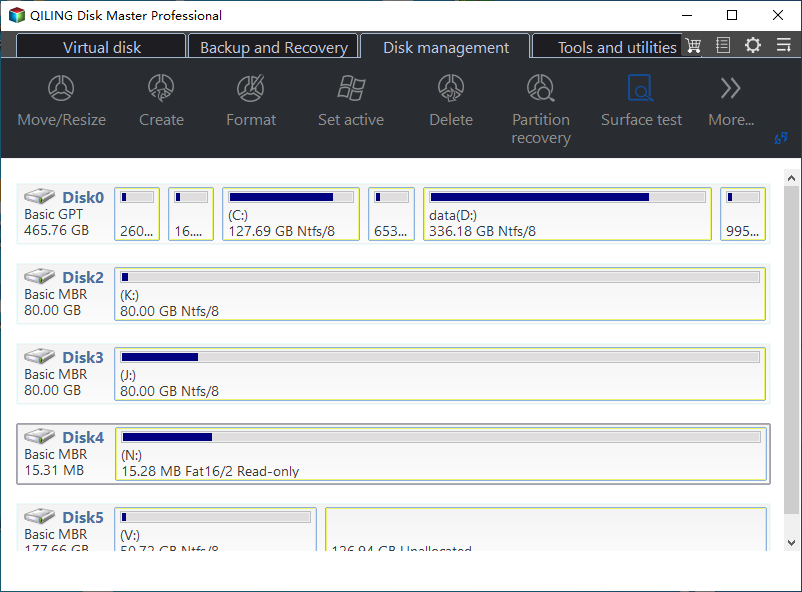
Once you've completed the process, disk management will display a new graphical representation of the external hard drive's partitions. You can then safely disconnect the hard drive from your computer and verify that the external hard drive size has been successfully adjusted by checking its properties.
Qiling Disk Master provides a seamless resizing experience, avoiding the "Extend Volume Grayed Out" error in Disk Management, and is ideal for efficiently resizing external hard drives with its intuitive interface and powerful features.
Qiling Disk Master provides a portable edition of the tool, allowing users to use it without installing it on their PC. For more information, users can visit the provided page.

Top 4 Best Partition Resizer Portable Review: Pros and Cons
This article will explore the pros and cons of four top-rated portable partition resizer tools, providing a comprehensive comparison to help readers determine the most suitable option for their needs.
Conclusion
Whether you choose to resize your external hard drive using Disk Management or Qiling Disk Master, both methods offer user-friendly solutions for optimizing your storage capacity, providing a convenient way to free up space and make the most of your device's capabilities.
Considering the intuitive interface, advanced features, and efficient performance, Qiling Disk Master is the top choice for resizing external hard drives on Windows, offering a hassle-free experience with its data protection mechanisms, fast operation, and preview functionality. This tool can also help with other tasks.
Also, share this article with your friends if you have found it useful.
How to Resize External Hard Drive FAQs
Here are some commonly asked questions regarding resizing external hard drives. You can consult them for further assistance.
1. Can we resize the external hard drive for free?
You can resize an external hard drive for free using Disk Management on Windows.
- To connect your external hard drive to your Windows computer, start by locating the USB port on your computer and the external hard drive. Ensure that the external hard drive is properly plugged into the USB port, and you may hear a slight click as it secures in place. Once connected, your computer should automatically recognize the external hard drive and display it in File Explorer, allowing you to access and transfer files between your computer and the external hard drive.
- To access Disk Management, press the Windows key, type 'Disk Management,' and select 'Create and format hard disk partitions.'
- To resize an external hard drive, first select the drive you want to resize from the list of available drives. Then, choose whether you want to increase or decrease the drive's capacity by selecting the "Enlarge" or "Shrink" option.
To resize the partition or volume, follow the steps below. Ensure the external hard drive is properly connected and powered on. Open the Disk Utility app on your computer and select the external hard drive.
2. Why can't I resize my external hard drive?
Resizing an external hard drive can be hindered by several common reasons, including insufficient unallocated space, unsupported file systems, disk errors or corruption, and hardware limitations.
If you're still having trouble after checking the factors I mentioned, it might be helpful to reach out to technical support or consult with an expert for further assistance.
3. How do I shrink my external hard drive?
Here is how you can shrink your external hard drive:
1. Connect your external hard drive to your Windows computer.
2. To create a new partition on your computer, open the Disk Management tool and select the option to create and format a new hard disk partition. This will allow you to set up a new partition on your hard drive, which can be used to store files, programs, or other data. Simply follow the prompts to choose the size and location of the new partition, and the Disk Management tool will handle the formatting and setup process for you.
3. Locate your external hard drive in Disk Management, select 'Shrink Volume,' and follow the on-screen instructions to resize the drive.
4. Enter the space you want to reduce from the total size and follow the prompts to complete the procedure.
Related Articles
- [Fixed] Hard Drive or C Drive Full for No Reason in Windows 10/8/7
- How to Install Windows 11 from USB Step by Step
- Fix Genshin Impact Insufficient Storage Space | Best Ways 🏆
If you're planning to download and play Genshin Impact, you might encounter the 'insufficient storage space Genshin Impact' error on your device, whether it's a PC, Android, or iPhone. To resolve this issue, you can refer to this post for guidance on how to fix it. - What Is the Best MBR to GPT Convert Tool? Your Checklist Here
If you need to convert MBR to GPT, follow this easy guide to find a reliable MBR to GPT convert tool that works for your storage device. We have included a table comparison of pros and cons for each of these features, making it simple to select the best tool for your needs. - How to Repair Invalid Dynamic Disk With Ease
If you encounter an invalid dynamic disk error in Windows 10/8/7, you can repair it without data loss using the Windows disk management tool. This tool provides a simple and direct way to fix the issue without destroying your data, allowing you to convert the invalid dynamic disk to a basic disk. - How to Repair MBR on Windows Server (Two Quick Ways)
Qiling Partition Master enables users to repair the Master Boot Record (MBR) of a Windows server with minimal hassle, streamlining the process for system administrators and IT professionals.