How to Fix SSD Shows Up in BIOS But Not Windows Issue 💡
Many people are upgrading to solid-state drives (SSDs) due to their advantages over traditional magnetic hard drives. However, a common issue with SSDs is that the Windows operating system may not recognize them, even if they are properly connected to the computer and recognized by the BIOS. This can result in the SSD not appearing in this PC, File Explorer, or Disk Management, which is the problem that this article aims to address.
- Fix 1. Initialize SSD
- Fix 2. Upgrade Storage Controller Drivers
- Fix 3. Assign New Drive Letter to SSD
- Fix 4. Format SSD to the Correct File System
- Fix 5. Resolve Memory Problems
Fix SSD Shows Up in BIOS But Not Windows - 5 Efficient Ways
If a drive is detected in the BIOS but not in the OS, it could be due to a driver compatibility issue. This can be resolved by updating the OS, reinstalling the driver, or using a different driver. Additionally, checking for any hardware issues or running a disk check can also help to identify the problem.
Fix 1. Initialize SSD
After getting a new SSD, you'll need to initialize it before using it with Windows 10. If not initialized, the SSD may appear in BIOS but not in Windows, making it inaccessible through File Explorer or Disk Management utilities. Qiling Disk Master can initialize the SSD, making it visible in Windows, and is a more user-friendly option compared to built-in tools, allowing for efficient initialization of new SSDs.
Step 1. Open Qiling Disk Master and got to Partition Manager.
Step 2. To initialize the target disk, right-click it and select "Initialize to MBR" or "Initialize to GPT", then click "Proceed" to confirm the changes.

How to Fix BIOS Recognizes SSD But Won't Boot
If your system won't boot despite the BIOS recognizing your SSD, there are several effective fixes and solutions to resolve this issue. First, ensure the SSD is properly seated in the motherboard and connected to the correct port.
Fix 2. Upgrade Storage Controller Drivers
If Windows doesn't detect your SSD, it's likely that your drivers are outdated, so updating the storage controller driver is the first step to resolve the issue. To do this, you'll need to follow these steps:
Step 1. Select and access Device Manager from the Start screen.
Step 2. Locate and expand the storage controller group.
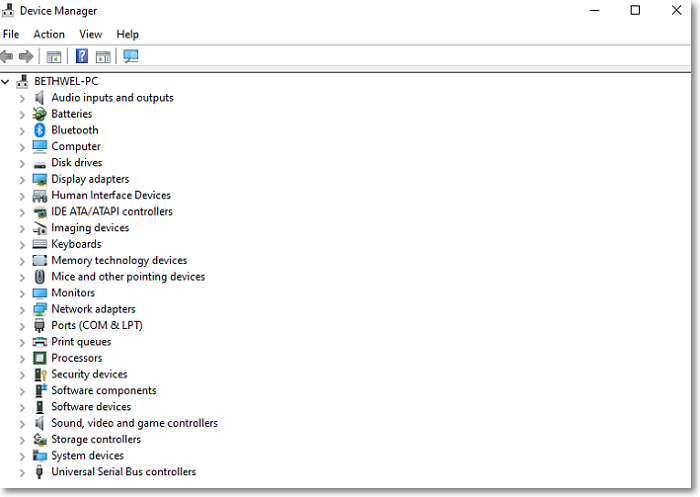
Step 3. To update the storage controller, right-click on the device and select Update Driver from the context menu. This will initiate the driver update process, ensuring the storage controller is functioning properly and efficiently.
Step 4. When searching for the latest driver software, select "Search automatically."
Solved - Windows Not Booting After Installing New SSD
If your new SSD doesn't boot Windows after installation, you can troubleshoot the issue by checking the SSD's power connection, ensuring the SSD is properly installed in the system, and verifying that the SSD is recognized by the system. You can also try resetting the SSD's firmware or updating the system's BIOS.
Fix 3. Assign New Drive Letter to SSD
If Windows 10 has trouble recognizing an SSD, it's often due to conflicting or disappearing drive letters. Changing or assigning a new drive letter to the SSD can quickly resolve the issue. For those who are inexperienced, Qiling Disk Master is a reliable choice that can easily change or assign a new drive letter to the target SSD, solving the problem.
Step 1. Open Qiling Disk Master, right-click the target partition, and select "Change Drive Letter".
Step 2. To create a new partition on your computer, open the Disk Management window. In the new window, click the down arrow and choose a drive letter for the partition from the drop-down menu.
Step 3. Waiting to change the drive letter of the selected partition.
If you're an experienced user, you can refer to the link to learn how to use Diskpart to assign drive letters.
You can initialize your SSD to either MBR (Master Boot Record) or GPT (GUID Partition Table) format, and if you're unsure, you can refer to the provided links for more information on the differences and considerations between the two.
Fix 4. Format SSD to the Correct File System
To resolve the issue of the target SSD showing up in the BIOS but not in Windows, you can format the SSD to a compatible file system using Qiling Disk Master. This utility can format a RAW SSD or other file systems to a format that is compatible with Windows. This can help remove the error and allow the SSD to be recognized and used by Windows.
Step 1. Run Qiling Disk Master, right-click the hard drive partition you intend to format and choose "Format".
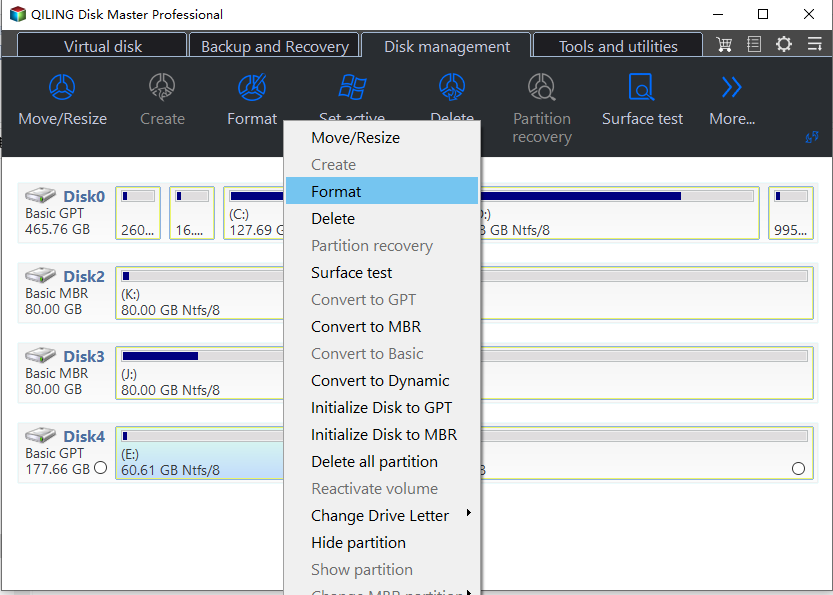
Step 2. Set the partition label, file system, and cluster size in the new window, then click "OK" to format the partition.
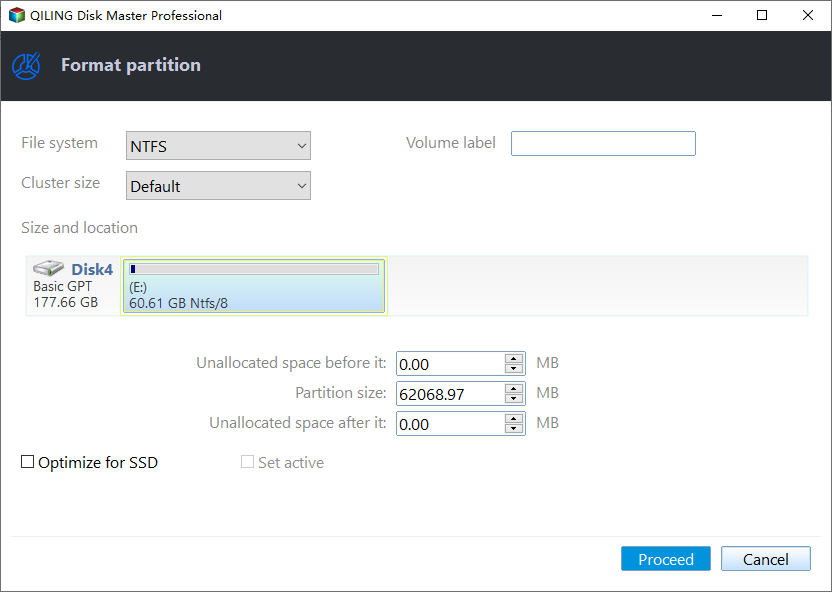
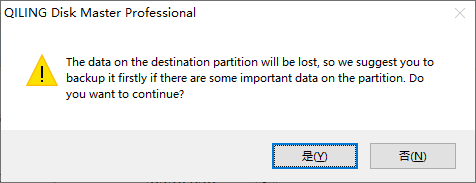
Step 3. Click the "Proceed" to start formatting the partition on your hard drive.
Step 4. To update the operating system, click on the "Update & Security" tab, then on the "Windows Update" tab, and finally on the "Check for updates" button. If there are any updates available, Windows will download and install them.
You may also like the following:
Fix 5. Resolve Memory Problems
Windows memory limitations may also limit SSD recognition. If your RAM fails, Windows Memory Diagnostic helps you fix it. To access the Windows Memory Diagnostic Tool, follow the instructions below.
Step 1. When you get to Windows Memory Diagnostic from the start screen, right-click on it and select Run as administrator.
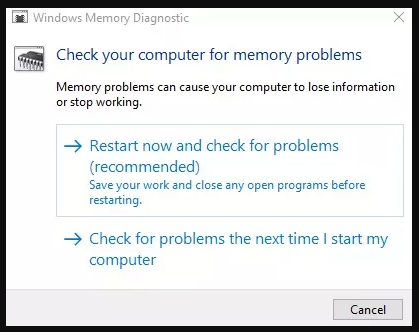
Step 2. The Windows memory diagnostic test is currently running on your computer. It will restart automatically after the test is completed, and the test results will be displayed on your PC screen.
After the test results appear, you can verify if Windows has recognized your SSD by checking Disk Management or File Explorer. If the SSD is not recognized, you can try the fixes mentioned earlier to resolve the issue. These fixes can help more users troubleshoot and resolve the problem.
Why SSD Shows Up in BIOS But Not Windows
Here are the main reasons why an SSD may appear in BIOS but not be recognized in Windows:
- ⏱️The driver is outdated.
- 💻SSD is not pushed and inserted properly.
- 🧰It is a new SSD that has not been initialized.
- 🧩The drive letter for the SSD partition is missing.
- 📱The data cable connection was interrupted.
- 🪪Incompatible file system.
- 🔍SSD may get damaged.
Related Article:
If your SSD (Solid-State Drive) is not showing up in Disk Management on Windows, there are several troubleshooting steps you can take. First, ensure that the SSD is properly connected to the motherboard and that the power supply is sufficient.
Users who encounter the issue of their SSD not showing up in Disk Management may find solutions in this article, which offers four efficient fixes to resolve the problem.
If you're experiencing issues with your phone, consider trying a quick fix before looking for a more permanent solution. This might involve restarting your phone, checking for software updates, or clearing your cache and data.
- Take out the SSD and insert it (on another computer) again.
- Restart your PC.
However, if neither of them works, continue to read and learn the professional tutorial on how to fix the "SSD shows up in BIOS but not Windows" error.
Conclusion
Despite growing adoption, solid-state drives (SSDs) still have issues, such as Windows 10/11 not recognizing them. However, the methods mentioned can often resolve these problems. It's also worth noting that if your SSD is a brand new hard drive, you'll need to initialize it to either MBR or GPT format before it can be used. If this article helps you resolve your issue, feel free to share it with others who may benefit from the information.
SSD Shows Up in BIOS But Not in Windows FAQs
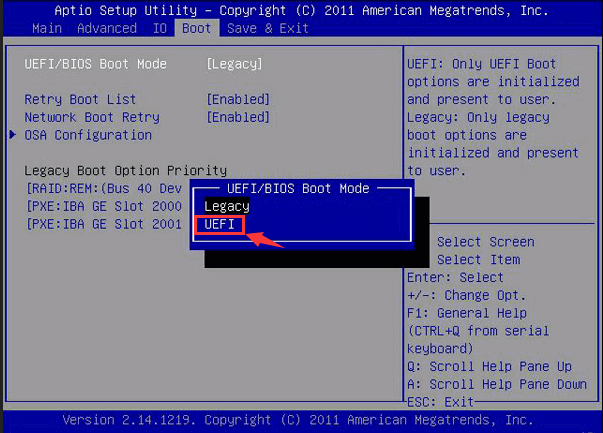
The issue of an SSD showing up in BIOS but not in Windows, Device Manager, or Disk Management can be caused by various factors. Some possible reasons include incorrect SATA port settings, faulty SSD, loose connections, or outdated BIOS. Additionally, some users have reported that their SSDs were not recognized by Windows after a BIOS update, while others have experienced issues due to a mismatch between the SSD's firmware version and the BIOS version.
1. Why is my M.2 in BIOS but not Windows?
M.2 drive appears in BIOS but not Windows due to file format incompatibility, uninitialized status, outdated driver, or lack of drive letter. Resolution involves formatting the M.2 SSD, initializing the M.2 drive, assigning a drive letter, or updating the driver to ensure compatibility and proper functioning.
2. Why is my hard disk detected in BIOS but not booting?
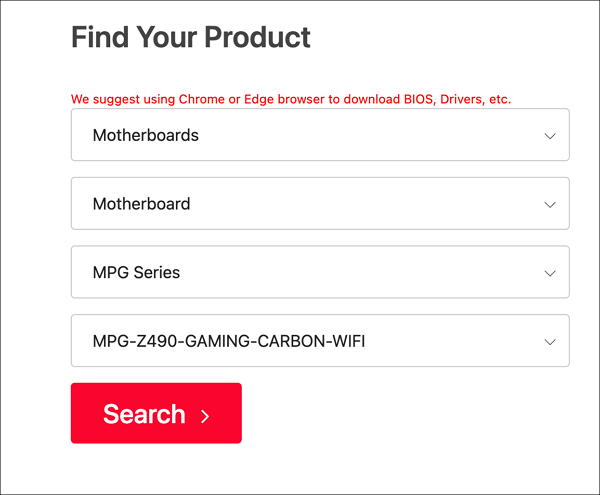
The error can be resolved by resetting the computer's BIOS settings, updating the BIOS to the latest version, or reinstalling Windows. However, updating the BIOS can be a complex process that may damage the motherboard, so it's recommended to read the manual carefully before attempting it.
3. How can the "WD SSD not detected in BIOS" error be fixed?
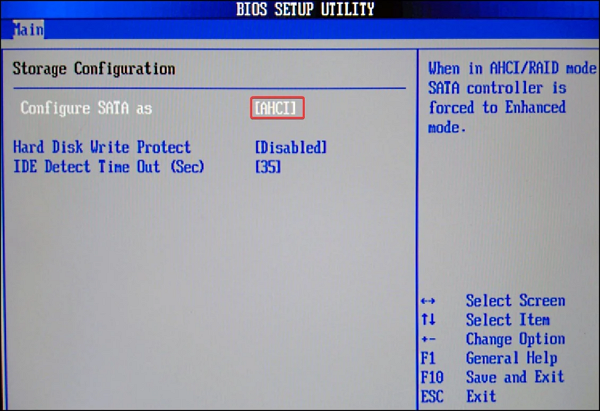
The BIOS may not be able to detect a WD SSD due to an issue with the SATA driver or BIOS settings. To resolve this, try updating the SATA driver or adjusting the BIOS settings to ensure the SSD is recognized.
- To troubleshoot the issue, check the SSD hardware and its corresponding ports to ensure they are functioning correctly. This includes verifying the SSD is properly connected to the motherboard or other relevant hardware, and that the ports are not damaged or malfunctioning.
- Configure the SATA controller settings in BIOS.
- To keep your device running smoothly, make sure to regularly update your device drivers, particularly focusing on SSD drivers and motherboard drivers, as these components play a crucial role in the overall performance and stability of your system.
Related Articles
- Fixed: The Disk Is Write Protected Windows 11
- How Do I Format Hard Drive on Windows 11? 2024 Complete Guide
- How Can I Fix Windows 11 NVMe Slow Error 2024
- How to Fix "Steam Not Enough Disk Space" Error [Updated]
- What to Do When the Disk Is Write Protected in Windows 10
You may get an error that says the disk is write protected when formatting a USB or SD card in Windows 10/11. Then, how to remove write protection from a disk? Read on and you'll find several useful solutions in this post. - I Need Help: How to View the User Password in Windows 10
Are you struggling to recall a forgotten Windows 10 user password and want to know how to view the user password in Windows 10? This post provides you the 2023 newest and most comprehensive answer.