How Can I Fix Windows 11 NVMe Slow Error 2023
NVMe (Non-Volatile Memory Express) is a storage interface for high-performance SSDs, leveraging PCIe to provide faster data transfer rates and reduced latency. NVMe SSDs offer significant speed improvements, enabling quicker boot times, file transfers, and application loading. To optimize their performance on Windows 11 devices, Qiling provides insights and solutions to address any issues.
The slowdown of NVMe SSDs on Windows 11 can be attributed to several factors, including users not 4K aligning their NVMe, poor health, changes in system settings, outdated or incompatible drivers, or software conflicts. These issues can impact the performance of NVMe SSDs, leading to a noticeable slowdown.
7 Fixes for Windows 11 NVMe Slow
Get ready to tackle the Windows 11 NVMe slow error without any challenges! We've got seven fixes with step-by-step instructions to help you resolve this issue. Let's get started!
Fix 1. 4K Align NVMe SSD
Qiling Disk Master is a robust tool that offers 4K alignment for NVMe SSDs, a solution that can significantly improve their performance. By running the 4K alignment process, the software optimizes the partition layout and enhances the read and write speeds of the SSD, making it a convenient choice for users seeking to enhance their NVMe SSD performance, including those running Windows 11.
Follow the steps below.
Step 1. Go to "Disk management" and choose "4K Alignment".
Step 2. Select the disk you want to align, then click the "Proceed" button.
Typically, this fix can help you efficiently improve SSD performance on Windows 11/10.
Fix 2. Download NVMe Driver
The NVMe driver, typically developed by manufacturers like Samsung, is software designed to optimize the performance of their SSDs. Installing the Samsung NVMe driver can enhance performance compared to previous versions, making it a valuable software for users. To utilize this software, the process involves downloading and installing it, which can be done by following a series of steps.
- Notice:
- To install the Samsung driver, download the installation files from the official Samsung website. Before proceeding, access the BIOS settings and modify them by going to BIOS > System Configuration > SATA Configuration > Choose AHCI, as failure to do so may result in driver installation failure.
The Samsung 970 EVO Plus and 970 EVO M.2 NVMe SSDs may experience slow write speeds, particularly when the drive is nearly full.
Step 1. Decompress the files and open them.
Step 2. Click on the "Next" button.
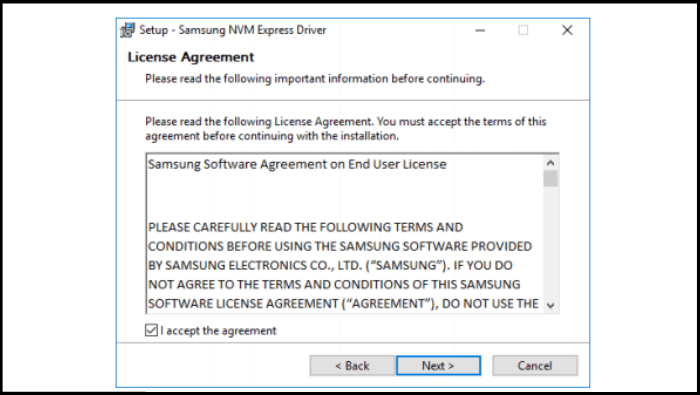
Step 3. Carefully read the License Agreement, select "I accept the agreement," and click "Next."
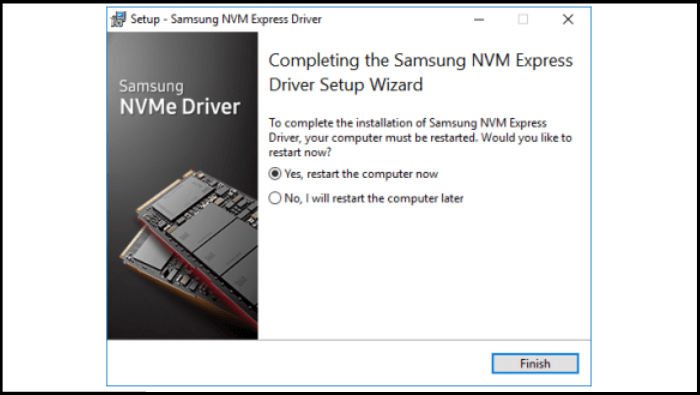
Step 4. The driver installation wizard will start, and if prompted, choose to restart the computer now or later.
Step 5. To confirm a successful installation of the Samsung NVMe Controller, navigate to the Device Manager, type "Device Manager" in the search box of the taskbar, and select the "Storage Controllers" option. If the Samsung NVMe Controller is listed, the installation was successful.
To fix Samsung SSD slow write speed on Windows 10/8/7, try updating the Samsung Magician software, disabling the Windows Search service, and checking for firmware updates. Additionally, consider disabling the Windows Disk Cleanup service, and checking for any disk errors using the built-in Check Disk utility.
If you're experiencing slow write speeds on your Samsung SSD, don't worry - there are simple and easy-to-perform solutions to help you resolve the issue.
Fix 3. Update Windows 11 KB5007262
Microsoft has released a new cumulative update, KB5007262, for Windows 11, which improves disk performance, including NVMe, SSD, and other hard disks, potentially resolving slow performance issues.
Follow the steps below:
Step 1. To open the settings on Windows 11, press the "Windows+I" buttons simultaneously, which will open the settings in one go.
Step 2. Navigate to "Check for Updates" to see if KB5007262 is available, and if so, click "Download now." If not, download it manually from Microsoft's official website.
Step 3. Once installation completes, click "Restart now."
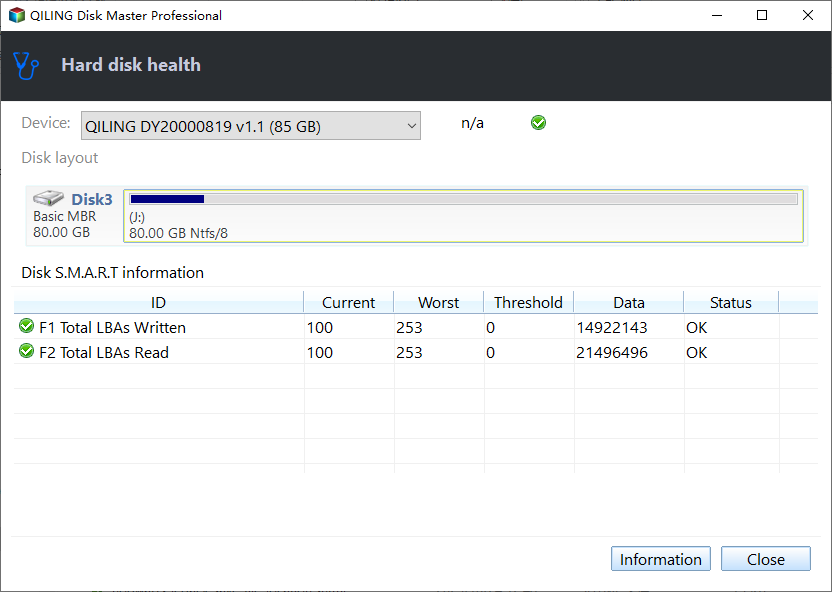
Fix 4. Check NVMe Health Status
If the performance issue persists after trying the above solutions, you should check the NVMe SSD's health status. Qiling Disk Master is a powerful tool that can help you analyze and diagnose the health of your SSD, ensuring optimal performance, with its comprehensive features and intuitive interface.
To assess the health of your NVMe SSD, use a reliable software that can monitor its performance and provide detailed information about its health. Follow the steps below to get started.
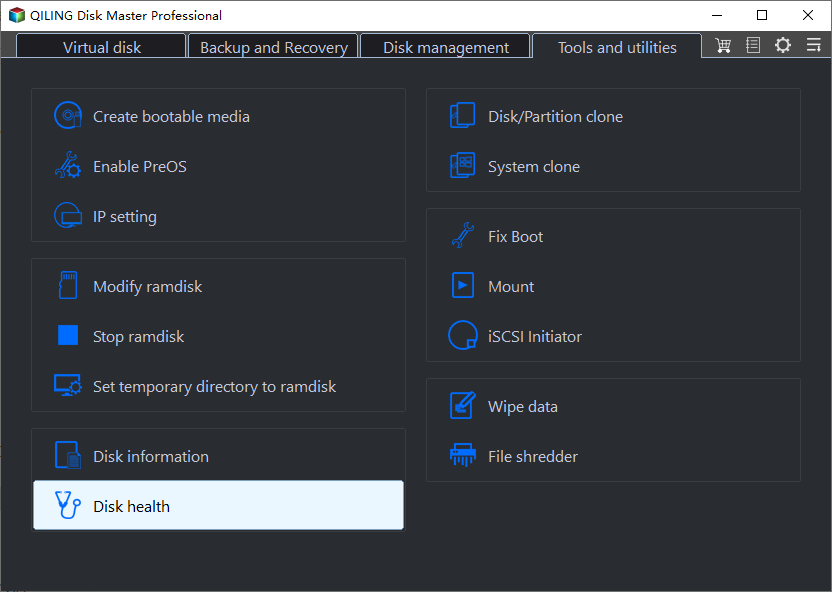
Step 1. Launch Qiling Disk Master and click the blue arrow to activate the "Disk Health" feature, which can be found under the "Tools and utilities" tab page.
Step 2. To check the health condition of your disk, select the target disk and click the "Refresh" button. This shows you the current status of your disk.
Here, we also added a video tutorial, and you can follow to learn even more clearly on testing and checking the health state of your NVMe SSD.
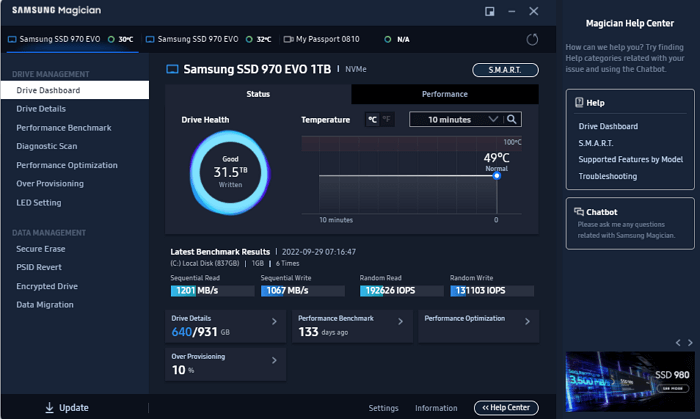
Fix 5. Test NVMe Performance (Speed)
To assess the performance of your NVMe SSD, use Qiling Disk Master's DiskMark feature for a speed test, which can help identify potential issues and guide you toward a solution.
Please follow these steps:
Step 1. Launch Qiling Disk Master, click the download button to activate the "Surface test" feature under the "Disk management" tab.

Step 2. Select the target drive, test data, and block size from the drop-down menus to configure the test settings.
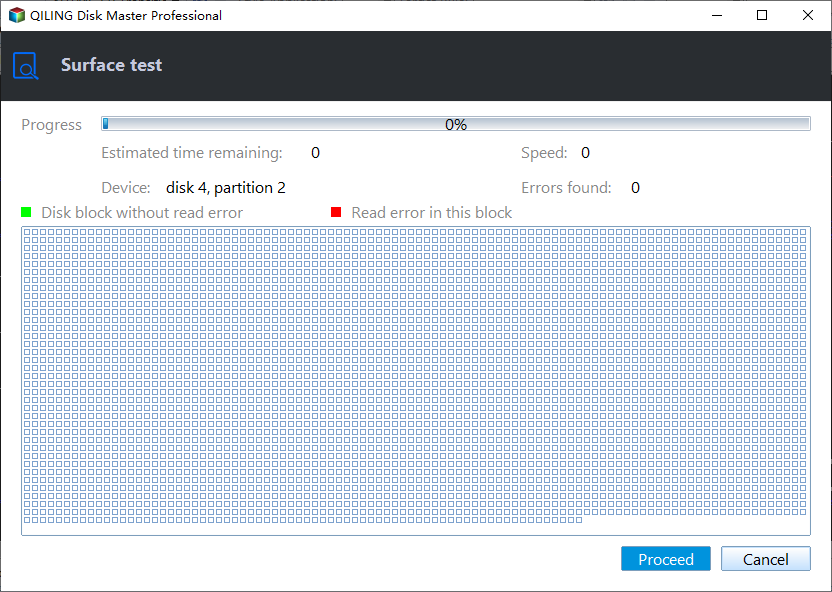
Step 3. Once everything is configured, click "Proceed" to begin the disk test, which will display sequential read speed, I/O, and Delay data.

Fix 6. Transfer Windows 11 to Faster and Lager SSD
Qiling Disk Master offers a convenient "Migrate OS" feature that simplifies the process of moving your operating system to a new SSD, allowing you to migrate all data without reinstalling Windows OS and applications. This feature saves time and makes the process easier.
Before moving to the operational steps, it's essential to note some key points. These include acknowledging the significance of the task, being aware of potential challenges, and having a clear understanding of the expected outcomes.
- Prepare your SSD by correctly installing it on your PC.
- To ensure your data is safe, create a backup of your important files and save it to an external disk, such as a USB drive or an external hard drive, if needed. This will protect your data from being lost due to hardware failure, software corruption, or other unforeseen events.
- Migrate Windows to your SSD using Qiling Disk Master.
- Create the Windows bootable on the new SSD, allowing your PC to start up successfully.
Follow the steps below to operate Qiling Disk Master and successfully transfer Windows 11 to a faster and larger SSD.
- Notice:
- When migrating your operating system to a new SSD or HDD, keep in mind that any existing data on the target disk will be deleted. If the target disk doesn't have enough unallocated space, it will be completely erased. So, it's a good idea to back up any important files to an external hard drive before proceeding.
Step 1. To clone and migrate your OS, select "Clone" from the left menu, then choose "Migrate OS" and click "Next" to proceed.
Step 2. Select the desired target disk to clone the data to. Click "Next."
Step 3. Carefully review the warning message and click "Yes" to confirm. Please note that this action will result in the deletion of data and partitions on the target disk. Ensure that you have backed up any important data beforehand.
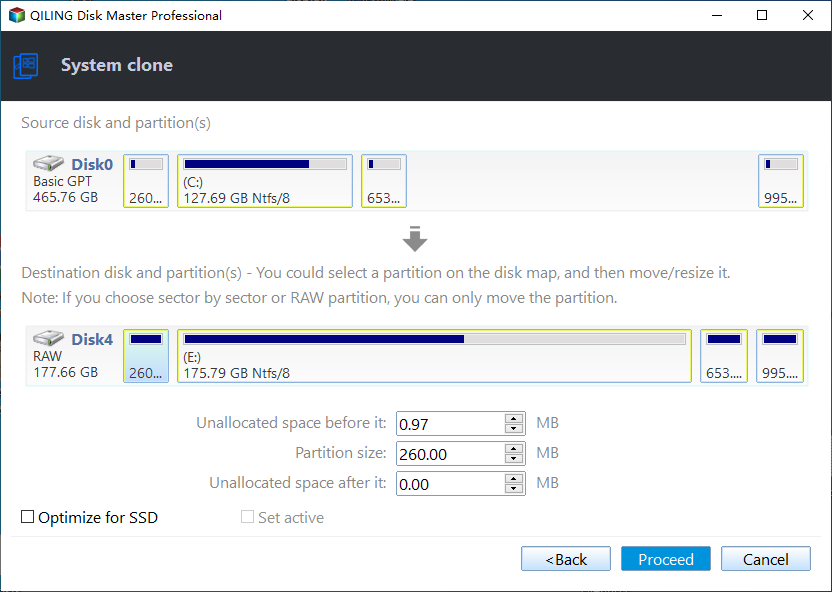
Step 4. Preview the target disk layout, customize if needed, then click "Start" to initiate OS migration.
Fix 7. Wipe NVMe SSD on Windows 11
When you need to securely erase data from an NVMe SSD on Windows 11, Qiling Disk Master offers a reliable solution. You can use its "Wipe" feature to remove all data from your NVMe SSD, ensuring it cannot be recovered. Before doing so, it's recommended to create a backup to preserve your data, and then proceed with the wiping process.
To securely wipe your NVMe SSD using Qiling Disk Master, download and install the software on your computer, then launch it and select the SSD you want to wipe. Choose the "Secure Wipe" option, select the number of passes you want to perform (e.
Step 1. Download and install this tool on your PC, then navigate to the Partition Manager section.
Step 2. Right-click the SSD and choose "Wipe."
Step 3. To complete the factory reset on your device, follow the on-screen instructions in the video and finish the wipe process.
💡Note: Before wiping an SSD, please carefully select the correct one you want to erase. Once erased, you won't be able to recover data using any data recovery software. Therefore, it's essential to back up your important data beforehand and choose the right SSD to wipe.
Why Windows 11 NVMe Gets Slow
It's frustrating when Windows 11 NVMe SSD performance is sluggish, and various factors can contribute to this slowdown, making it essential to identify and address the issue for optimal performance.
Possible Reasons:
- Users don't 4K align NVMe: Improper partition alignment, especially the lack of 4K alignment, can negatively impact NVMe SSD performance. Correctly aligning partitions, however, can improve data transfer efficiency.
- Poor health: Over time, NVMe SSDs can experience wear and tear, affecting their overall health and potentially leading to a decline in performance. Regularly monitoring the health of your NVMe SSD is crucial for optimal performance.
- Windows Update: Windows 11 updates may cause compatibility issues or bugs that affect NVMe SSD performance, but keeping your system up to date with the latest updates can help mitigate these problems.
- NVMe is too small or old: Using an older NVMe SSD with slower performance specifications or insufficient storage capacity can lead to decreased overall system performance.
- Windows 11 OS slows down the NVMe: To improve NVMe performance on Windows 11, consider updating your operating system to the latest version, disabling Windows Search, and enabling the "Turn off Windows Search Indexer" feature. Additionally, ensure that your NVMe drive is properly configured in the BIOS or UEFI settings, and consider updating your NVMe driver to the latest version. You can also try running a disk cleanup, disk defragmentation, and disk error checking to ensure your drive is in good condition.
If you found this information helpful, share this article with others who may benefit from it to understand and fix the issue. By spreading awareness, we can empower users to address performance issues effectively and ensure optimal NVMe SSD performance.
Conclusion
To overcome the performance issue of NVMe on Windows 11, seven different fixes are presented with 100% accurate instructions to simplify the process. Understanding the possible causes of NVMe SSD slowdown, including improper partition alignment, poor health, Windows updates, using a small or old NVMe SSD, and the Windows 11 operating system's impact, is crucial. By recognizing these factors, you can take the essential steps to optimize your NVMe SSD performance and overcome the issue.
You May Also Like:
Windows 11 NVMe Slow FAQs
Let's learn more through the below frequently asked questions if you have any queries.
1. Why do NVMe SSDs perform so slowly on Windows 11?
NVMe SSDs may perform slowly on Windows 11 due to issues such as improper partition alignment, poor SSD health, outdated drivers, software conflicts, or specific Windows 11 settings. Identifying the root cause is key to implementing the correct solution.
2. What is the normal speed range of an NVMe SSD?
NVMe SSDs offer significantly faster speeds than traditional storage options like HDDs or SATA SSDs, with speeds ranging from a few hundred megabytes per second to several gigabytes per second, outperforming SATA III's 600MB/s maximum throughput.
3. How can I fix NVMe SSD's slow performance on Windows 11?
To fix NVMe SSD's slow performance on Windows 11, try solutions like 4K aligning the SSD, updating Windows, monitoring SSD health, installing drivers, optimizing Windows settings, or transferring the OS to a faster and larger SSD, depending on the cause of the slowdown.
Related Articles
- How to Fix Dell No Bootable Devices Found [2023 Full Guide]
- [New] How to Add Unallocated Space to C Drive in Windows 10
- How to Format Maxtor External Hard Drive [2023 Guide]
- How to Make a Password Reset Disk for Another Computer 🔥
- Does SSD Get Slower When Full? Easy Tricks to Fix SSD Slowing Down
SSDs can become slower over time, and one possible reason is that they can become fragmented, leading to slower performance. However, being full does not directly cause an SSD to slow down. It's still worth checking the disk's health to rule out any potential issues. Checking the disk's health can be done through built-in tools or third-party software, and it's a good idea to do so periodically to ensure the SSD is running smoothly. - Does SSD Speed Matter for Gaming? Guide to Select an SSD for Optimizing Gaming Performance
The speed of a Solid-State Drive (SSD) matters for gaming, as it can significantly impact the overall gaming experience. A fast SSD can load games quickly, reduce loading times, and provide a smoother gaming experience. Therefore, when selecting a SSD for a gaming PC, choosing one with a high speed, such as a PCIe NVMe SSD, is recommended to ensure optimal performance.