macOS Monterey Update Not Found | How to Solve Monterey Update Issue
If you're a Mac user, you might encounter the issue of your Mac being updated to the latest macOS version, including the problem of a macOS Monterey update not being found. However, don't worry, as there are effective methods to fix this issue, allowing you to resolve the problem and get your Mac up to date.
| Workable Solutions | Step-by-step Troubleshooting |
|---|---|
| 1. Check If Your Mac Is Available for macOS Monterey | Verify device compatibility, and then download macOS Monterey from the Apple Store...Full steps |
| 2. Shutdown and Restart Mac Device to Fix the Issue | Hit the Apple logo in the left-side upper corner, and click on the "Restart" button...Full steps |
| 3. Search and Download macOS Monterey in App Store | Open the Application folder, drag and drop the "Install macOS Monterey" application to Trash...Full steps |
| 4. Check macOS Date and Time Settings on Mac | Select the Apple menu, and click on System Preferences. Hit the "Sharing" button...Full steps |
| Other Methods | Hit the Wi-Fi from the menu bar, and toggle Wi-Fi off. Wait for another 10-15 seconds to reconnect...Full steps |
Why macOS Monterey Update Not Found
Apple regularly releases macOS updates to enhance Mac's security, stability, and performance, making a smooth upgrade from Monterey to macOS Ventura a desirable option for Mac users, who can take advantage of the new features and improvements.
Users may not be able to update their Macs to the latest version of macOS, such as macOS Monterey, due to various issues, including problems during the updating process, like the "macOS Monterey update not found" error, which can prevent a hassle-free update.
- Unstable internet connection
- The macOS version is outdated in setting up
- Your MacBook needs more storage to update to the newest macOS Monterey.
- Mac can't spot any updates.
The best first-To prevent further data loss, it's essential to back up all your data on your Mac. You can use the practical program Qiling Dara Recovery Wizard for Mac Pro to create a backup of your Mac. Simply click the green button below to obtain the free software download.
Back Up Your Mac and Never Lose Data
You can back up and restore your MacBook/iMac without relying on Time Machine, iCloud, or external hard drives. This can be done using the built-in "Archive and Install" feature in macOS, which creates a bootable clone of your startup disk.
How to Fix macOS Monterey Update Not Found Error
If you're experiencing issues updating to macOS Monterey, released on October 25, 2021, and are seeing the message "macOS Monterey update not found," try the following fixes:
1. Check If Your Mac Is Available for macOS Monterey
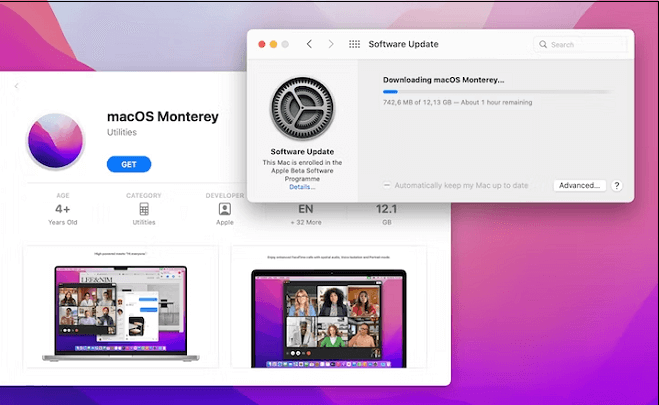
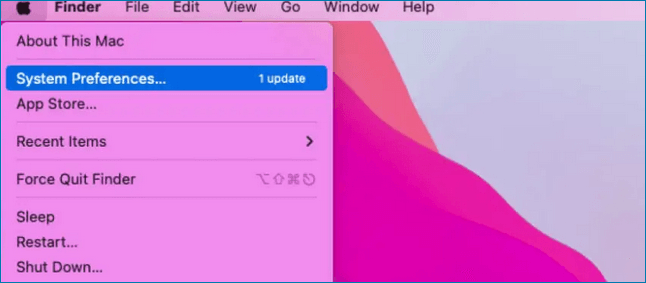
To install macOS Monterey on your Mac, head to the Apple menu, then download it from the "About This Mac > Software Update" section, and if you can't find it, try restarting your Mac, checking for updates again, and ensuring your Mac meets the system requirements.
Step 1. Several outdated Mac models are not supported by macOS Monterey, making it unlikely to run on your Mac.
Step 2. Download macOS Monterey from the Apple Store.
Step 3. To resolve the issue, press Command + R to bring up the Software Update dialogue. This may resolve the issue if there was a network fall.
2. Shutdown and Restart Mac Device to Fix the Issue
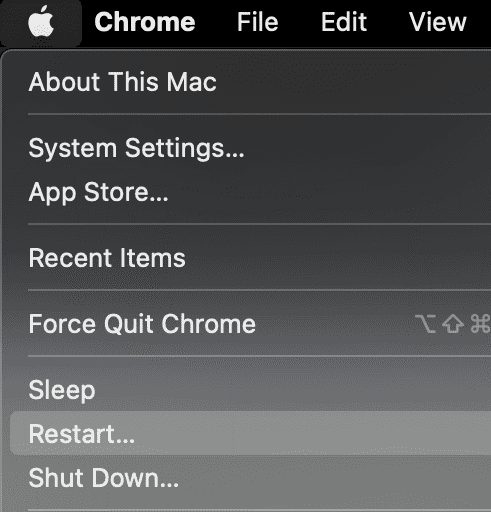
To fix the macOS Monterey update not found error, restart your MacBook Pro/Air by shutting down and then turning it back on. This will help resolve software bugs and errors linked to the OS. To do this, go through the following steps:
Step 1. Hit the Apple logo in the left-side upper corner.
Step 2. Click on the "Restart" button.
Once you have restarted your Mac, let's start with the macOS update again.
3. Search and Download macOS Monterey in App Store
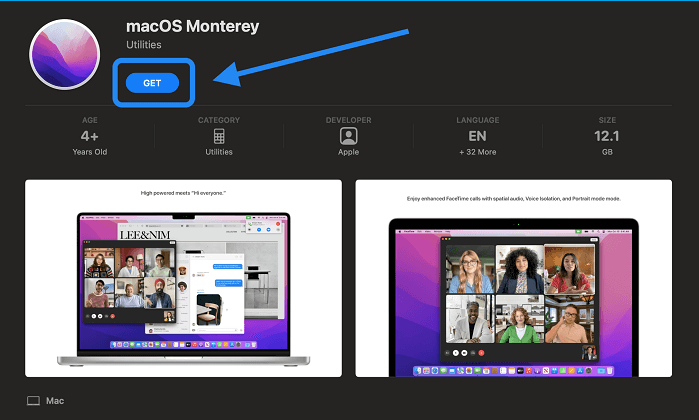
To resolve the "null" error on macOS Monterey, search and install macOS Monterey from the App Store. Follow the steps below.
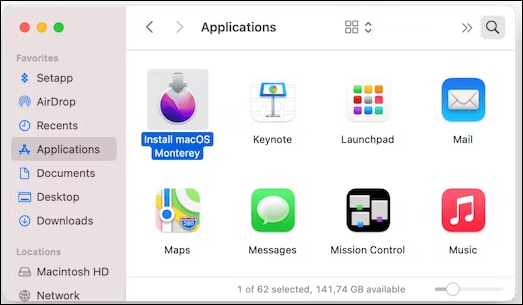
Step 1. Open the Application folder.
Step 2. Drag the "Install macOS Monterey" application to the Mac Trash to uninstall it.
Step 3. Download it again from the Apple Store, and install it in the usual manner.
Share this article on social media to read it anytime.
4. Check macOS Date and Time Settings on Mac
Once you reinstall the macOS Monterey installer, you may see an error message saying "can't verify macOS" or "macOS Monterey can't be cross-checked". This is usually due to cached user account information or incorrect System Preferences date and time settings.
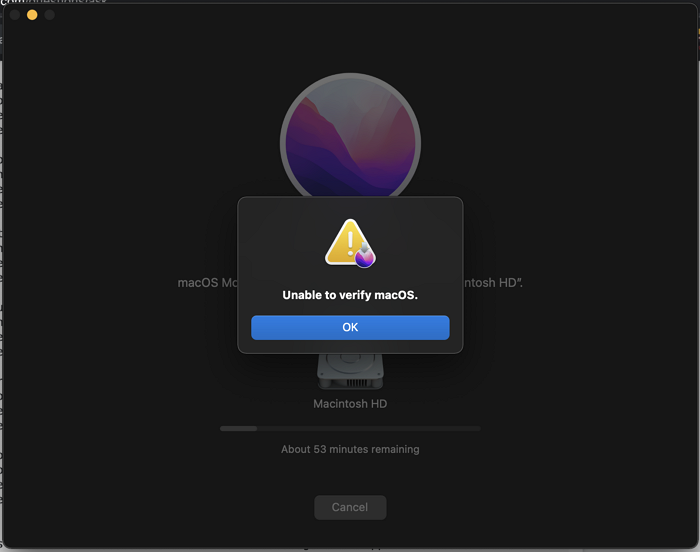
Consider the fixes below to solve the error "macOS Monterey couldn't be verified":
Step 1. Select the Apple menu, and click on System Preferences.
Step 2. Hit the "Sharing" button.
Step 3. To make modifications, click the lock in the bottom left corner.
Step 4. Opt for "Content Caching" to ensure it's toggled off.
Step 5. Select "All Content" under Cache.
Step 6. It's time to restart the Mac and download it once again.
You may try using the below-mentioned method in case you can't verify macOS Monterey:
Step 1. Hit the Apple logo, and hit the System Preferences.
Step 2. Opt for the Date & Time to open it.
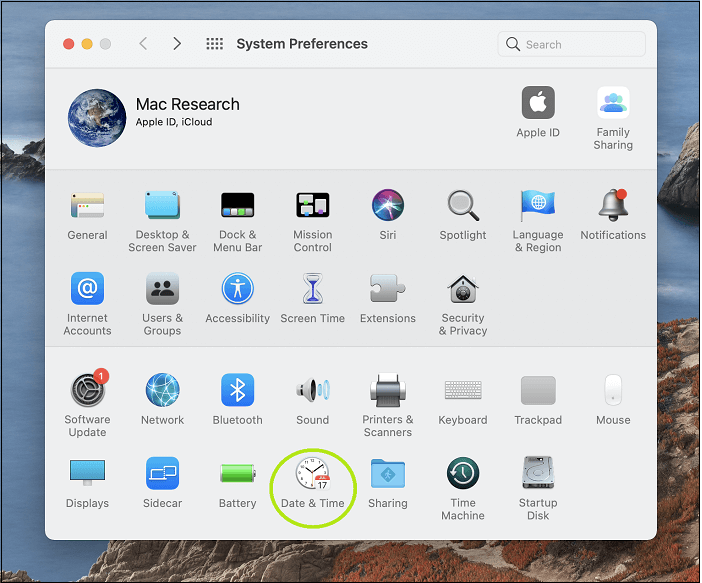
Step 3. Hit the lock at the lower left side to modify things.
Step 4. Untick, and after that, crosscheck the "Set date & time automatically" option. Save the changes you made by hitting the lock.
Once you've completed the steps, restart your MacBook and then download the update again via the "Software Update" option.
5. Check the Internet Environment to Fix macOS Monterey Update Not Found
If you're unable to access the internet after installing macOS Monterey, check your internet environment to resolve the "macOS Monterey Update not found" error. To fix this, you can try restarting your router, checking your Wi-Fi connection, or using an Ethernet cable to connect to the internet. If the issue persists, consider restarting your computer and trying the update again. Additionally, you can check for any software updates for your router or modem, as this may resolve the issue.
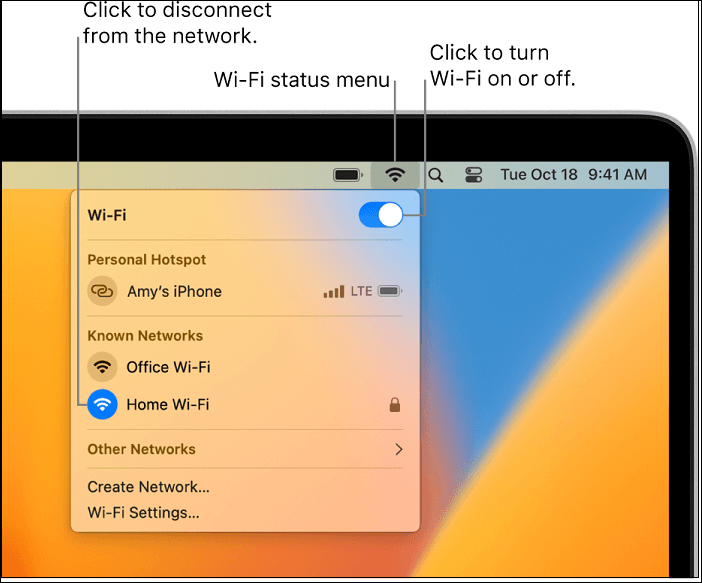
Step 1. To fix the issue, go to the menu bar, select Wi-Fi, and toggle it off. Wait for 10-15 seconds, then toggle it back on to reconnect to your Wi-Fi.
Step 2. Turn off your MacBook, and before it boots up again, pause for a few seconds. This brief pause can help your MacBook perform a self-check and clear any temporary data, potentially improving its performance and stability.
Step 3. Generate a brand-new Network Location:
- To access System Preferences, click the Apple symbol at the top left side of the screen, then select "System Preferences" from the drop-down menu.
- To establish an additional Network location, find "Network" which is usually displayed as "Automatic" in the list of available locations, and select it.
- To add a new location, select "Edit Locations", tap the "+" button to add a new place, and then click "Done".
- Rejoin an established, functional Wi-Fi network.
6. How to Reinstall macOS in Mac Recovery Mode
The new MacBooks have a feature called Internet Recovery mode that allows them to boot directly from a stable internet connection even without a retrieval partition. To reinstall macOS in Recovery Mode, follow these steps.
Step 1. Your Mac needs to be shut down.
Step 2. To force restart your Mac, press the Command (⌘) and Option (⌥) keys at the same time, then press the R key. While holding these keys, press and hold the Power button until your Mac restarts.
Step 3. Keep pressing those keys when a spinning globe and the phrase "Starting Internet Recovery" appear. This process can take a while.
Step 4. There will be a progress indicator placed on top of the message. Let it fill, and it will take some time.
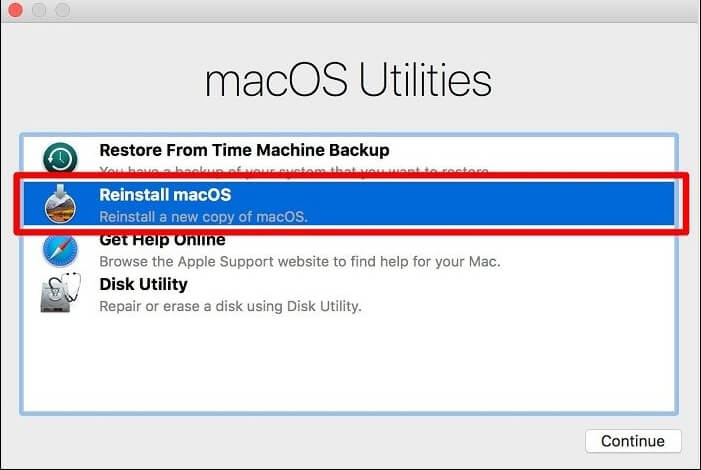
Step 5. Hold off until the macOS Utilities window appears.
Step 6. Continue the setup steps after selecting Reinstall macOS.
Your Mac needs to get the setup file for the current version of macOS that was preinstalled on it, using Internet Recovery Mode to reinstall, and must be connected to a network with DHCP and WPA/WPA2 encryption if OS X Restoration is chosen.
LEARN MORE
If you're experiencing trouble booting your Mac into Recovery Mode, don't worry, as there are several methods to resolve this issue. You can try booting from an external drive, resetting the System Management Controller (SMC), or using the built-in Recovery Mode options. Additionally, you can try booting from a USB drive, resetting the Power Management Unit (PMU), or using a third-party bootable media creator to create a bootable USB drive. If none of these methods work, you may need to seek further assistance.
7. Clean Install macOS Monterey with Bootable Media
To clean install macOS Monterey using bootable media, create a Monterey USB installer on a Mac and follow these steps:
Step 1. The macOS Monterey installation process should display the newly installed operating system in the Applications folder immediately after installation, making it easily accessible for users to launch and explore.
Step 2. Please review your applications.
Step 3. Find the arrowed installer icon for macOS Monterey.
Attach a portable USB device with at least 16 GB of space to your macOS Monterey.
Step 4. You can format your current drive using Mac Disk Utility and put it in the macOS Advanced (Journaled) version. Once you have a bootable USB device with your installer using Mac Terminal, it's recommended to install Monterey.
Step 5. The Terminal command is telling the computer to copy the "macOS Monterey" file from the Apps folder to the Untitled drive and make it bootable.
Step 6. Access Launchpad and enter "Terminal" in the search field.
Step 7. Copy the following command and paste it into the Terminal, and press enter:
sudo /Applications/Install\ macOS\ Monterey.app/Contents/Resources/createinstallmedia --volume /Volumes/Untitled
How to Recover Data After macOS Monterey Update
Losing data due to hardware malfunction, malware attack, format during a macOS update, system collapse, or deletion without a backup is undesirable. If you've lost your data after updating to macOS Monterey, Deep Data Recovery for Mac is a powerful tool that can help recover your data, regardless of the complexity of your data loss scenario, and is suitable for both personal and business use.
Qiling data recovery software can assist your business in recovering lost data from any macOS-based device, leveraging its decades of experience in data retrieval. It can recover files of any size, from a single Office Word document to a large number of images, and resolve various data loss circumstances, including SD card recovery and restoring Trash data on Mac.
Qiling macOS Recovery Program
- After updating to macOS Monterey, you may have lost important files such as documents, photos, audio, music, and emails. Don't worry, you can recover these lost files using various methods.
- To recover data from a formatted hard drive on a Mac, as well as other devices like an emptied recycle bin, memory card, flash drive, digital camera, and camcorder, you can use various software tools. These tools can help retrieve deleted or lost files, including photos, videos, documents, and more.
- Data recovery services can help restore lost data due to sudden deletion, formatting, hard drive corruption, virus attacks, and system crashes, providing a safety net for individuals and businesses in case of data loss.
To recover your lost data after the macOS Monterey update, you can follow these steps: go to the Disk Utility app, select the startup disk, and click on "First Aid" to repair the disk permissions and run a disk repair. Then, go to the "Recovery" mode and select "Disk Utility" to create a new volume or erase the disk.
Note: To create a backup, click on "Disk Backup" on the left, which will allow you to recover data from a backup image in case of disk damage or accidental data loss.
Step 1. Select the location
After updating to macOS Sonoma/Ventura/Monterey/Big Sur, select the disk where your lost data is located and click "Search for lost files".

Step 2. Find lost data after the scan
Deep Data Recovery for Mac scans the selected disk volume, displaying the scanning results on the left pane, allowing users to find specific data using file type and file path.

Step 3. Recover data after macOS update
Select the target files that were unknowingly lost during or after the update and click the "Recover" button to get them all back.

To Wrap Up
macOS Monterey has had some minor bugs, primarily related to installation or download issues due to incompatibility with devices, networks, or available space.
With beta revisions, Macs may experience issues such as slow performance, overheating, and reduced battery life. Additionally, users may encounter problems with basic Bluetooth, Music, and AirPlay functions. If data loss has occurred, Deep Data Recovery for Mac can be downloaded to help recover lost files.
macOS Monterey Update Not Found FAQs
Follow the below-mentioned FAQs to understand the topic better:
1. How to fix the macOS Monterey update stuck at x minutes?
To fix the macOS Monterey update that is stuck, terminate the download process when it gets stuck with less than a minute remaining. Check the Applications folder for any leftover files, then restart your computer in Safe Mode and try installing the operating system again. This should resolve the issue and allow you to complete the update successfully.
2. How to install macOS Monterey on an unsupported Mac?
Follow the steps below:
Step 1. Put in your usual or any external USB drive.
Step 2. The OpenCore-Patcher application needs to be opened.
Step 3. Hit the "Create macOS installer" button, which is located in the man window of the application.
Step 4. To install the most recent version of macOS, click on the available macOS versions that pop up and select the most recent one.
3. Why can't my Mac update to macOS Monterey?
To install macOS Monterey, ensure you have enough space on your Mac (about 20GB) and a working Wi-Fi connection. If your Mac is low on space, clean it up and make room before proceeding.
4. How to update macOS Monterey with a USB?
To proceed, select the USB icon for the USB Installer Drive at the boot options window and press "Enter" to continue, then choose your preferred language if prompted. The installation setting will then start loading, after which you can select "Utilities", download macOS, and press "Continue" to continue the process.
Related Articles
- 2023 Tips| Are You Sure You Want to Copy This File Without Its Properties [Fixed]
- Does exFAT Work on Mac and PC? Learning the Usage of exFAT
- Disable Keylogger in Windows 11 to Stop Microsoft from Collecting Your Data
- 8 Tips | How to Fix Windows 7 Stuck on Welcome Screen
- What Is A Modem and How Does It Work?
The modem, once a staple of internet connectivity, may seem like a relic of the past. However, this article will delve into what a modem is and how it functions, followed by a comparison with modern routers to assess its relevance in today's digital landscape. - What Is a Snapshot and How Is It Different from a Backup
The concept of a Snapshot is explained in this post, where it is defined and distinguished from a backup, providing a concise answer to the question.