How to Fix Spotlight Search Not Working Ventura/Sonoma
The Mac Spotlight search feature is a built-in search engine on macOS, allowing you to search for anything you have stored on your computer. With Siri suggestions enabled, it also provides you with sports scores, news, stock market information, weather conditions, and more.
If you're having trouble finding your files quickly, you might be using the Spotlight search shortcut on Mac, but finding that it's not working due to system errors, inadequate settings, or indexing errors.
If you're experiencing issues with Spotlight search not working on your macOS Ventura or Sonoma, don't worry! There are seven fixes to try and resolve the problem. Let's dive into them to get your search system up and running smoothly again.
| Workable Solutions | Step-by-step Troubleshooting |
|---|---|
| Fix 1. Relaunch Spotlight Search | Open Launchpad, hit Other > Activity Monitor, and locate SystemUIServer...Full steps |
| Fix 2. Restart Your Mac | Hit the Apple menu, opt for Restart to reboot your Mac, and use Spotlight Search again...Full steps |
| Fix 3. Rebuild Spotlight Index | To rebuild the whole Spotlight Index, you must drag Macintosh HD into its Privacy tab...Full steps |
| Fix 4. Reindex Using Terminal | Open Terminal by launching Finder > Applications > Utilities, and type a command...Full steps |
| Other Practical Fixes | Delete com.apple.Spotlight.plist file, run First Aid in Disk Utility, and update Mac...Full steps |
Before fixing the Spotlight stops working error, read on to learn the possible causes.
Why Spotlight Search Not Working
As you use your MacBook daily for personal and office tasks, you likely have accumulated a large collection of photos, files, documents, folders, and other confidential data on your Mac. This can make it time-consuming and frustrating to find specific files using the built-in Spotlight search, which is why a reliable and efficient file search tool is essential to streamline your workflow and ensure you can quickly locate everything you need.
Innumerable reasons may lead to the Spotlight search not working on macOS Ventura, including corrupted Spotlight database, issues with Spotlight indexing, outdated or corrupted system software, incorrect Spotlight settings, or conflicts with third-party apps.
- Imprecise Spotlight settings
- System glitches and errors
- Mac Spotlight indexing errors
If you're experiencing the error on your MacBook, don't worry, as it's a common issue. To resolve it, follow the methods below.
How to Fix Spotlight Search Not Working
Here are the fixes to the Spotlight Search not working on macOS Ventura in one paragraph:
Fix 1. Relaunch Spotlight Search
To resolve the issue of Spotlight crashing daily, start by relaunching Spotlight services. This involves force quitting the system service that handles the Mac's user interface. To do this, go to the Apple menu and select 'Force Quit.' From the list of running processes, select 'WindowServer' and click 'Force Quit.
Step 1. Open Launchpad, and hit "Other > Activity Monitor".
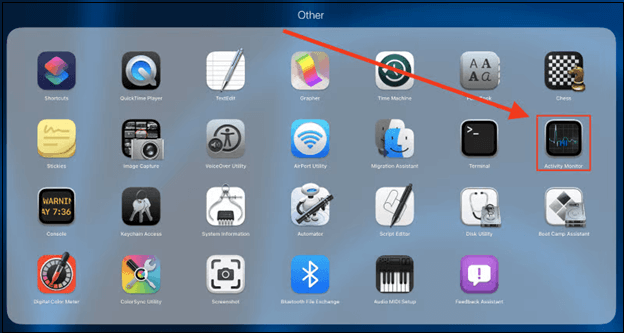
Step 2. To find SystemUIServer, navigate to the CPU tab and use the search field in the top right corner of the screen to locate it. Once found, highlight the service by clicking on its name.
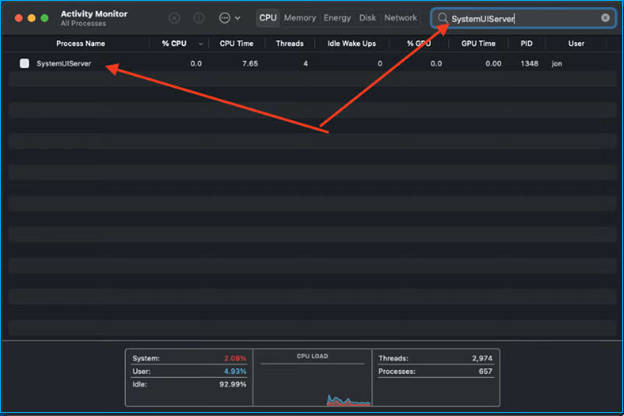
Step 3. To stop the system, simply hit the stop button located on the top side of the screen once you've finished highlighting the system. This will immediately halt the process, allowing you to resume or exit as needed.

Step 4. You'll see a pop-up window where you can choose to force quit the program or use the "Ctrl Alt Del" method on your Mac, and then you can proceed with other services like Spotlight and mds based on your searches.
Force Quit Not Working on MacBook Pro/Air
If you're experiencing issues with the Force Quit button not working, don't worry - there are several practical methods to fix this error. One solution is to restart your Mac, as this can resolve any temporary software glitches. Another approach is to check for any updates to your operating system, as newer versions may address Force Quit issues.
Fix 2. Restart Your Mac
To restart your MacBook and fix Spotlight errors, follow these steps: simply shut down your MacBook, wait for a few seconds, and then press the power button to turn it back on. This simple process can resolve the Spotlight errors that are preventing Spotlight from working properly on your MacBook.
Step 1. To reboot your MacBook, go to the Apple menu and select Restart. This will shut down your MacBook and then immediately restart it, returning it to a fully functional state.
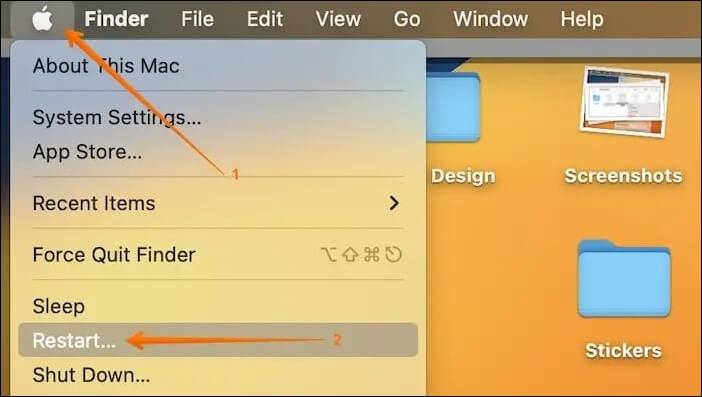
Step 2. Now, you need to use Spotlight Search again to check if it's working. If the "Restart" option isn't working, you should hard restart your MacBook.
Fix 3. Rebuild Spotlight Index
To troubleshoot the issue with Spotlight Index, you can try disabling and then rebuilding it. This process helps refresh the fundamental settings and may resolve the current problem. To do this, follow these steps:
Step 1. To rebuild the whole Spotlight Index on your macOS Ventura, drag "Macintosh HD" from your desktop into the Privacy tab.
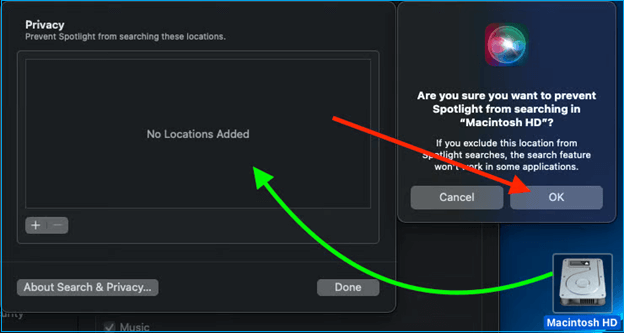
Step 2. To confirm you don't want Spotlight to index the drive or directory, hit the "OK" button in the pop-up window. Then, select the item you want to delete and click the "Minus (-)" button to remove it.
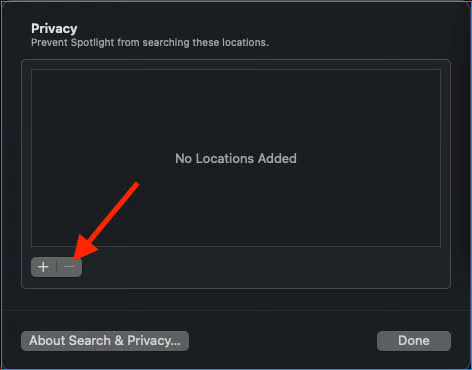
This process allows your Mac to delete the Spotlight Index and rebuild it entirely, which can take some time as it indexes the complete internal storage. If you're unable to find the "Macintosh HD" in the first step, this article provides guidance on resolving this issue.
Fix 4. Reindex Spotlight Search Using Terminal
In case your Spotlight Search can't work after recreating the index in the System Preferences, it's time to reindex Spotlight employing Terminal. Follow the steps below to reindex Spotlight Search:
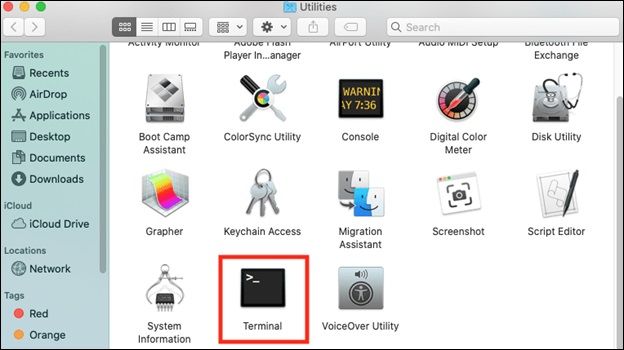
Step 1. Open Terminal by launching "Finder > Applications > Utilities".
Step 2. To erase the metadata from the root directory, type `sudo mdutil -E /` in the terminal window, and press the "Return" or "Enter" button.
This command will remove the existing fixed index on your MacBook and replace it with a new one, requiring your admin password for the change.
If Spotlight Search isn't working on your Mac, don't worry - it's an easy fix! First, make sure Spotlight is enabled by going to System Preferences > Spotlight and checking the box next to "Show Search Field".
Fix 5. Delete com.apple.Spotlight.plist File
If this stubborn Spotlight Search function isn't working, you may try deleting the com.apple.Spotlight.plist file. These are the steps to follow:
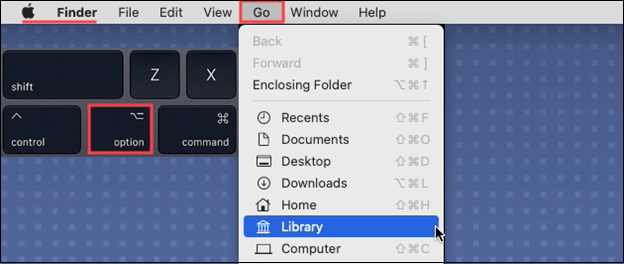
Step 1. To access the Library folder, you need to hold down the "Alt" key (or "Option" key on a Mac) and click on "Go" in the Finder menu, then select "Library" from the drop-down list. This will allow you to view and access the Library folder.
Step 2. Launch the "Preferences" folder.
Step 3. Delete the com.apple.Spotlight.plist file.
Step 4. To check if Spotlight works effectively on your macOS Ventura, log out of your system and log back in. This simple step can resolve any issues you're experiencing with Spotlight.
Fix 6. Run First Aid in Disk Utility
To run Mac First Aid in Disk Utility and resolve frustrating Spotlight errors, follow these steps. First, click the "Disk Utility" applet in macOS, then select the drive you want to repair from the left-hand sidebar. Click the "First Aid" tab and select "Run" to initiate the diagnostic process.
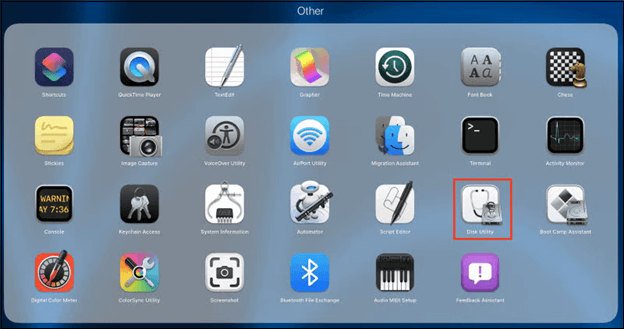
Step 1. Open Launchpad, and hit the "Other" option.
Step 2. To erase the startup disk, open Disk Utility and navigate to "Macintosh HD" on the sidebar.
Step 3. Select First Aid button on the screen's upper side.

Step 4. Hit the "First Aid" button and select "Run" in the pop-up window.
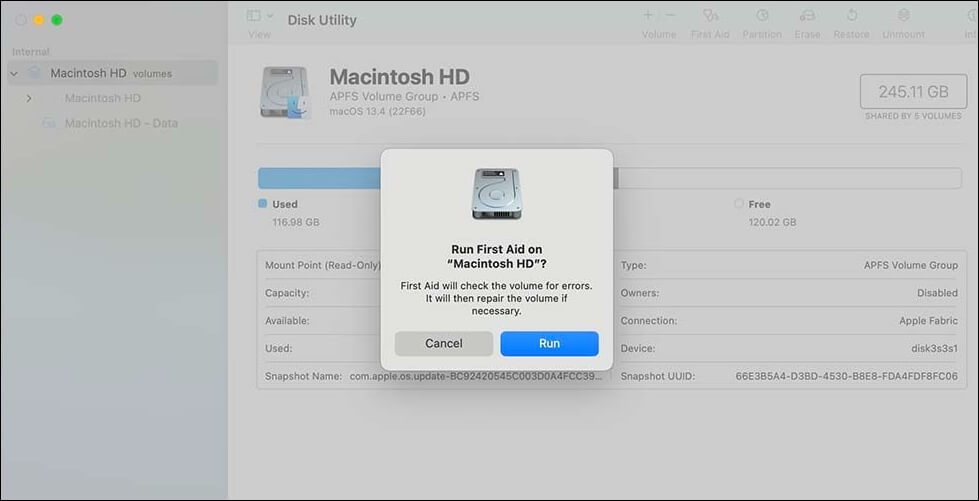
Step 5. Allow a few minutes for Disk Utility to scan and mend disk errors, then hit the "Done" button when a new window appears.
* Instead of saying "your system spots disk errors", you could say "your system detects disk errors" to make the language more concise.
If you've discovered corruption within a first aid system, it's essential to report it to the appropriate authorities. This could be the organization responsible for overseeing the first aid system, such as a healthcare regulatory body or a government agency.
The "found corruption that needs to be repaired" error in first aid can be frustrating, but it's often a simple fix. To resolve this issue, you'll need to repair the corrupted first aid file. This can typically be done by reinstalling the game or app that uses the first aid, or by running a system file checker to identify and replace any corrupted system files.
Fix 7. Update macOS
Updating your Mac is crucial if Spotlight Search isn't working after a macOS upgrade, especially if you haven't updated the macOS for months or if the macOS Sonoma installation failed, which may be the reason behind your Mac's non-functional Spotlight Search.
Step 1. Launch the Apple menu > System Preferences > Software Update.
Step 2. To resolve the Spotlight not working error on your MacBook, search for updates and update your MacBook. Once the update is complete, check if the Spotlight issue is resolved.
Updating macOS does not automatically delete all data on your Mac. However, if you're experiencing data loss, it's likely due to other factors such as file system corruption, accidental deletion, or issues with third-party software. To minimize the risk of data loss, it's recommended to create a Time Machine backup before updating your macOS. This way, you'll have a safe copy of your data in case something goes wrong during the update process.
To avoid losing important files, it's recommended to back up your data before updating to a new version of macOS. If you've already updated and lost files, you can use a professional data recovery software like Deep Data Recovery for Mac to retrieve them.
Data loss due to deletion without a backup, virus attacks, hardware failure, system crashes, macOS updates, or unforeseen shutdowns is frustrating. Fortunately, you can recover lost files after the macOS Ventura update using the Qiling data recovery software.
Conclusion
If Spotlight Search is not functioning properly on your Mac, you can try a simple reboot or use built-in apps to troubleshoot disk issues, which are often quick and easy fixes.
Spotlight Search Not Working FAQs
Go through these FAQs below to better understand the topic:
1. How do I reset my Spotlight index Mac?
To rest the Spotlight Index on a Mac, you'll need to delete the Spotlight index file. This can be done by going to the Terminal app, typing the command "rm /Library/Caches/com.
Step 1. Opt for Apple menu > System Settings
Step 2. Go to System Preferences, select "Siri & Spotlight" in the sidebar, scroll down, and hit "Spotlight Privacy" on the right-hand side.
Step 3. You need to add a disk to your computer. To do this, click on the "Add" button (+) and select the disk you want to add from the list of available disks.
Step 4. To remove a disk from the list, go to the disk you want to remove, click the three dots on the top right corner, and select "Remove from Library".
Step 5. Hit the "Done" button, and shut down System Settings.
2. How do I activate Spotlight on Mac?
To activate Spotlight on a Mac, simply press the Command + Space bar keys or click on the Spotlight symbol in the menu bar. This will open the Spotlight search window, where you can type in what you're looking for and start searching.
3. Why is my search not working on Mac Finder?
The Finder's poor performance in finding objects is often due to indexing issues, which can be resolved by resetting the index. This simple step can immediately improve the search functionality.
4. How do I enable Spotlight to search streaming files?
Here, make sure the option labeled "Enable Spotlight to search streaming files" is selected. in one paragraph shortly
Related Articles
- [Fixed] Boot Camp Error "The Startup Disk Cannot Be Partitioned Or Restored To A Single Partition"
- Transfer Data from Mac to Mac (Old to New) - 6 Tested Methods
- How to Fix Mac/MacBook Pink Screen? Here Are Reasons and Solutions
- WD Easystore VS My Passport: Which One to Pick?🔥
WD Easystore VS My Passport: which is better and which one to choose? If you don't have an idea, you've come to the right page. This article will tell you the difference between WD Easystore and My Passport. After reading, you can pick the right one. - Laptop Turns Off When Unplugged - How to Fix?
You may encounter the frustrating issue of your laptop turning off when unplugged, and it's essential to learn how to fix this problem to continue using your device correctly. This tutorial will outline 5 fixes to resolve the issue, and we'll also recommend an efficient backup tool for your files. - Solved: Screen Black But Still Running Issue
If your Lenovo laptop screen is black but still running, you're not alone. This issue can be caused by various factors, and fortunately, there are fixes available. In this article, we'll take you through the possible causes and solutions to resolve the problem of your Lenovo laptop's screen being black but still running.