Time Machine Backups Not Visible on Mac, Why and How to Fix It
Time Machine, an in-built backup feature on Mac, allows users to automatically back up personal data, making it possible to repair or format the system without losing all data.
Time Machine backups are present on an external disk connected to the device, but in some cases, users may experience issues where Time Machine backups are not visible on their Mac.
If Time Machine backups are not visible and Time Machine restore is greyed out, you can try troubleshooting the issue by checking the Time Machine disk is not full, verifying the disk is connected and powered on, and ensuring the backup disk is set as the startup disk. Additionally, you can reset the System Management Controller (SMC) and restart your Mac. If the issue persists, you can try reinstalling the Time Machine backup software or seeking further assistance from Apple Support.
| Workable Solutions | Step-by-step Troubleshooting |
|---|---|
| Fix 1. Recover Deleted Time Machine Backups | Use professional data recovery software to recover accidentally deleted Time Machine backups...Full steps |
| Fix 2. Restart Your Mac in Safe Mode | Restarting your Mac can help you solve the Time Machine backup not visible error on your Mac...Full steps |
| Fix 3. Reselect Backup Disk | Go to the Apple menu, and select System Settings. Choose General from the left side...Full steps |
| Fix 4. Run First Aid in Disk Utility | Open Disk Utility in the Applications> Utilities folder, and choose the disk from the left sidebar...Full steps |
| Fix 5. Remount Time Machine Drive | Open Disk Utility, click the View button and select Show All Devices. Choose the volume...Full steps |
Time Machine Backups Not Visible, Why
Here are the reasons why your Time Machine backup is not visible in one paragraph:
- ❌Incomplete drivers: If your Mac doesn't recognize an external hard drive as the Time Machine backup disk, your Time Machine backup will be invisible.
- ⛔Issues with the connection: The error might be caused by a faulty connection between the backup disk and the device, such as an external hard drive not showing up on Mac Ventura due to connection issues, requiring a secure and proper connection.
- ❎Incorrect backup disk: Make sure you've connected the correct external drive to your device, as Time Machine won't be able to find the backup drive if it's incorrectly selected.
- ⚠️Failure to mount the backup disk: If the Mac can't mount the backup drive, Time Machine won't be able to locate it and the backup won't be visible. (powered by AI)
- 💾Corrupted backup drive: Backup disks can be damaged by various factors, such as virus attacks, software issues, or physical damage, which can prevent Time Machine from recognizing the backup drive.
- 😰Accidental formatting: Formatting your MacBook Pro will completely erase all data on the drive, making it impossible to recover any files or information.
To recover data from a formatted hard drive on a Mac Pro, using a powerful data recovery software like Deep Data Recovery for Mac Pro is recommended. This software can recover formatted hard drives, fix corrupted hard drives, and recover permanently deleted files, even without Time Machine backups.
When your Time Machine stops working, Qiling Mac data recovery software can help you back up your essential data.
How to Fix Error: Time Machine Backups Not Visible on Mac
If you're experiencing issues with your Time Machine backup not being visible, there are multiple solutions you can try. However, before attempting any of these, it's essential to check four key items: ensure the backup disk is properly connected and recognized by your Mac, check that the backup disk is not full or nearly full, verify that the backup disk is not corrupted or damaged, and confirm that the Time Machine backup is not being held back by a system or user-level backup limit. Once you've checked these items, you can then proceed with troubleshooting and resolving the issue.
- Check disk connections: If the disk connections are fine, the issue might be with the Time Machine backup disk itself, such as a corrupted backup or a problem with the disk's permissions. Try checking the disk's permissions and making sure the user account has the necessary permissions to read and write to the disk. If the issue persists, try resetting the Time Machine backup disk.
- Check Time Machine settings: To confirm, you need to check the settings of the Time Machine to ensure that it's properly configured and not disabled, which is crucial for its functionality.
- Check network connection: Ensure the network settings on your Mac and backup disk are identical, allowing Time Machine to connect to the backup disk.
- Check for macOS updates: To resolve the Time Machine backup not visible issue, go to the App Store to update your Mac, ensuring it is up-to-date, which might resolve the problem.
Fix 1. Recover the Deleted Time Machine Backup
If you can't find the TM backup on your Mac, it's possible that it was accidentally deleted. However, you can recover deleted Time Machine backups using the Qiling Mac data recovery software.
With Deep Data Recovery for Mac Pro, you can recover deleted files without the Time Machine by following these 3 steps:
Note: You can create a backup of your Mac by clicking the "Disk Backup" on the left first. This allows the software to recover deleted files from the backup image, making it safer and more reliable.
Step 1. Select the location and scan
Launch Deep Data Recovery for Mac, select the disk where the lost data is located, and click "Search for lost files" to initiate the scanning process.

Step 2. Filter and preview lost files
After scanning, use the file format filter to find the deleted files you need.

Step 3. Recover lost data or files
You can double-Click on a file to preview its content, or select multiple files to recover them simultaneously. After selecting the files, click "Recover" to restore the lost data to a local drive or cloud storage.

Fix 2. Restart Your Mac in Safe Mode
Mac Safe Mode is a feature that allows users to troubleshoot issues by booting the system with only essential items launched, helping to identify and resolve problems caused by software that loads during the boot process.
The steps to enter safe mode vary depending on your device model. Generally, to enter safe mode, you need to press and hold the power button until your device turns off, then release the button and press it again to turn it back on.
To restart your Intel-based Mac in safe mode, here are the steps:
Step 1. Restart the system.
Step 2. Press the "Shift" key and hold it.
Step 3. Release the key until the login window appears.
Step 4. Log into the device.
To restart your Apple Silicon Mac in safe mode, follow these steps: Press the power button and hold it for 10 seconds to shut down your Mac. Then, press and hold the power button again until you see the Apple logo.
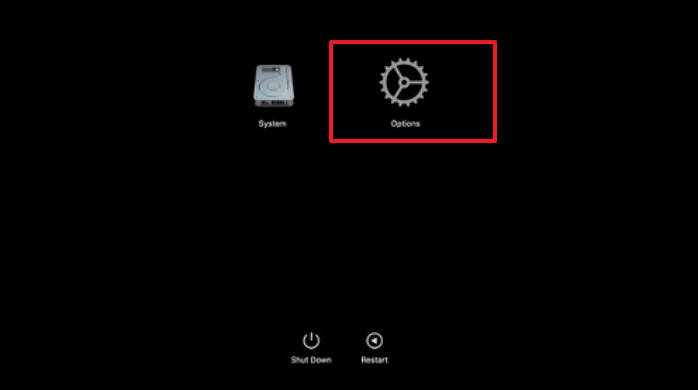
Step 1. Go to the Apple menu. Select "Shut Down".
Step 2. Press the Power button and hold it until you see the Loading startup options, then release it.
Step 3. Choose the volume. Press and hold the "Shift" key.
Step 4. Click "Continue in Safe Mode".
Fix 3. Reselect Backup Disk
To fix the Time Machine not showing up issue, try reselecting the backup disk by ensuring it's connected to the system and checking if it's mounted in Finder.
To reselect the disk, follow these steps:
Step 1. Go to the Apple menu, and select "System Settings".
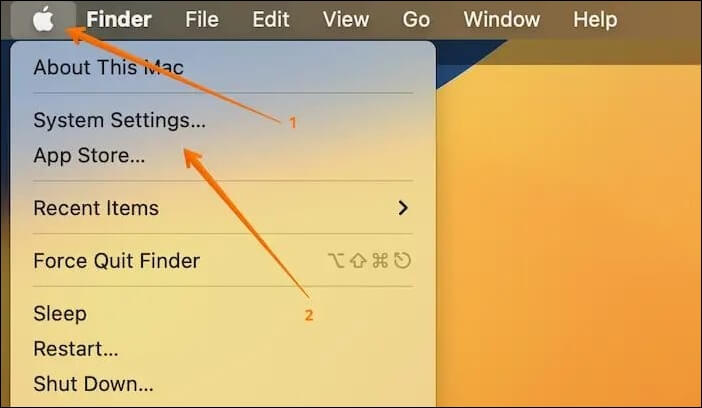
Step 2. Choose "General" from the left side.
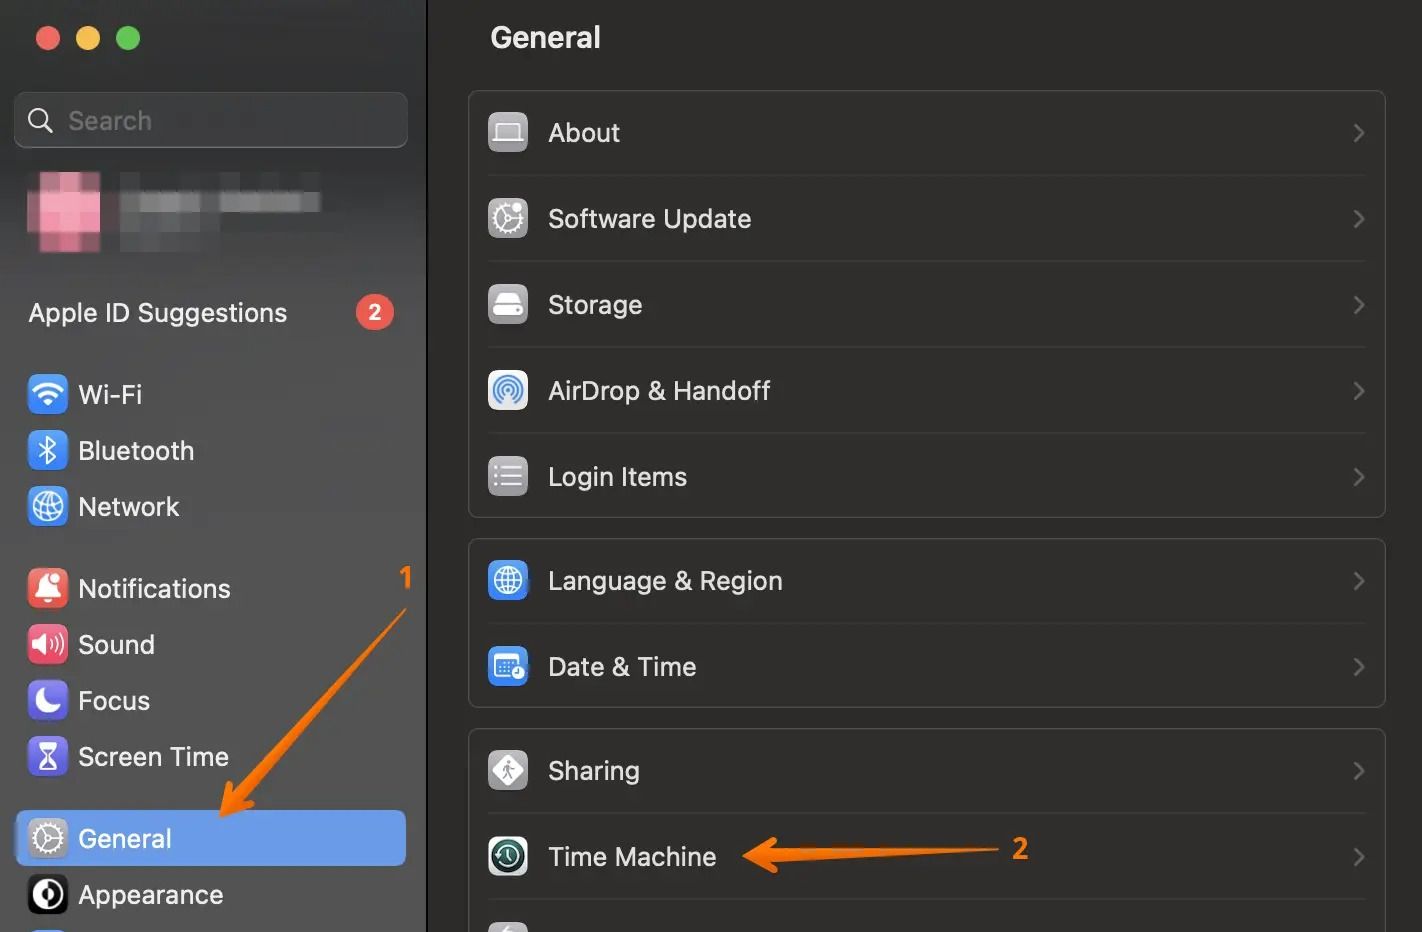
Step 3. Click "Time Machine" from the right-hand settings.
Step 4. Check if the backup disk is visible in the Time Machine window, then select it.
Step 5. Click the "-" under it, and select "Forget this Destination".
Step 6. To add a backup disk, go to the "Add Backup Disk" option and select the disk you want to use. If the disk requires a password, you will need to enter it.
If your Time Machine backup is not visible on your Mac, don't panic! You can try restarting your Mac and Time Machine, or checking the Time Machine settings to ensure the backup disk is selected.
Fix 4. Run First Aid to Repair Time Machine Drive
To fix the Time Machine not showing up issue, you can run Mac First Aid. This involves restarting your Mac, then immediately holding down the Command (⌘) and R keys. This will boot your Mac into Recovery Mode, where you can run Disk Utility and select your startup disk.
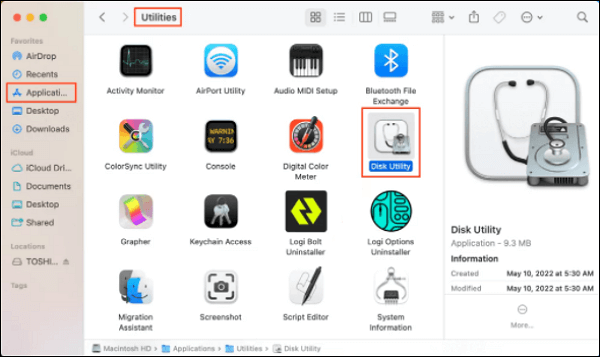
Step 1. Open "Disk Utility" in the Applications> Utilities folder.
Step 2. Go to the Disk Utility app, select the disk you want to repair from the left sidebar, and click the "First Aid" button.
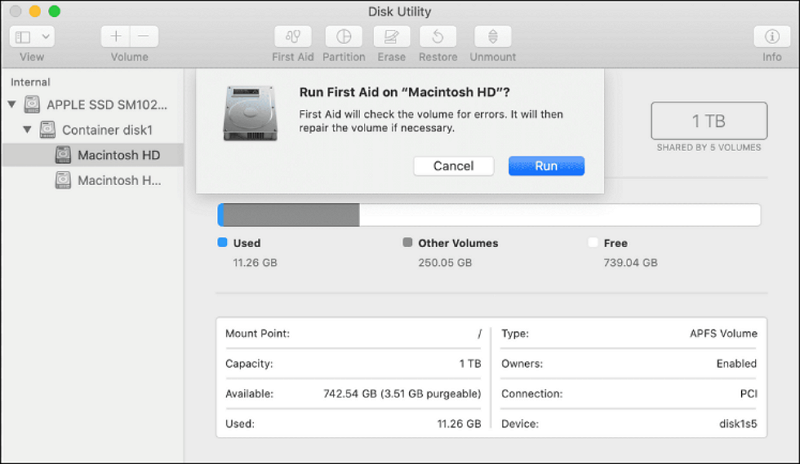
Step 3. Click "Run" to check the disk.
If the First Aid process has failed to repair the issue or displays a message indicating that corruption needs to be repaired, don't panic. This article provides guidance on how to resolve the problem. You can find the solution by reading the article.
If you've discovered corruption within a first aid organization, take the following steps to address the issue:
This article provides guidance on repairing errors when First Aid finds corruption, helping users to troubleshoot and resolve issues related to file system corruption and other problems that may arise during the boot process.
Fix 5. Remount Time Machine Drive
Failure to mount a disk on a Mac can lead to the Time Machine backup not visible issue. To fix this, you need to remount the drive. Here are the steps:
Step 1. Open "Disk Utility" in the Applications> Utilities folder.

Step 2. Click the "View" button, and select "Show All Devices".
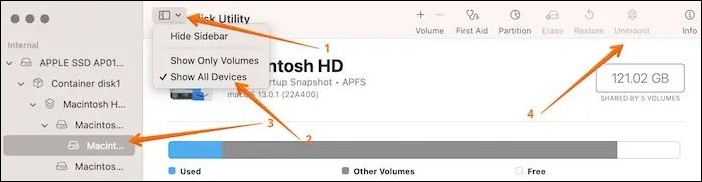
Step 3. Choose the volume that contains the backup.
Step 4. To mount a drive, click the "Mount" button. If the drive is already mounted, you'll see "Unmount" instead. Click on it twice to unmount the drive.
Mac users often encounter issues with unmounting a disk, such as Disk 69888, due to various reasons like permissions issues, corrupted disk image, or system file problems. To resolve this issue, users can try the following methods: checking the disk permissions, running the Disk Utility, rebooting the system, using the Terminal command to unmount the disk, resetting the System Management Controller (SMC), or reinstalling macOS.
This article explains what the Couldn't unmount disk 69888 error is. The Couldn't unmount disk 69888 error is a common issue that occurs when a user tries to eject or unmount a disk drive, typically a USB drive, external hard drive, or CD/DVD drive, but the system is unable to do so. This error can be caused by a variety of factors, including file system corruption, disk errors, or conflicting system settings.
Conclusion
The Time Machine backup is not visible on Mac, which can be caused by various reasons such as incorrect connections, system restart issues, or disk problems. Solutions to resolve this issue include checking connections, safely restarting the system, running First Aid, and other troubleshooting steps.
In case of data loss, professional data recovery software Deep Data Recovery for Mac Pro can be relied upon for assistance. This tool helps quickly retrieve data, regardless of the cause of loss, and can restore various types of files including audio, video, photo, and email.
Time Machine Backup Not Visible on Mac FAQs
If your Time Machine backup is not visible on your Mac, there are several potential reasons. It's possible that the backup disk is not properly connected or recognized by the system, or that the Time Machine service is not running.
1. How do I view backups on my Mac?
To view backups on your Mac, go to Time Machine in the menu bar, select Time Machine backups, and browse through them using the arrows and timeline to find the desired backup.
2. Why can't I see my Time Machine backups?
If you're not seeing Time Machine backups, it could be due to several reasons, such as corrupted drives, incorrect backup drives, faulty connections, wrong networks, incomplete drivers, or even accidental formatting of the backup drive.
3. Where did my Time Machine backups go?
To check a Time Machine backup, navigate to the Time Machine menu in the menu bar, and then use the arrows and timeline to select the backup you want to browse.
4. Does Time Machine delete older backups?
Time Machine deletes older backups only when it runs out of space, but you can transfer them to another external drive to keep them safe.
5. How do I enable Time Machine backups on my Mac?
To enable Time Machine backups on a Mac, go to the Time Machine option and select the external storage device you want to use as the backup drive. Click the "add" button or select "backup disk" and follow the on-screen instructions.
Related Articles
- How to Backup Gmail Emails to Outlook for Windows 11/10/8/7
- [BSOD Error] How to Fix the Stop Code Memory Management in Windows
- Computer Freezes When Playing Games in Windows 10
- How to Factory Reset Lenovo Laptop Without Password [with 4 Practical Ways]
- How to Run CHKDSK on SSD [2023 Most Efficient Ways]
Learn whether you should run CHKDSK on an SSD, when it helps, and how to check and repair SSD file system errors safely. - Samsung 990 Pro vs 980 Pro: Which SSD to Choose?
If you're considering upgrading to a Samsung SSD, you're probably wondering whether to opt for the latest 990 Pro or the previous model 980 Pro. This review compares the two in terms of specs, read and write speeds, costs, and other factors to help you make an informed decision.