How to Install Windows 10 to eMMC [Step-by-Step Guide]
The demand for compact, efficient, and high-performance devices has increased, with solid-state storage solutions replacing traditional hard disk drives, and embedded MultiMediaCards (eMMC) being a popular choice for their speed and reliability.
Qiling will provide a comprehensive guide on installing Windows 10 to eMMC, which is a cutting-edge storage medium that requires a compatible operating system to harness its full power.
| ⏱️Duration | About half an hour |
| ⛏️Required Tools | ISO burner - Qiling Disk Master |
| 🧑💻Suitable Users | For all Windows users, even if they are beginners |
| 👣Steps |
1️⃣Stage 1. Ensure the eMMC Driver Is Installed on Windows |
For other solutions to install Windows without product key, please check the following article:
How to Install Windows 10 to eMMC?
To get started with installing Windows 10 on your eMMC device, it's crucial to have all the necessary tools and prerequisites at your disposal. By following these steps diligently, you'll be able to unlock the full potential of your Windows 10-equipped device with eMMC.
Stage 1. Ensure the eMMC Driver Is Installed on Windows
To ensure the suitable eMMC driver is installed on your device, you can check and install the correct driver, which is essential for efficient communication between the operating system and the eMMC storage, enabling optimal performance and stability, and allowing your Windows installation to recognize the eMMC as a valid storage option.
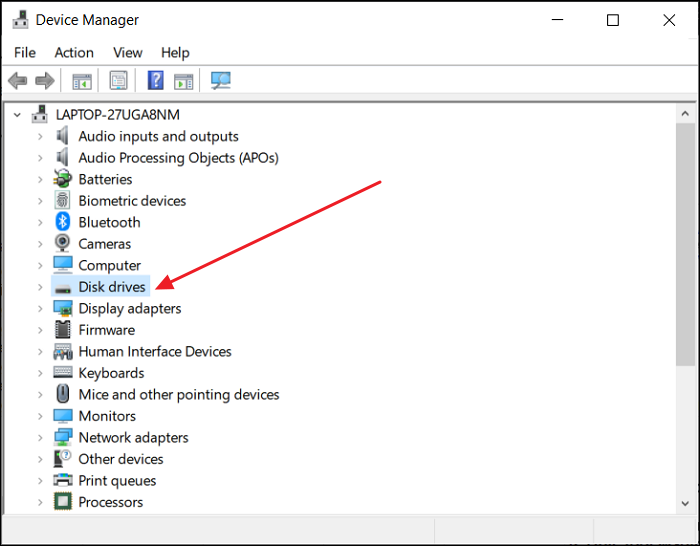
Step 1: To check if the eMMC driver is installed, right-click the "Start" button, select "Device Manager," and expand the "Disk drives" section, where your eMMC storage should be listed, indicating the driver is likely already installed.
Step 2: To verify the eMMC driver status, double-click on the eMMC storage device to open its Properties window. In the window, navigate to the "Driver" tab to check the current driver status, specifically looking for the "Driver Provider" and "Driver Date" fields to confirm it is up-to-date.
Step 3: If you find that the eMMC driver is missing or outdated, you can update it by right-clicking on the eMMC storage device and selecting "Update Driver," then following the on-screen instructions to complete the update. This ensures a smooth Windows 10 installation.
Read Also: Install Windows 10 on Second Hard Drive
Stage 2. Create Windows 10 Bootable Media
With the eMMC drive now recognized as the installation disk, the next step is to create a bootable media containing the Windows 10 ISO file. This can be achieved using the Qiling Disk Master, a versatile tool that simplifies the process and offers features to manage storage efficiently, making it a useful utility for this task.
Guide 1. Download Windows 10 ISO File
To start the installation process, download the official Windows 10 ISO file that matches your device's architecture (32-bit or 64-bit).
Download link: windowstan.com/win/download-windows-10-iso/
Guide 2. Burn Windows 10 ISO File to eMMC Drive
To burn the Windows 10 ISO file to your eMMC drive, we'll use Qiling Disk Master, a versatile tool that allows you to create bootable USB drives and manage storage devices securely.
Here are the steps to install Windows 10 to an eMMC drive using Qiling Disk Master:
Step 1. Launch Qiling Disk Master, go to the Bootable Media section, click "Burn ISO", and then click "Next".

Step 2. To start the installation process, select the downloaded ISO image on your PC and click "Open".

Step 3. After clicking "Next", select the target USB as the destination and click "Burn" to start the burning process.
To install Windows 10 on your device, first burn the Windows 10 image to an external drive using Qiling Disk Master. Once the image is successfully burned, the eMMC will serve as the installation disk. To proceed, follow the installation steps carefully.
To learn more about the burning tool's functions, click on the buttons for detailed information.
Stage 3. Install Windows 10 to eMMC
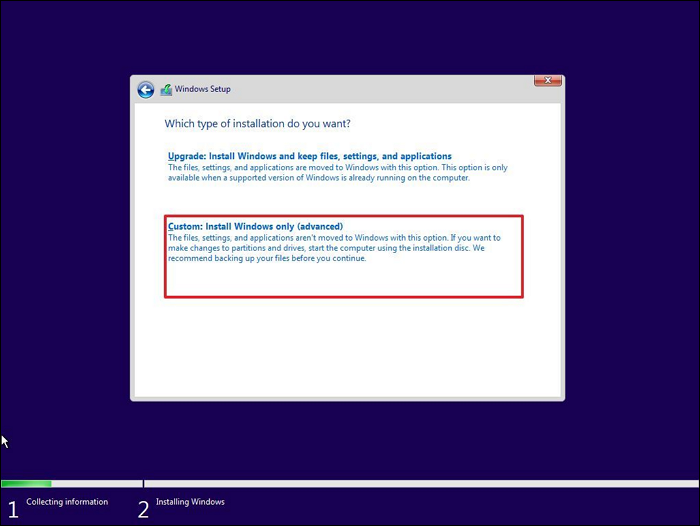
To install Windows 10 on your eMMC device, start by booting from the prepared Windows 10 media. Follow the on-screen instructions to select your language preferences, time and currency format, and keyboard layout. Next, choose the 'Custom: Install Windows only (advanced)' option and select the eMMC drive as the installation location.
Guide 1. Boot from eMMC Drive
Ensure your eMMC drive is set as the primary bootable device in your BIOS or UEFI settings before installing Windows 10. To do this, follow these steps:
Step 1: To access the BIOS or UEFI settings, power on your device and quickly press the key designated by the manufacturer (usually F2, F10, Del, or Esc) during the boot process. This will allow you to enter the settings menu and make any necessary changes.
Step 2: To access the BIOS or UEFI settings, press the designated key (usually F2, F12, or Del) on your keyboard as your computer boots up. Once in the BIOS or UEFI settings, navigate to the "Boot" or "Boot Order" menu using the arrow keys on your keyboard. Look for the list of available boot devices, which may be labeled as "Boot Priority," "Boot Sequence," or something similar, and adjust the boot order to prioritize the USB drive or CD/DVD drive.
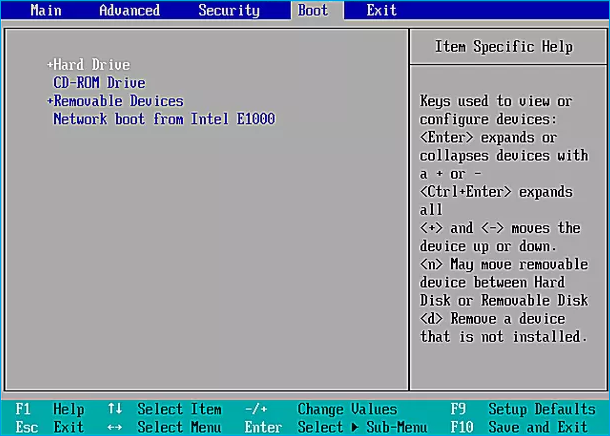
Step 3: To set the eMMC drive as the first bootable device, rearrange the boot order by using the +/- keys to move it to the top of the list, prioritizing it over other storage devices. After making the change, save your applied settings and exit the BIOS or UEFI settings.
Further Reading:

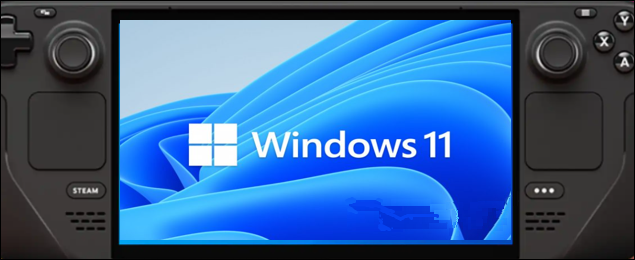
To install Windows on your Steam Deck in 2024, follow these steps: first, enable Developer Mode on your device, then download and install the Windows 11 or 10 ISO file from Microsoft's official website. Next, use a tool like Rufus or PowerISO to create a bootable USB drive from the ISO file. Insert the USB drive into your Steam Deck, and restart the device.
Learn how to install Windows OS on your Steam Deck in detail, with a step-by-step tutorial and troubleshooting alternatives, in this post.
Guide 2. Install Windows 10
To install Windows 10 to eMMC, select the eMMC drive as the primary boot device, then follow the installation wizard's instructions to complete the installation process.
To complete the Windows 10 installation on your eMMC-powered device, follow these steps: customize your preferences and settings along the way, and then proceed with the installation process. This will enable you to enjoy a seamless computing experience with your device.
Step 1: After setting the eMMC drive as the highest boot priority, restart your device and it should boot from the eMMC drive, starting the Windows 10 installation process.
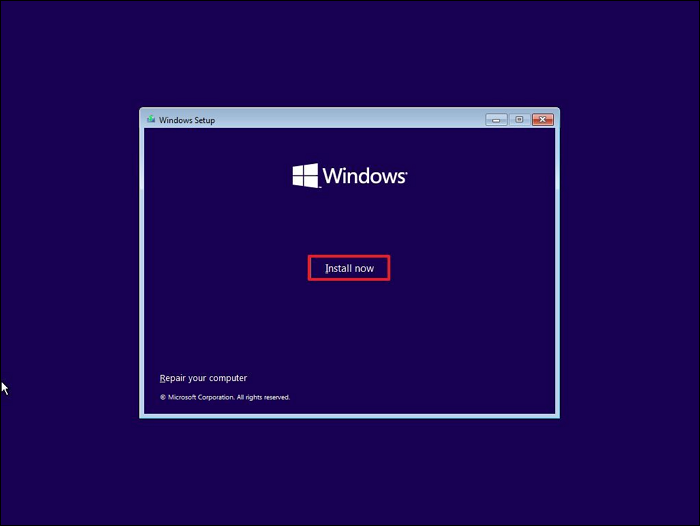
Step 2: Select your preferred language, time format, keyboard layout, and other regional preferences on the initial Windows Setup screen, then click "Next" and "Install Now" to start the installation process.
Step 3: To activate Windows 10, enter your product key or choose not to enter one if you plan to activate later, allowing you to continue without a key for now.
Step 4: Accept the Windows license terms and click "Next." Then, choose the installation type by selecting "Custom: Install Windows only (advanced)" for a clean installation. After that, select your eMMC drive from the list of available storage drives and click "Next."
Step 5: Windows will begin the installation process on the eMMC drive. This process may take some time and your device may restart multiple times.
Once the installation is finished, your device will reboot, and you'll be guided through the initial setup of Windows 10. Follow the on-screen instructions to personalize your settings.
- Notice:
- This guide provides a detailed program based on methods from the professional Vam community. If you have any questions, you can also contact our support center for assistance.
If this guide solved your problem, click the link and share to help more people.
Bonus Tip to Fix Cannot Install Windows 10 on eMMC Drive
Installing Windows 10 on eMMC can be straightforward, but some users may encounter challenges that prevent a successful installation. Common issues like the "Cannot Install Windows 10 on eMMC Drive" error can be frustrating, but they can be overcome with practical solutions. This bonus tip addresses these issues and provides tips to ensure a smooth installation experience.
Take Manual Service to Install Windows 10 on eMMC Disk Drive
If you prefer a more efficient solution to install Windows 10 on the eMMc disk drive, you can browse to take a manual service, Qiling experts with complete solutions are here to help.
Qiling experts provide one-on-one manual services 24/7 to resolve various Windows configuration issues, offering free evaluation services and using their expertise to diagnose and fix errors related to Windows updates, installation, and daily OS issues.
- 1. To fix Windows update errors, start by checking the Windows Update settings and ensuring that the correct update settings are selected. Then, run the Windows Update troubleshooter to identify and fix any issues.
- 2. To successfully download and install the latest Windows operating system on your PC, simply follow these steps: first, ensure your PC meets the system requirements for the latest Windows version; next, go to the official Microsoft website and click on the "Download Windows" button; select the correct version and language for your PC, and then choose the correct download option (e.g.
- 3. To fix daily Windows system errors, update outdated drivers to ensure smooth system performance. Also, check and adjust file and folder permissions to prevent access issues. Additionally, review and correct account settings, such as password and login issues, to maintain system security.
Cases of Cannot Install Windows 10 on eMMC:
Users may encounter issues installing Windows 10 on an eMMC (embedded MultiMediaCard) due to compatibility problems or limitations in the eMMC's firmware. This can prevent the installation process from completing successfully. The reasons behind this error may include outdated firmware, incorrect settings, or hardware incompatibility. To resolve the issue, users can try updating the eMMC's firmware, checking the BIOS settings for any relevant configurations, or using a different installation media.
Reasons and Solutions to Fix "Cannot Install Windows 10 on eMMC"
| Reasons | Solutions | Get it |
| Incorrect Format: The format or partition style of the drive may not be compatible with Windows 10 installation, which can cause issues during the installation process. | The eMMC drive should be formatted to the necessary format and configured with the GPT partition style. | Format eMMC Drive |
| Not Enough eMMC Memory: Insufficient available space on the eMMC drive may cause it. | To free up space on the eMMC drive, consider deleting unused files and apps, or upgrading to a larger-capacity eMMC drive if possible. | Upgrade EMMC to SSD |
| Windows ISO File Error: ISO file may be incorrect or damaged. | To install Windows 10, download the official ISO file from a trusted website, then verify its integrity and ensure it's compatible with your device before proceeding with the installation. | Unable to Download Windows 11 ISO File |
| eMMC Not Detected: Due to connection or adapter compatibility | If you're experiencing issues with your eMMC drive being detected, try connecting it to your device using a different microSD or USB adapter. Sometimes, a specific adapter can resolve the detection problem. | Hard Drive Not Detected |
Conclusion
Installing Windows 10 on eMMC offers numerous benefits, including lightning-fast performance and enhanced reliability, making it an ideal choice for various devices. The process involves following essential steps to successfully install Windows 10 on eMMC, which can be optimized for a computing experience. However, users may encounter some challenges during the installation process.
To overcome common storage issues such as incompatible formats, insufficient storage, or ISO file errors, we recommend using Qiling Disk Master, the best choice for a hassle-free experience. With its user-friendly interface, reliable performance, and versatile functionality, Qiling Disk Master is a powerful storage management solution that can clone, resize, and optimize your storage devices, making it an all-in-one solution for your storage needs.
FAQs About How to Install Windows 10 to eMMC
As we conclude our comprehensive guide on installing Windows 10 to eMMC, you may still have some lingering questions. Fear not, for we have compiled a list of FAQs to address any remaining uncertainties, providing further answers about the process of installing Windows 10 to eMMC.
1. Is 32GB eMMC enough for Windows 10?
Installing Windows 10 on a 32GB eMMC can be done, but it may not be the most ideal setup as the operating system and updates can quickly fill up the limited storage space, making it necessary to consider a higher capacity eMMC or an external storage device for a smoother experience.
2. How to install Windows 10 on a portable drive?
To install Windows 10 on an eMMC, use the official Microsoft Media Creation Tool to create a bootable Windows 10 media, such as a USB drive or external SSD, following a similar process to installing it on a portable drive.
Set the portable drive as the first bootable device in the BIOS or UEFI settings, then proceed with the Windows 10 installation process, choosing the portable drive as the installation location.
3. How to install Windows 11 on 32GB eMMC?
Installing Windows 11 on a 32GB eMMC may be challenging due to Windows 11's increased system requirements, which exceed the 32GB storage capacity of the eMMC.
Installing Windows 11 on a small eMMC may be impossible due to storage limitations, making it advisable to upgrade to a higher-capacity storage device or use an external storage solution with sufficient space.
Related Articles
- How to Clone C Drive to Larger SSD in 2024 [Full Guide]🔥
- Portable Partition Manager Download Free | With Guide
- Fix 'Not Enough Space on the Disk to Complete This Operation'
- How Do I Completely Wipe C Drive [Full Guide]
If you're looking to erase all information on your C drive but haven't found a practical method yet, this article provides a full guide with easy steps to help you wipe your C drive. - Wyze Cam SD card Format: How to Format SD Card for Wyze Cam?
This article will address two problems - how to choose Wyze Cam SD card format and how to format SD card for Wyze Cam. Stay here and start to format drive from Camera, Windows, and Mac. - Solved: Xbox 360 Hard Drive Not Detected [5 Ways] 💡
Even though Xbox 360 is an old console, it still works, and there are a lot of games to play. However, if your Xbox 360 hard drive is not detected, then what do you do?